Hey Guys! Today’s post is something of a housekeeping update for you all! As you may have noticed if you follow me on multiple social media platforms, I have made quite a few changes over the past few weeks and I wanted to address these changes with you! If you enjoy reading my blog or want to follow more of my work and my life outside of the blog, I hope you find this post informative!
Social Media
Although I have been on Twitter & Instagram for a while now, I just recently set up a Facebook Group for this blog which you can access here. Please head on over to that page and give it a like if you enjoy reading my blog, but especially if you want to follow more of my work online because my Facebook page is going to be something of a hub for all my content!
As you may have noticed in my blog post last week, I am also active on the new Blogger based social media app, Pippit, and you can find me there on my usual handle, MissTrenchcoat!
YouTube
I have been on YouTube since 2009 and I am still going strong! Recently, I made a major adjustment to my YouTube posting schedule and I am now uploading videos daily, Monday thru Friday! I have a general schedule that I am trying to stick to more or less according to the day of the week and that is as follows:
Monday: Planner or Filofax Related Topics
Tuesday: Tip of the Week in Under 2 Minutes
Wednesday: Lifestyle Topics
Thursday: Organization Topics
Friday: Tech Topics
If you are not already subscribed to my YouTube Channel, please head over and subscribe so you can catch up on my recent videos and stay up to date with the plethora of new content I am posting daily!
Empire Building Coaching Program
If you follow my YouTube Channel or my Instagram Account, you may already know that I have officially launched a new coaching program for members of my community who are looking for guidance building their own business online. The program is called Empire Building, and it was designed by me using all the knowledge I have acquired over the past few years building my own online business from a simple blog and rarely updated YouTube channel to an online community of over 30,000 followers and another 50,000 individual users who visit my site on a monthly basis! So, if you would like to work directly with me on your blog or online business, sign up today or send me an email!
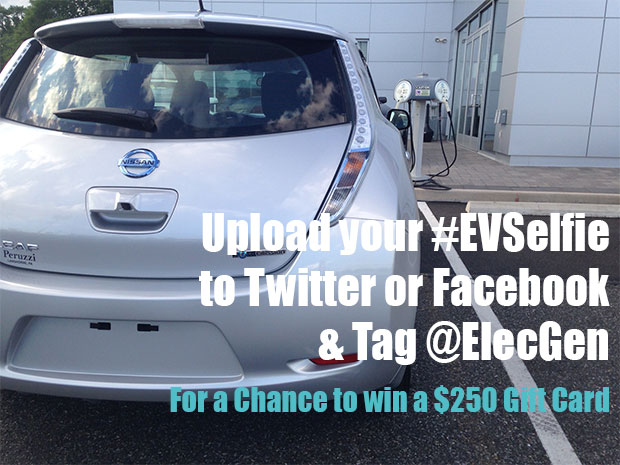
Have you guys submitted your #EVSelfie to Twitter or Facebook and tagged @ElecGen for a chance to win a $250 gift card? What are you waiting for? All you have to do is snap a photo or video of yourself with an Electric Vehicle or some symbol of EV Culture (a charging station or a sign)! Remember, you can use this website to find a local charging station or you can do what I did and take a test drive of one of the many EVs available on the market! Let me tell you, its an eye opening experience that will totally change the way you look at Electric Vehicles!
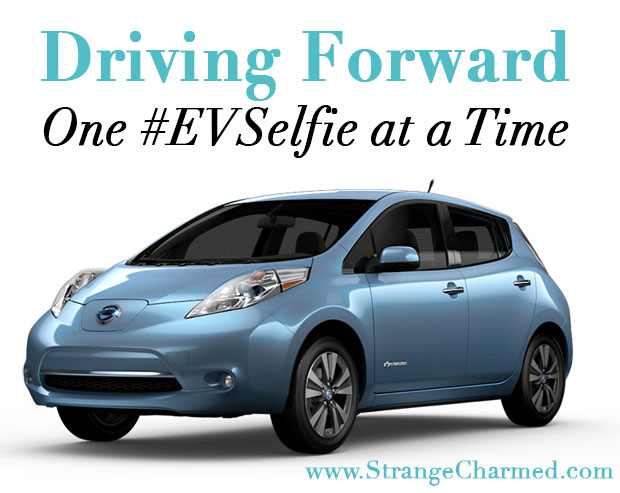
Last week, I went on my test drive of the Nissan Leaf and had a blast learning about and actually driving the vehicle! Of course, I made a video documenting my experience which I am going to go ahead and link below, but I also wanted to take some time to give you guys some interesting facts that I learned from my test drive!
EVs are AFFORDABLE! They are pretty competitively priced with other similarly sized vehicles and the Nissan Leaf that I tested was filled with cool technology and really felt like a luxury vehicle!
EVs are money and time savers! Driving an EV instead of a gas vehicle will save you nearly $9,000 over the course of 5 years and you never have to waste time at a gas station. Fill up on electricity at home to the tune of $550 dollars of year for the electric (based on driving 15,000/year) and say bye bye to oil changes, tune ups and transmission problems!
EVs are perfect for the modern commuter or two-car family. With a range of 75 miles for a full tank, you have plenty of power to get yourself to and from work as well as a few pit stops for shopping and activities!
I go into much more detail in my video, so if these fun facts are piquing your interest, I suggest checking it out! And don’t forget to take your #EVSelfie! I am telling you, once you open your eyes to the world of Electric Vehicles you begin to notice them everywhere! From charging stations at your local convenience store, to EVs parked in a neighboring driveway, they really are more prevalent than you think!
So, will I see your #EVSelfie before the June 26th deadline? Feel free to tag me @MissTrenchcoat as well in your entry so I can check out your pics and videos as well!
When I was younger, I had high hopes for what life would be like when I was an adult. I was pretty sure that by the time I graduated college, the human race would have colonies on far away planets (or at least the moon), we would all wear clothing that slightly resembled a space suit and we would drive electric-powered flying cars. You can blame Disney World, television, and books for my overactive imagination, but I am beginning to realize that the reason none of those things exist is because, we, as the population of Earth, haven’t prioritized those sorts of endeavors. The technology exists or it could exist if we actually started demanding it from our leaders and businesses. Technology currently has the power to solve many of our day-to-day problems, but most of us don’t realize it’s out there. Heck, I really thought that by now we would all be driving around Electric Vehicles to save our wallets and the planet from the dependence on gas!The truth is though, there are plenty of people who are living this dream right now and we all could be if we just educated ourselves to the presence and growing popularity of Electric Vehicles aka EV’s!
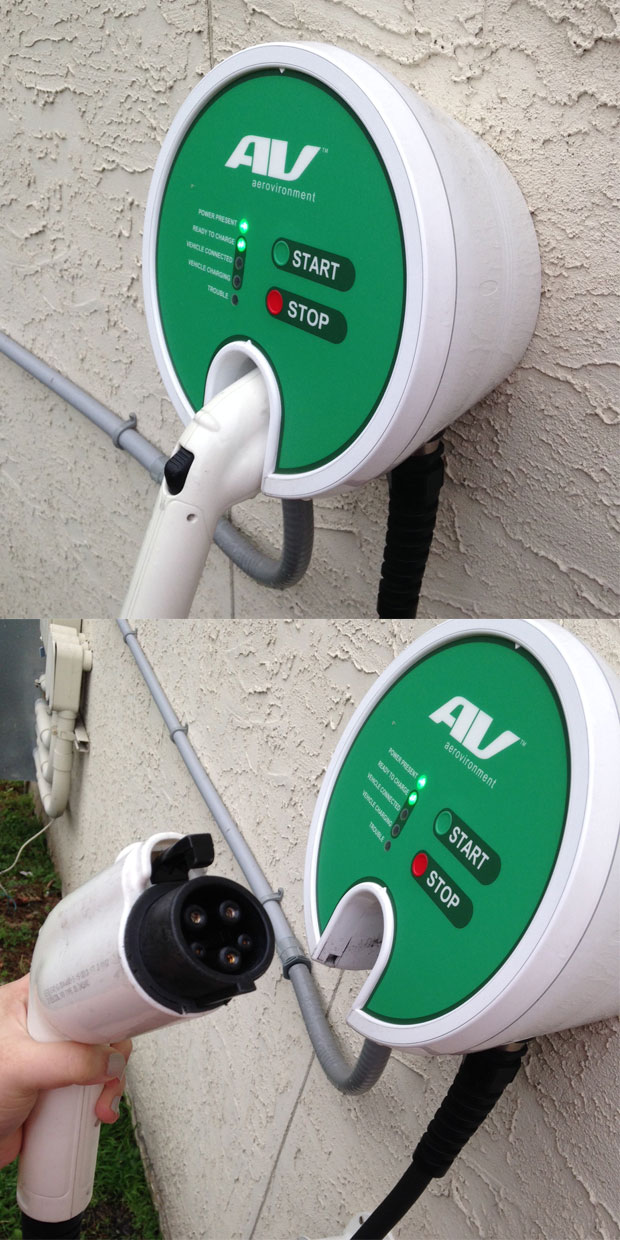
That is why I have partnered with the Edison Electric Institute (or EEI for short) to help raise awareness for the EV Movement. Whether or not you realize it now, EV’s are everywhere! And I’m not just talking about the glamorous Tesla Motors Model S that has been making headlines lately, but a variety of other manufacturers now make EVs as well! There is the Honda Fit EV, Nissan Leaf, Toyota Rav4 EV, Mitsubishi e-MiEV, Electric Ford Focus, Fiat 500e, Smart fortwo Electric Drive, BMW i3, and the Chevrolet Spark EV to name a few of the most popular. That’s a lot of Electric Vehicles available on the market, so why don’t more of us drive them? Price can’t be the issue because most of these vehicles are actually competitively priced with other similar sized gas-powered vehicles, not to mention the amount of money you would save on gas over the life of the vehicle is nothing to roll your eyes at. Okay, what about charging stations, the electric equivalent to gas stations? Surely, those must be few and far between or you would need to pay an arm and a leg to install some special charger for your vehicle? Nope. Charging stations are actually more prevalent than you might know. I have no less than four within a 5 mile radius of my home. Use the PlugShare website to see how many are near you. Speaking of home, you don’t need to install any high-tech, high dollar charging unit in your garage to fill up your electric tank overnight, because most EVs can charge off a standard household outlet! Seriously, that’s even more convenient than having a gas station down your block, when was the last time you were able to gas up in your own driveway? Hmm, so we’ve covered that EV’s aren’t prohibitively expensive, and that charging them is more convenient that you may have original guessed, so what else is stopping you from switching out your gas guzzler for an EV? What about maintenance costs? An Electric Vehicle sounds pretty high-tech, maintenance is probably going to cost an arm and a leg, right? Wrong! Think about it, without a gas engine, an EV doesn’t need things like oil changes or tune ups, they don’t need fluids drained or gas filters replaced. They just don’t have most of those parts that routinely break! What they do have, however, are tires just like other cars that need to be replaced similarly to gas-powered cars and they have brake pads that actually ware down at half the rate of a gas vehicle.
Here’s one of the charging stations 1.5 miles from my home! Pretty neat, huh?
Alright, I know what you’re thinking, I have drunk the Kool-Aid and I am seeing the EV world through rose-colored glasses. You’re right, it’s not all roses with owning an EV. The truth is, like with every different type of car out there, EVs aren’t going to be the right fit for everyone, but they are definitely a great option for certain people. So, who could benefit from owning an EV? First and foremost, commuters. If you use your car most of the time to drive back and forth to your job and then maybe a little around town to do errands, than an EV may be the vehicle for you! EV’s are low powered vehicles so they aren’t the right car for people who drive heavily throughout the day or for people who travel a lot via car, because they need to be charged more frequently than a gas powered car needs to be filled up. Now, even if you’re a commuter who does occasionally need to drive long distances, an EV could still be the right second car for you if you belong to a two car household! Many couples and families own more than one vehicle, and if one of those vehicles were to be an EV, all the bases are covered and money is definitely being saved in the long run!
Okay, so this was a lot of talk but when it comes down to buying a new car, some good information and a positive review aren’t all it takes to make such a big decision! That’s why I am going to be taking a test drive of an EV and sharing my experience with you guys here on my blog and on my YouTube Channel! That’s right, I am going to get behind the wheel of one of these and let you know if I could see myself in an EV one day! Now, I challenge all of you to open your mind and your eyes to the world of EVs around you!
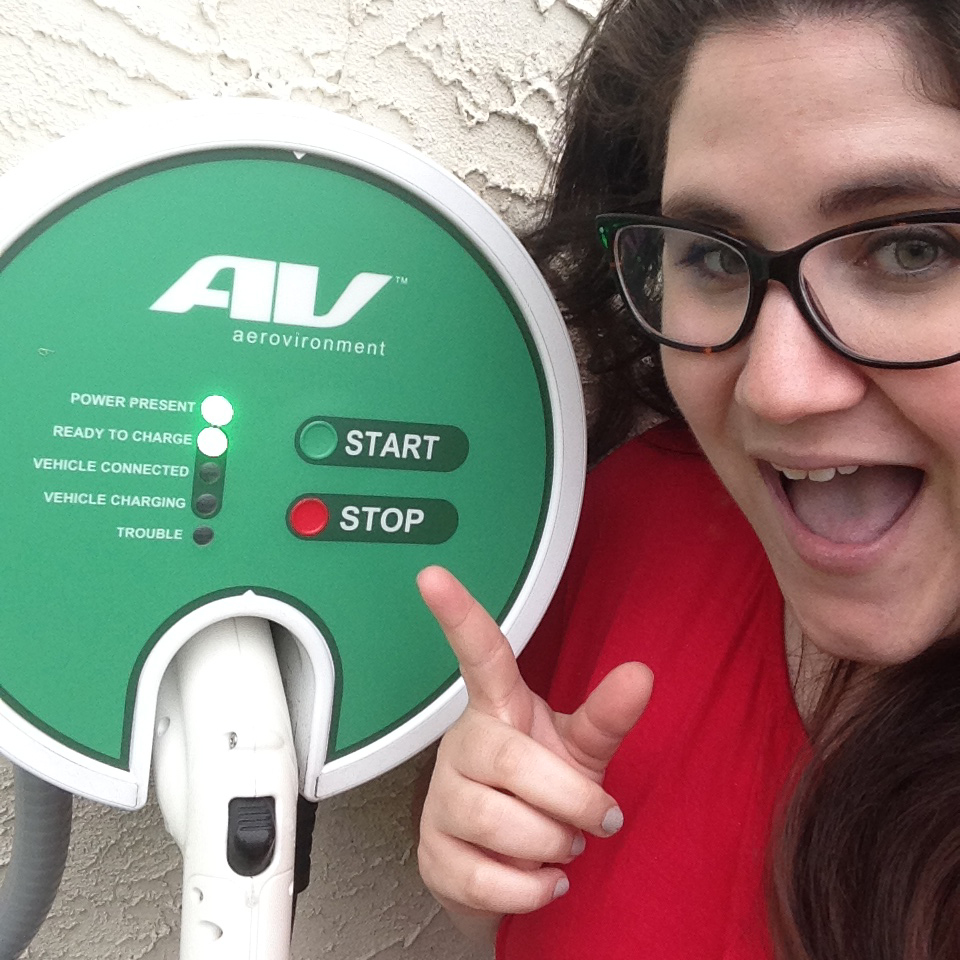
Here’s my #EVSelfie! Now, show me yours!
The Electric Generation is hosting a contest through their Facebook Page called the #EVSelfie Contest! What is an #EVSelfie? Glad you asked! An #EVSelfie is just like a normal #Selfie but it incorporates either an EV or some element of the EV world in the image! Take a picture or video of yourself with an actual Electric Vehicle, a Charging Station or other icon of the EV Movement, post the photo to Twitter or Facebook with the #EVSelfie hashtag and tag @Elecgen for a chance to win one of four $250 gift cards! Also make sure to “Like” The Electric Generation on Facebook and follow them on Twitter! Head on over to their Facebook page for more examples of the #EVSelfie and complete rules and details! Make sure to keep your eyes open to the EV world, you never know where you may see an EV, a charging station or even an EV related sign or bumper sticker, so take as many photos as you can before the contest ends on June 26th, 2014! You get up to 20 entries!
Good Luck Everyone and I can’t wait to see your #EVSelfie on Twitter & Facebook!
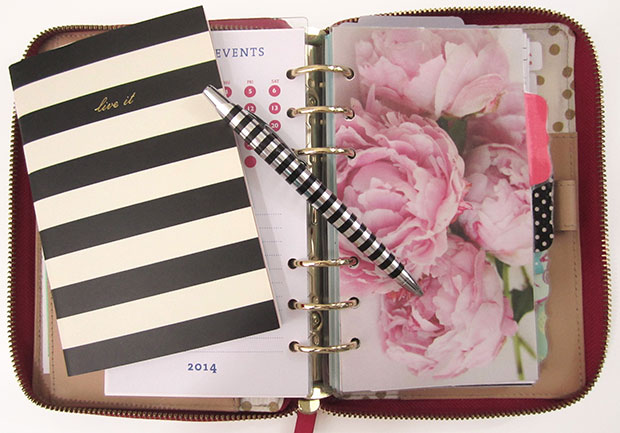
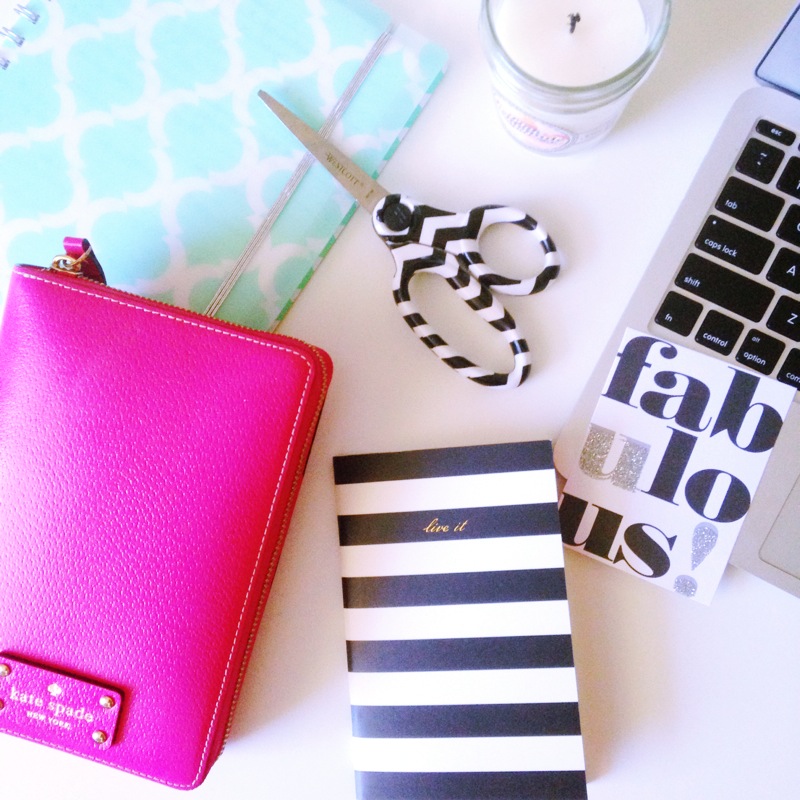
The picture above is from my Instagram feed, and was taken a few weeks ago. It is currently my most liked Instagram photo to date. Why? Personally, I think I have taken better pictures, but my opinion isn’t necessarily the one that matters when it comes to the popularity of my photos. So, what does matter when it comes to getting likes? I am by no means and expert on the subject, but I have been using Instagram for a few years now and I think I am beginning to crack the code to a successful IG shot. Here are my tips to getting more likes on your Instagram photos if you are looking to pick up some new followers or just increase your photo sharing skills! Make sure to follow me on Instagram as well by clicking here!
Take pictures that people are searching for
An image like the one above is something I know a lot of people like to look for. It’s essentially a deskscape, showing a workspace and some pretty office supplies. These aren’t just any office supplies, however. These items have been chosen for their popularity and for the application of their hashtags. I will talk more about the importance of hashtags in a moment, but back to the items in the image. They are all pretty items made by popular brands. A Macbook Air, a Kate Spade planner, a Bath and Body Works candle. All these items are things people like and people like to look at them. Now, I’m not saying you should just take pictures of deskscapes and office supplies, but I am saying you should think about the subjects you want to capture in terms of their overall popularity on the internet. People like certain things, it’s no secret. Pictures of pets do well, a beautiful plate of food, composed landscapes and the list goes on. When you take the photos that people are searching for and like to see, your photos will get more likes.
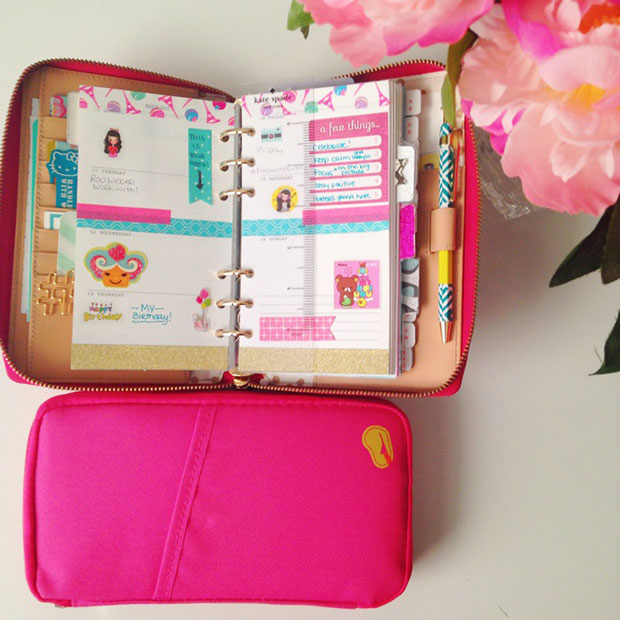
Use relevant hashtags
When I think about crafting my Instagram photos, I think about the hashtags I am going to be able to use to describe it. Hashtags are very important. If you are not already a popular Instagrammer, hashtags are the only way anyone new is going to come across your account and your pictures. So, it is very important that you use as many relevant hashtags as possible to give your image the largest audience possible. For this image specifically, I used 21 hashtags. Some are popular IG tags that everyone uses (#igers #igdaily #instagood etc) and some are specific brand oriented tags that I know are popular. The first hashtag that I used, #filofax, has over 130,000 posts when you search it. That’s a lot of posts, which means there are a lot of people who are using and searching for that tag. Now, I know people say that you shouldn’t use too many hashtags, and I know that sometimes it seems spammy, but the way I look at it is that I am giving more people an opportunity to find and enjoy my picture. Some people think that using too many hashtags can backfire, but ask yourself, when was the last time you saw a picture on Instagram that you liked but then decided not to like it because the user had tagged too many items? Chances are you’re going to get more positive attention than negative attention when you use hashtags. Now, I am not saying to use hashtags that don’t apply, that is spamming the system, but as long as your tags apply, I say use liberally!
Actively like other photos
When I post a new photo to Instagram, I like to go through the hashtags I used, one by one, and like other recent photos taken by others who have used the tag. When I do this, I find that the users whose photos I have liked, come back to my account and like my photo(s) as well. Sometimes I even get new followers this way, and sometimes I find new accounts that I want to follow, too! You can’t expect to just post images to Instagram and focus on your own account without searching around and interacting with other users. Although Instagram isn’t exactly the same level of socialization as Twitter or Facebook, liking photos and leaving comments for others draws people to you in a direct way. The more you do this and interact with others, the more likes you will get and inevitably, the more followers you will acquire.
Have a sense of composition
I have discussed the topic of taking great photographs before, so I won’t go into too much detail here and now, but having a sense of what makes a good composition is important when taking photos that people will like. Instagram gives you the option to use the camera grid when taking pictures directly in the app, and if you don’t think you are good with composition on your own, this is a great tool to use! Remember, composition is more than just about placement of your subject(s) in photos, it’s also about how your subject or subjects interact with each other and within the frame as a whole. Take some time to study the photos of others that you may find interesting and ask yourself what about the photo has drawn you in. Color, size and distance of objects in an image all play a role in the composition so you will want to think about all those things to understand what makes a great photo! Also, feel free to use other apps to edit your IG photos before you post them. I know there are purist out there who don’t believe in using edited photos on IG, but if you are trying to get more likes on your photos, you are going to need to produce the best content you can and sometimes that means using other apps to help you create a stunning image!
I have worn glasses since I was 13. When I was a bit younger, about 8 or 9, I tried to fake poor vision just so my parents would buy me glasses, but of course it didn’t work. I’m not exactly sure why, but I always associated glasses with being smart or having an education, so I really wanted to wear them, as though they were some sort of fashion accessory that denoted IQ. After I was finally prescribed glasses a few years later for legitimate near sightedness, I went all out searching for the pair that would be mine. After my dad forked over $150+ dollars for my first pair, I began to realize that glasses were slightly more precious than I had first expected and that I wasn’t going to get a variety to use as a new fashion accessory after all. To this day, I still own and use that first pair of glasses. I am apparently one of those rare people who’s prescription doesn’t change much over the years, which is actually quite convenient for me. More impressive than that, though, I am one of those rare people who hasn’t broken or lost their glasses in over a decade. Of that fact, I am immensely proud! So, to change things up a bit for me, before I left for college my father bought me a second pair of glasses. These were frameless and even more expensive ($200+) and I was even more careful with them (yep, still have them too) because I knew they would also have to last me quite some time!
And it was quite some time before I purchased a new pair, nearly six years! But this time around, I wasn’t going to be forking over a few hundred bucks. In 2011, I was introduced to the brand Warby Parker. I was flabbergasted to find out that I could buy nice designer glasses online for under $100 for a complete pair of glasses with the lenses. So I signed myself up, tested a few pairs with their home try on option and placed my order! It’s been a few years since this last experience, and I recently found myself hankering for a new style of glasses yet again, when I came across a YouTube video reviewing some different online options including Warby Parker and another online eyeglass shop called Eye Buy Direct. It piqued my interest, so I went to their website and found a few frames I thought would look good on me and without even giving it too much thought, I went ahead and placed an order for two new pairs, both costing me about $100 total!
I have always gotten a lot of questions asking me about my glasses, but I think people are even more curious when they find out I bought them online. Traditionally, buying glasses has been an in-person experience where you would try on frames in a store but the online landscape has really challenged that system. So, I thought I would go ahead and give you all my tips for buying glasses online, providing insights from my experience and some tips and tricks that may help you if you are looking to buy online and save yourself some money!
Know what you’re looking for
Whenever you’re buying an item online, I would suggest knowing what you’re looking for. The problem with browsing online is that you really don’t get much of a sense of a product or item just from looking at pictures. I think this is particularly when looking for glasses online because if you’re not sure what you’re looking for in terms of color, size, shape, you may end up falling for a pair of glasses that just aren’t practical for you and your needs, no matter how cool they look online. Remember, many online eyeglass shops offer very limited terms on returns. This is how they help keep costs down for the end-user, but you need to be very deliberate about what you’re ordering because eyeglasses are a custom item. Think about the style of frame you are looking for, the color, size and lens shape to help make your search easier and more specific.
Try before you buy
Like I mentioned above, Warby Parker, as well as some other online eyewear shops, give you the opportunity to try on their glasses before you purchase them for free. In these situations, you choose the frames you are interested in, provide a credit card for security purposes, and then the company ships the glasses to you to try on. These home try on scenarios usually have a limited time period for you to try the items before sending them back so make sure you are aware of your time limit before requesting a home try on. I highly suggest using the home try on feature when available as it’s very helpful to be able to test out the glasses before you make a purchase, however, not all eyewear sites give you this option. Some sites instead offer a virtual try on where you can upload an image of yourself and see an image of the glasses superimposed on your picture. Although this isn’t the most foolproof way of testing glasses, it can help you see yourself in the glasses. I suggest if you are going to use this feature that you take a picture of yourself head on in strong natural lighting so that you get the most realistic portrayal of yourself possible. Finally, if you do not have a home try on option and you are not sure about the virtual try on option, I suggest visiting a local eyewear retailer to test out glasses similar to ones you may be eyeing online. Most online eyewear retailers provide a front and side view of their glasses with the dimensions. If you print this out and bring it into an eyeglass shop, they should be able to help you find something similar to try on in their store so that you can get an idea of what the glasses will look like on you. Also, if you happen to see something in store that you like, I recommend taking down the model number and brand information of the glasses. When you get home you can research the dimensions of the glasses and you may be able to find the same glasses or a similar off brand style through an online retailer!
Understand your options
In my experience, shopping online for glasses is inexpensive and easy, but you need to understand what you’re getting from some of these online deals. For example, Eye Buy Direct offers glasses as low as $6 for a complete pair, but that includes the frame and single vision lenses with very little bells and whistles. You pay extra for bifocals, progressives and other types of lenses, as well as UV, scratch resistant and water-resistant coatings. Even Warby Parker has upgrades for lenses and certain extras you may get looped into paying if you have a very strong prescription for glasses. These are the sorts of things you need to understand before you make a purchase. Online retailers may wheel you in with an unbelievably low deal, but in reality, most people who wear glasses may require certain extras that will raise the price of the purchase. I’m not saying that online retailers are sketchy and you shouldn’t trust them, I am just saying that you show know this before you go in so you understand the pricing structure and what you are willing to pay.
Have your correct vision Rx information on hand
One of the major parts of ordering prescription glasses online is knowing your current vision prescription! Warby Parker is a great site because you can give them the information for your eye doctor and they will call them up and make sure they get your most current information so you don’t feel pressured or make a mistake filling out your online order form, but not all sites do that. I suggest looking at the sites you may want to buy from and see the prescription information they need so that you are familiar with the information before calling your eye doctor. For most sites you will need your prescription as well as your pupillary distance (aka PD). If you are going to the optometrist before placing your order, print out the order page from the site you are interested in using (or sites) and show them so that they give you all the information you need!
Experiment
Glasses are a necessary tool that many of us need to get through life but they also are a great way to show your personal style, and with the low prices that many online eyewear retailers advertise, taking a risk and going a little outside your comfort zone may be a fun experiment. Don’t be afraid to try a new trend or deviate from your usual frame shape. If worse comes to worse if you don’t like the style they can become a backup pair.
Where oh where has the time gone? Next week is Memorial Day and soon enough summer will be upon us. Are you ready? I know I’m not nearly as prepared for summer as I would have hoped. I have quite a bit of shopping to do to catch up, so in the meantime, I thought I would share with you my pre-summer essentials checklist. Here are some of the items that I consider must have’s for the upcoming season. Check out the carousel below for some of my favorite picks!
An awesome beach bag
A big floppy hat
A statement beach towel
Sephora Sun Safety Kit
Caudalie Grapeseed Water
An awesome pair of sunglasses (Prescription sunglasses if you need them)
A cute water bottle
A tablet computer
A signature scent
A backup phone battery charger
A durable video camera (to capture all the fun)
Have a wonderful week and I hope you enjoy Memorial Day Weekend and the summer ahead!
[show_shopthepost_widget id=”58244″]
I am certainly not the only one who wishes they could see the future, but there are moments where I really wish I had a magic ball that could show me what was right around the bend. Usually, I feel this way when I am stuck in some sort of limbo, which could pretty much sum up my current state of mind. Do I move forward through my issues and take a risk or do I avoid them and stick to the familiar and safe. This has been on my mind as of late. I usually pride myself on being a person who can see the big picture, make hard decisions quickly and then make the best of what’s to come, but right now I feel paralyzed and unable to make any choices. When I get like this, I often think of these lyrics from one of my favorite songs.
“Well, something’s lost, but something’s gained, in living everyday.”– Joni Mitchell, Both Side’s Now
Joni Mitchell is right, everyday we have new experiences, learn and grow and because of that we loose that old part of ourselves. What’s done is done and can never be undone. We can’t move backwards, we can’t stand still, even if we wanted to. Everyday we have to make choices, some easy and some hard, but we can’t just stand still. I know this. But sometimes I want to skip through the hard parts to get to the end just where all the tough choices have been made and everything is resolved. I want instant gratification and its not always possible. I want things to happen without having to do the dirty work. It’s ironic because I read a lot of metaphysical books and they always tell you to think positively and let the universe guide you, and I really really wish I could let go of the reins and let someone or something else take over trusting that everything will turn out right, but I’m deathly afraid that if I loose control I will end up someplace I don’t want to be. I want control and I want to give up control both at the same time, how’s that for messed up paradoxes.
As I’m writing this I am getting that sense that I am supposed to wrap up this rant with some sort of lesson so that my readers aren’t left with an uneasy feeling, but honestly, I have no clue how to wrap this up because I too am uneasy. I don’t have the answers yet and maybe that is the answer. Maybe the lesson is you never know until you know. I have a gut feeling thats leading me and that’s about it. Perhaps, one day, if I ever resolve this matter in my mind, I will go ahead and write a follow up to this rather cryptic piece. But for now, you’re left in limbo, with me.
I apologize if this post seems weird or out of place here. I’m sorry if I am coming off vague and not being specific, but the problem is, there isn’t just one specific thing going on that is the catalyst for this, its like multiple different things mushed together to add complexity on top of complexity so its not something I feel comfortable discussing publicly on my blog right now. I would ask, however, that if you could, please send positive vibes my way. Thoughts, prayers, chants, whatever you do to get the positive mojo flowing, send it in my general direction please.
I am so accustomed to being busy and having a never ending to do list that when I do get down time, my mind blanks on how I should be spending it. Inevitably, I end up wasting time planning out what I should do and then, there goes half my free time down the drain! Does this ever happen to you? Well, if it does, I think this post could be a helpful reference when you have nothing to do or find that your struck with boredom but still want to do something productive. I suggest printing this out or book marking this page and rereading it whenever you have extra time that you don’t want to waste!
Choose a room or small area of your house to clean and organize
Create a new playlist from your existing music collection
Take pictures of all the valuable items in your home and save them in a file in case you one day need to file an insurance claim
Think of a topic you have always wanted to learn about and google the heck out of it
Collect all the loose change around your home and start a change jar
Read the entire front page of a news website or newspaper
Find things around your house that you are no longer using and take them to be donated
Okay, now go forth and be productive! Did you like this list? If you would like me to do lists like these more often, leave me a comment and tell me what sort of list you would like?
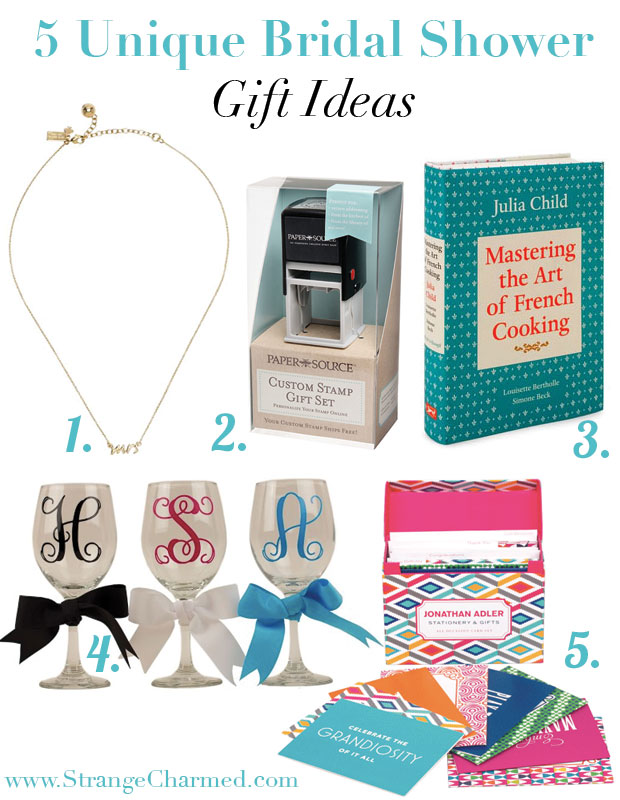
Spring inevitably means one thing, wedding season is here! I’m sure I am not the only one with some wedding related events on the calendar for the next few months, and with the fun of wedding celebrations also comes the stress of having to pick out gifts. Although a traditional couple will usually provide a gift registry, not all of us are the buy off the registry types. Whether it’s because the bride or groom is a significant person in your life or perhaps you would prefer the surprise of picking out an item yourself, I have assembled a few gift ideas that you may not find on your average registry!
2. Paper Source Custom Stamp Gift Set ($39.95): Once the bride and groom get back from the honeymoon they are going to have a lot of thank you’s to send out. Make the process a little easier and much more personalized by giving them a custom stamp gift set that they can have made with their address and name to reflect their new life and home together.
3. Mastering the Art of French Cooking by Julia Child ($22): Whether or not the bride and groom are already knowledgable cooks, this timeless guide to cooking is like a cooking school in paper form. Let them learn the basics or unleash their inner chef with this cookbook staple!
4. Glitzy Glam Initial Wine Glasses ($15 each): Although the happy couple may be registered for some fine china wine glasses, this unique and personalize gift will be a welcome treat, and well, you can never have enough wine glasses! Am I right?
5. Jonathan Adler All Occasion Note Card Set ($15): Beautiful stationery is one of those things most people don’t register for, but it makes a classic and very affordable gift. This set is a great staple to have around in case a last-minute note is needed or someone forgets to pickup a birthday card!
Since I just posted my best tips for taking awesome photos as part of my Blogging 101 series, I decided to also give you guys a tutorial of sorts on how I edit my iPhone photos for the web! I do frequently use my iPhone for photos I post to my blog because my iPhone takes great pics and I have an array of apps that help me achieve multiple different effects from my phone.
The apps I use in this video are AfterLight, BigLens and Rhonna Designs! Please make sure to click through the video player to Youtube and give me a Like and Subscribe to my channel if you aren’t already! Thanks so much and I hope you enjoy the video!
What other iOS or Android Apps do you use to edit photos from your phone? Let us know in the comments below!