One of the hardest parts of being a blogger is coming up with great new content every week. As a blogger, I need a constant stream of inspiration in order to come up with ideas for my posts, images and my blog’s design. Although as they say, inspiration is everywhere, being a constant learner is an important part of locating inspiration in your life. If you are having trouble finding inspiration, here are a few things I like to do to find inspiration when I need it most!
1. Listen to music: I suggest listening to all types of music, even genre’s your not that familiar with or don’t even like. Variety is so important when opening up your mind to inspiration and you need to listen to everything that’s out there if you want to discover something new that will inspire you to think differently.
2. Read about something new: Scientific articles tend to be the most powerful for me, but learning about any new subject can open a door of possibilities and inspiration. It doesn’t really matter what your blog topic is or what you normally write about, just learning a bit about a new discipline or subject can really help open the channels of creativity in your mind!
3. Write stream of consciousness style: Sometimes you never know where your own mind will lead you until you follow it. One great exercise I suggest for writers is to do a bit of stream of consciousness writing. This means you just start typing and listen to that voice inside your head about what to write. Start with things on your mind and your own thoughts and just follow them through and see where they lead you.
4. Go to a new place you have never been: New experiences generate inspiration like none other! I find that just driving or wandering to a new part of town I have never been to really helps open my brain up to possibilities. Seeing new sights, smelling new smells and living through new experiences can be very inspiring and something of an adventure!
5. Get to know someone new: Meeting new people and getting to know them is a very powerful one on one experience. There are so many wonderful people out there in the world with so many interesting points of view that hopefully by getting to know one of them, their views may rub off on you a bit and cause you to look at the world differently!
6. Watch a movie that you don’t think you’re interested in: Often times its important to challenge our perceptions of our own likes and desires. Breaking established patterns like watching movies in genre’s your not used to watching is a really simple way to sample and test out new things without making a major commitment. Hopefully, that movie you weren’t interested actually entertains you and brings you to see that you shouldn’t discount things based on what you think you already like!
7. Do something physically challenging to you: This doesn’t have to mean you should go out and run a marathon if you don’t normally run, it just means to push yourself physically. While I’m at the gym I find so much inspiration just hiding out in my own mind while I’m on a machine. I think that when you’re focusing your physical energy on working out, your mind starts to open up and relax allowing new inspiration and ideas to just hit you. Give it a try and you’ll be killing two birds with one stone!
What sorts of things do you do to find inspiration? Have you ever tried or plan to try any of the items on this list? How did it work for you? Let me know in the comments below!
xoxo,
This article was first published on Strange & Charmed on March 20th, 2014 and is being reposted as part of my Holiday Prep Hiatus! For the months of November & December I will be recycling some vintage S&C content that you may have missed in order to give myself some extra time to finalize projects and spend time with my family during the holiday season. All reposted content will be marked as such. I hope you enjoy this blast from the past blog post!
You probably didn’t know that the cold winter months can take a toll on your gadgets and tech devices! Its true, the cold weather creates a unique set of issues for gadgets that you should be aware of in order to keep your tech working properly. Here are 5 tech tips to help you treat your tech right this winter!
1. Do not leave gadgets like computers, smartphones or iPods in your car while its cold outside. The weather can freeze internal parts of your devices and potentially cause damage.
2. Keep your gadgets in heavy duty cases to protect from precipitation and drops onto snow or ice. Otterbox and Lifeproof cases that cover ports and openings in your gadget will help to make sure no excess moisture builds up in sensitive areas of your device.
3. Keep a stylus on hand in case your fingers are too cold to register on your touch screen devices.
4. If a gadget is excessively cold, be sure to bring it up to a normal temperature before turning it on or using it or else you could compromise internal parts.
I hope these tips were helpful to anyone who is experiencing cold winter weather or who may live in a region where cold weather is the norm! Do you have any other tech tips to share to help us get through the chilly winter months with our smartphones intact? Let us know in the comments!
xoxo,
This article was first published on Strange & Charmed on January 28th, 2014 and is being reposted as part of my Holiday Prep Hiatus! For the months of November & December I will be recycling some vintage S&C content that you may have missed in order to give myself some extra time to finalize projects and spend time with my family during the holiday season. All reposted content will be marked as such. I hope you enjoy this blast from the past blog post!
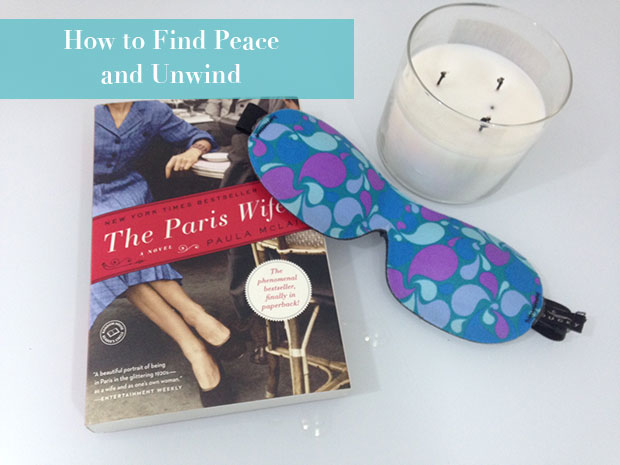
Do you ever feel like life is so hectic sometimes that you just don’t know how to unwind? I mean, we hear about the importance of finding time to locate your inner peace and all, but how does one actually start that journey? Do we need a map to locate peace of mind? Sometimes I think so! In all honesty, I am writing this post for myself because I have been so out of it and stressed for so long that I need to remind myself to take time and unwind, even if it’s really really difficult to do it! So, I sat down and thought about all the things that are mentally blocking me from unwinding and relaxing and some ways that I cope with stress when it gets too out of control on my own life. Hopefully this list will resonate with you, too!
1. Turn off notifications that ding: The threat of a dinging notification is a stressor in and of itself in my life. I have taken to turning my iOS devices on airplane mode just to escape them!
2. Light candles all over your home: I don’t know what it is, but for some reason candles make me feel like I have a clean home (…even if my home isn’t clean) and this releases an OCD stress about everything having a place and being there!
3. Take a nice relaxing bath: I suggest using epsom salts for a deep muscle relaxation and using whatever aromatherapy bubble bath or oils you have available to do. When I take a bath when I am stressed, I drown myself in the stuff!
4. Drink plenty of water: If you are well hydrated you are less likely to get a headache and I feel like water also helps me feel fresh and clean on the inside. Its like the water is cleaning out all the toxins from my cells and flushing them out (I actually think that might be what water does, so the more the merrier)!
5. Listen to soothing music or a book on tape: This one is pretty self-explanatory. If I take a bath with epsom salts and then put on a book on tape (usually the Hobbit!) I am guaranteed to fall asleep in 5.7 seconds!
What other tips do you have for relaxing and unwinding when you are stressed out? Please, please, please tell me, because I really need to know!!
xoxo,
This article was first published on Strange & Charmed on February 27th, 2014 and is being reposted as part of my Holiday Prep Hiatus! For the months of November & December I will be recycling some vintage S&C content that you may have missed in order to give myself some extra time to finalize projects and spend time with my family during the holiday season. All reposted content will be marked as such. I hope you enjoy this blast from the past blog post!
It’s that time of year again, and no I am not referring to the return of the Pumpkin Spiced Latte at Starbucks, but if you want my DIY PSL recipe, click here! I am referring to the return of cold and flu season! I know, so much less delicious than a pumpkin spiced latte, but it’s here and we all have to deal with it! I know we have it drilled into our heads to make sure we carry around little bottles of antibacterial hand gel and to wash our hands frequently and sneeze into our elbows (gross, but it does help fight the spread of germs), but how often do we stop to clean our devices like our iPhones and laptops that we are constantly touching? Your iPhone can actually carry more germs than the lever on a toilet and you are putting that up to your face on holding it in your hands countless times a day! So, I thought I would review the steps to help properly clean an electronic device like a computer or smart phone so that you can start keeping your gadgets clean without fear of shorting a circuit!
Step 1: Turn off your device. Whenever you are going to clean your device, make sure its off. This helps prevent you from getting some sort of electric shock in case you do make a mistake and get moisture into a crevice in your device.
Step 2: Use an antibacterial wipe to gently whip down the surface of your device. I like to use Wet Ones wipes because they are antibacterial and easy to take along with me. The problem with some “tech wipes” is that many aren’t antibacterial so you may be cleaning dirt off your device but not preventing cold and flu germs from spreading! Make sure the wipe is moist but not to wet before you begin. If it is let it sit out for a minute or two to dry or try ringing out any excess moisture.
Step 3: Avoid any openings in your device like headphone jacks or charging ports. You can get close, but don’t try to clean inside because those openings go directly to the innards of your device and can cause damage! If you are cleaning a computer keyboard, you can wipe over keys and in the spaced between, but just make sure you don’t get moisture into the openings under the keys!
Step 4: Dry your device with a microfiber cloth. Although your device shouldn’t be wet, you will have some moist spots on the casing or screen from the wipe down. So, use a microfiber to quickly wipe off any moisture left on your device before you turn it on. Once your device is dry and clean, turn it back on!
Step 5: Repeat this activity 2-3 times a week! Technically, I think this should be done everyday, but I understand that not everyone has the time to do that so if you can do it 2-3 times a week you will probably do a lot to cut down on the amount of germs your devices are carrying around. If you think you will forget to do it, set a reminder on your phone!
Do you frequently clean your devices? What products do you use? Do you think that cleaning your gadgets helps to cut down on instances of illness for you? Let us know in the comments!
xoxo,
This article was first published on Strange & Charmed on October 8th, 2013 and is being reposted as part of my Holiday Prep Hiatus! For the months of November & December I will be recycling some vintage S&C content that you may have missed in order to give myself some extra time to finalize projects and spend time with my family during the holiday season. All reposted content will be marked as such. I hope you enjoy this blast from the past blog post!
There is no doubt that having a uniform brand and visual experience online is crucial for every blogger and online business owner, however, you don’t need to spend thousands of dollars on professional software to create great images and design elements for your brand especially if you are just starting out. Here are a few free design tools that I love to use and would recommend to any blogger or business owner just getting started!
1. Color Hex: Using uniform colors throughout your website and graphics is a critical part of achieving brand uniformity for your blog or online business. When working with color online, I always rely on a hex code, which is a digital formula for web based colors. Websites and various online design resources use hex codes to determine color, and so having a site like Color Hex bookmarked will help you pinpoint your specific brand colors and ensure you are always using the same colors over and over again!
2. Colour Lovers: Need to find a specific color palette to use for a project or post online? Colour Lovers is an awesome free website that helps you determine color palettes. Browse the site for one of their pre-designed palettes, design your own using the suite of tools available on the site or create a color palette from your favorite photo with their Photocopa tool that analyses images for their color palettes!
3. Death to the Stock Photo: If you are in need of some awesome stock photography for your website, don’t waste your time with standard stock photography sites with their obviously staged images. Death to the Stock Photo is a modern approach to stock photography that offers an awesome and affordable monthly premium service, or a free monthly pack of images for you to use in accordance with their image licensing terms. These are some awesome pictures that can be used in a variety of ways to liven up your site, so check them out for an awesome alternative to bland stock photography.
4. Canva: Need some powerful software for creating awesome graphics and images, but don’t have Photoshop? A free account with Canva will give you access to all the tools you need to design your own eye-catching graphics, promotional images or any other images or design elements you may need for your website.
5. Flat Icon: Looking for some custom icons for your website or design elements? Flaticon.com gives you access to a large library of vector icon images that you can use for your blog or business. With both free and paid icon options, you are sure to find the right icon set to fit the needs of any project.
I hope these 5 Free Design Tools help you make the most of your blog or business online! Let me know how you like them or if you use any other awesome free tools that I need to know about!
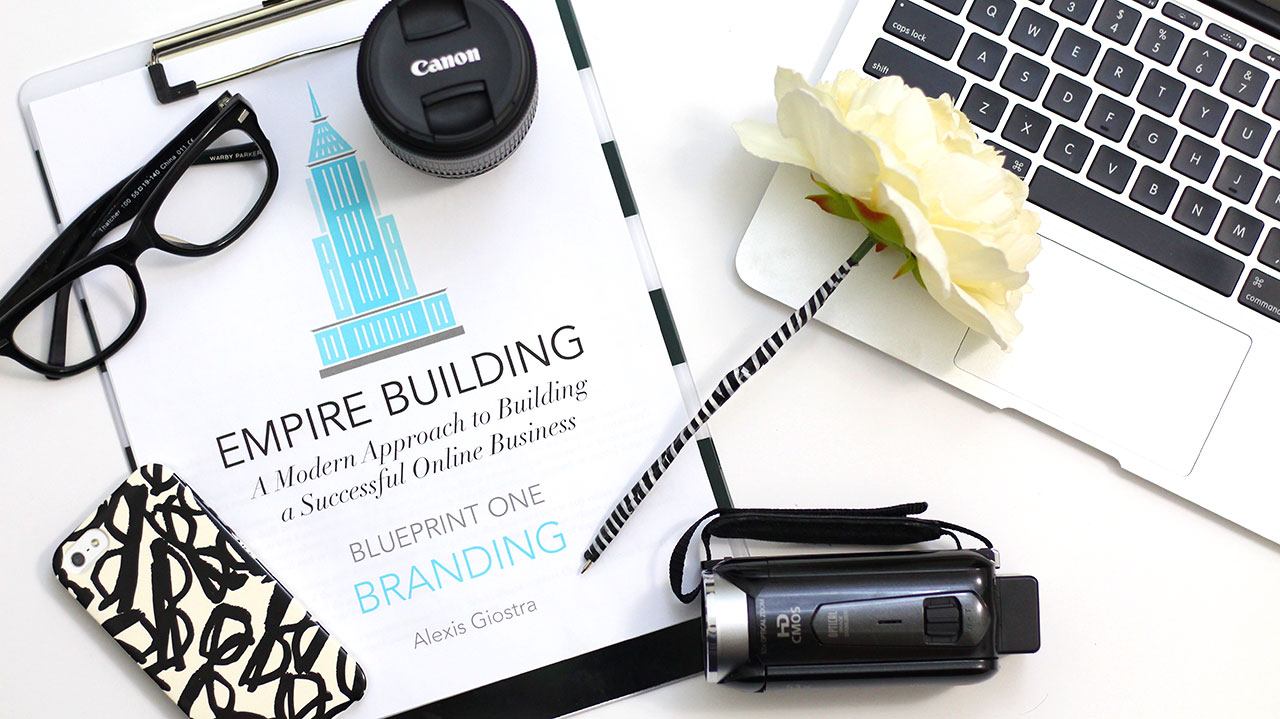
Sunday was a very exciting day for me. If you follow my YouTube Channel or my Instagram Account, you may already know that I have officially launched a new coaching program for members of my community who are looking for guidance building their own business online. The program is called Empire Building, and it was designed by me using all the knowledge I have acquired over the past few years building my own online business from a simple blog and rarely updated YouTube channel to an online community of over 30,000 followers and another 50,000 individual users who visit my site on a monthly basis!
I have to admit, my path to entrepreneurship has been an interesting one, especially when I take into account the fact that I have no specialized business training, nor have I participated in any of the popular online marketing courses you hear about. I’m definitely not against a business degree or taking a dedicated course on the subject of online marketing, but it just wasn’t something I ever did, and terms like hooks, listing building and lead pages still baffle me to this day. No, my success didn’t come from any fancy business or marketing strategies, but rather from doing what I thought was the most logical way to attract an audience and build a community. I created content that was of value to people, stayed consistent with my brand and focus, and treated my followers like I wanted to be treated. Apparently, I had inadvertently stumbled upon the golden rule of online business success.
Although this lesson was a long time coming for me, if you are looking for your own online success, I want to ensure you save as much precious time as possible, which is where Empire Building comes in! The Empire Building Program is a 5 Pillar Method for building a business online using tried and true methods that I have learned over the past 6 years of trial and error online! The Core of the Empire Building Program are 5 Blueprints (or workbooks) each covering one of the 5 Key Pillars to online business success. The first Blueprint, Branding, is currently available on my shop if you are interested in getting started on your own journey to online entrepreneurship, however, Empire Building doesn’t end there!
Over the past 6 years, I have learned much about myself and my own strengths. One of those strengths is my sincere ability to help others and provide focused, practical advice and assistance to those who need it. This is the true reason I created Empire Building, because I wanted to design a program where I could coach members from within my community either on a group or one-to-one basis. So, in addition to the Blueprint workbooks, I am also offering two Coaching Paths to you so that I can use everything I have learned to help you build a successful business online. Now, I am not going to go into the details of these programs here in this post, however, if you are interested in learning more about those programs or the Blueprint workbooks, please head on over to my dedicated information page for the Empire Building Program! This page outlines the program in more detail and is the best place to start if you are interested in working with me, but want to find the option that best suits your needs!
Of course, if you have any questions, please do not hesitate to reach out to me directly via email. I would be happy to answer any and all questions you have regarding the Empire Building program to ensure you make a choice that works for you! I am so excited for this amazing opportunity to work directly with the wonderful members of my community and help turn dreams and aspirations into reality! Thank you so much to all those who have already joined the program, I am beyond grateful for the chance to work with you!
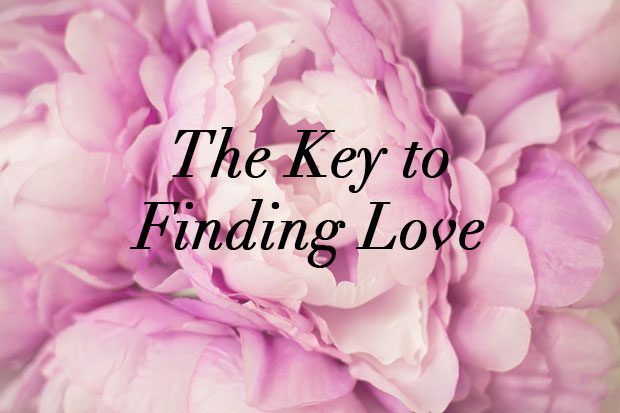
I know February can be something of a controversial month. Most people in relationships claim this month as a chance to celebrate their love, while those currently in between relationships complain that February is nothing special and that Valentine’s Day is just a product of the greeting card, chocolate, floral and jewelry industries! Whatever your stance, I thought that this would be the perfect opportunity to share my wisdom with my readers when it comes to what I have learned about love thus far in my short existence! I don’t claim to be a professional or highly schooled on the subject, but I have a few common sense lessons to share that will hopefully help any of you out there who are looking for a deep, meaningful relationship. Whether you are currently single, or in a relationship lacking that special something you are longing for, I submit this post to you like an old love song dedicated to the lonely hearts club!
First Key to Finding Love: Stop Looking
You know the old adage that “you find love when you aren’t looking,” well it is completely true! I have said it before and I will say it again, but love is invisible (obviously) so you can’t go around searching for it. It’s not a shoe that you lost in the back of your closet, it’s not the perfect little black dress hanging out on some rack in a department store waiting for you to spot it, and it certainly isn’t something you can concoct with a spare guy and a quick recipe! Love, in fact, is an energy! Which means it must be attracted! Because of this basic principle, it is possible for you to repel love through the act of searching, the way a magnet repels another if it uses a similar charge. So, if you have been searching high and low for Mr./Mrs. Right and have come up short, this is why! So, halt all efforts immediately and jump straight into the next lesson!
Second Key to Finding Love: Self Love Means Everything
If love is an energy that can only be discovered by being attracted, the best possible way to find it is to love yourself. Why? Because if you are truly, madly, deeply in love with yourself, who the heck wouldn’t want to also fall in love with you? Self love is everything when it comes to finding true romantic love. First of all, to love yourself means to truly know and understand yourself and your own mind and heart. Once you are in tune with that your heart and mind want, it actually becomes much easier to identify Mr./Mrs. Right once they are inevitably attracted to you! Secondly, when it comes to love, you will attract that which you believe you deserve deep down inside. So if you loath yourself inside and have a laundry list of flaws that you like to dwell on, and generally don’t have much esteem or confidence in yourself, guess what? You will find someone who is attracted to that weakness in you and they will latch on and exploit it! We’ve all see it before, maybe it hasn’t happened to you personally or to someone you know intimately, but I bet you know someone in that situation. Where they didn’t have any self esteem or self love and they got into a relationship because they were desperate for one and they ended up being used and abused. So, if you want to find a relationship, one with someone who thinks you are wonderful and amazing and will love you to the moon and back, you need to feel that way about yourself. You will attract a partner who will treat you the way you treat you, so make sure you are loving yourself to the moon and back first!
Third Key to Finding Love: Put Yourself Out There
One of the major barriers to finding love these days really stems from a lack of accessibility. If you don’t put yourself out there, you will never attract a loving partner. Common excuses for this range from work, to family obligations, to having too many friends, but when you boil it down, the truth is you are not prioritizing yourself and putting yourself in the situation to have love find you. This may be because you are truly a busy person, or it may be because you are afraid to put yourself out there, but either way, you are making no progress and should therefore not be surprised when no one comes knocking on Friday night! Another common defense I hear is that you do put yourself out there but there are no good available guys/gals. Untrue! The truth to this situation is that you are going out, usually with friends, and you are not actually putting yourself into the right setting. Putting yourself out there doesn’t mean going out to bars and clubs and to the movies with friends, it means prioritizing yourself, and your hobbies, and getting yourself involved in external situations without the crutch of a friend or another security blanket. The best way to meet people to start a relationship is to join a regular activity or group that interests you. Join it for the fun and for the heck of it, but make sure its something you like, whether that be spending time outdoors, or joining a book club, following your passions will always guide you in the right direction! Get involved with something, put yourself out there, be open to new friends and new experiences, that is the key to finding love!
I hope you found this post informative and helpful! Like I said in the introduction, I am no love expert, but these lessons aren’t ones you need a degree in to understand. For some people finding love is easy, its the part that comes later on that is really the difficult stuff! If you start to understand and practice these three simple tips, I think you will surprise yourself with the amount of attention you will begin to receive and theamount of eligible individuals you will start to notice!
With Black Friday just short of two weeks away, I thought now was the perfect time to discuss my favorite ways to get deals and save money, especially on pricier items. I am definitely the type of person who has slightly more expensive tastes, but I am also a complete cheap-skate! I hate spending more money than I have to on an item (who doesn’t, really?) and I will go out of my way and spend extra time price checking and scouring clearance racks to get a deal on an item I want. I realize, however, that not everyone always has the time to comparison shop and price check, so I thought it would be helpful to compile a list of a few tried and true methods I use to find deals quickly, when I need to make a purchase!
1. Take advantage of Black Friday Deals: Now, although Black Friday only happens once a year, it’s one of those events that we all know is coming. So, throughout the year, I will hold off on buying certain items for myself, my family and my home if I can wait until November 30th to grab them at a great price. With Black Friday around the corner, I suggest giving good thought to items in your home that may need replacing, upcoming gifts you may need to buy within the next year, and any wish list items you have been pondering. Decide if its worth it to upgrade that aging tv now, to buy your nieces graduation gift a few months early, or to pick up that high-end bag you have been eyeing, taking advantage of seasonal sales for purchases you know are coming down the line anyway!
2. Shop Designer Outlets: I think you can tell from watching a few of my youtube videos that I am something of a designer handbag and accessory nut! I love having quality staples in my wardrobe, but I don’t like to pay full price! I don’t even like to buy bags and accessories from designers when they have sales or provide me with a 25% off coupon (I feel like they send those to me every week)! No, I pretty much never buy a designer item from their retail stores, instead I shop their outlets or larger department store outlets and take advantage of real savings and price cuts! Outlets are great because their items are always significantly marked down in comparison to what you would pay for an item in a designer retail store, and on top of that they are always running at least one sale on any given day. If you shop around holidays (any holiday really, Presidents Day, Memorial Day, Labor Day- not just Christmas) they often have sales on top of sales! If you ever wondered how it is that I own multiple bags that retail for a few hundred dollars each, it’s because when I want a $500 bag, I go to the outlet where they sell it for $350 and then take advantage of their 40% off with an additional 30% because it’s a holiday. So that $500 bag ends up being less than $150 dollars!
3. Sign up for store mailing lists:Now, you and I both know that it isn’t the occasional splurge purchase on a handbag that kills your budget, but rather it’s those daily expenses on pricey necessities that add up quicker than anything! Clothing, home supplies, or car repairs are much more dangerous to our finances than we give them credit for and on a daily basis, I don’t think enough of us are taking advantage of sales and discounts in these areas. Make sure to sign up for store mailing lists and email marketing lists to the places you shop at most often, and even a few you may only occasionally visit. Why? Because most stores send out weekly coupons and flyers that outline sales on specific items, and if you just spend a few minutes checking out what is on offer and making your shopping decisions based on the stores advertising coupons or running sales across specific departments, you will save loads of money for sure!
4. Price check through Amazon: Whenever you are questioning whether or not you are getting a deal on an item, the best thing to do is to price check through Amazon.com. Why? Because Amazon is all about making sure they price match even the best published deals. So, if you are looking for an item and you think you are getting a deal in store, Amazon will be able to accurately tell you what the lowest advertised price is for that item, because they automatically lower their prices to match deals found elsewhere in store and online! So, if you have the time to do one quick little price check, use Amazon and feel confident that it was time well spent!
5. Check Clearance and As Is sections: For some pricey items, especially home goods, appliances and furniture, many stores keep a clearance/as is section where you can find great deals on new items that may be older or slightly damaged. With many large items, even the smallest dent or scratch means the store can’t sell the item at full price because it’s not in perfect condition. If you don’t mind a little superficial marking or buying an item that is maybe a model year older than current offerings, make sure to check for Clearance and As Is sections in your favorite stores because you can save a lot of money this way!
I hope these tips help save you some time and money, not just during the holiday season, but year round! There are plenty of great deals out there, you just need to know a few little retail secrets to find them sometimes! If you score some big deals this Black Friday, make sure to let me know about it in the comments or send me a tweet!
If you remember, last September I challenged myself not to make any frivolous purchases for the whole month! It was actually a pretty successful endeavor for me, and to help keep my readers inspired to save their hard-earned dollars along with me, I spent the month writing about various money-saving techniques, tips and tricks! Well, fast forward a year and here I am this September doing an awfully bad job at saving money. So, I thought to give myself a little reminder of all the ways I should be saving my money instead of wasting it, I would do a quick little flashback of some of my favorite posts from that series! If you remember these posts, hopefully this will be a nice refresher for you to get your butt in gear and into money-saving mode, and if you missed it last year, hopefully this will give you a little inspiration to poke around these posts and learn some money-saving hacks!
One of my first posts from the Commercial Detox series last year was one of my most popular! It was my first installment of my Starbucks @ Home DIY coffee recipes, a delicious Salted Caramel Mocha! So, if you have a Starbucks addiction that is costing you too much, you may want to give this recipe a try!
Although I am not normally a big clothing shopper, especially now that I work from home, I have been addicted to the boutique clothing site Jane.com for the past few months and just can’t say no to some of their amazing deals. Sales or no sales, however, I really need to reel it in when it comes to my spending on clothing because I know I already have too many items in my wardrobe! So, I think I will have to plan a day this month to clean out my closet using the tips from my Rediscover Your Wardrobe post! If you are a clothing hoarder, you may want to start with this one!
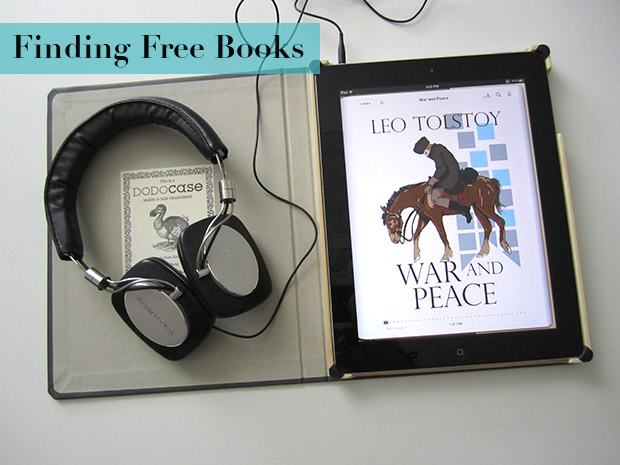
Entertainment is another area that I often find myself spending too much money on! With one-click purchases enabled on my iTunes and Amazon accounts, it often seems too easy for me to buy a book or rent a movie on my devices! So, if you are an entertainment junkie and over spender, you may want to check out Finding Free Books and From Cable to Netflix! Oh and if you already have a Netflix subscription, don’t forget to check out my list of YouTube Series’ Worth Watching!
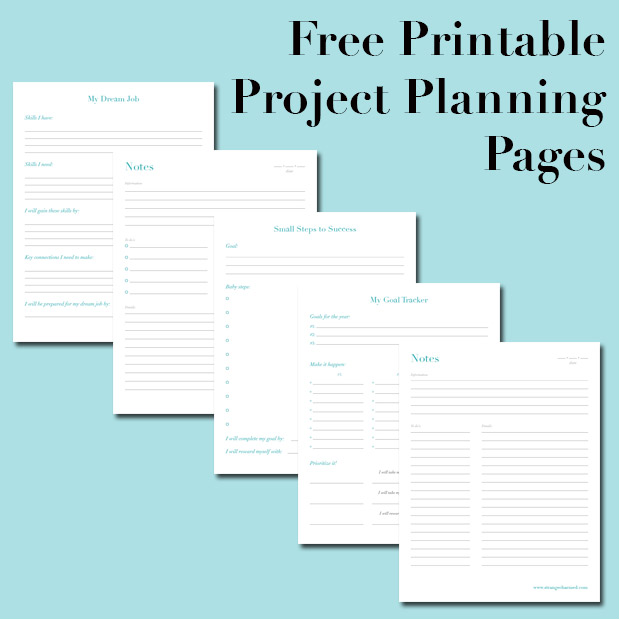
Last but certainly not least, I know I have a bunch of readers who are #plannernerds just like me! Did you know I created some custom project planning pages and made them available for download FREE on my blog? Yep, here is the link in case you missed it the first time around! You could even use these project planning pages to help you track a personal financial goal, smart eh? And if you are stuck with the basics of budgeting, don’t worry, I have that covered too! Happy Planning and Money Saving!
I hope this little blast from the past helped to inspire you to say NO to your frivolous spending habits! I know from time to time I need a reminder too! Oh, and of course, there were many more posts in my Commercial Detox series, so if you want to read them all, go ahead and click here! Tell me what you think of the series and let me know if you need any other more specific money-saving advice by sending me a tweet!
As you may already know, back in July I purchased my first DSLR camera, then of course, being the internet loving, tech savvy chic I am, I went straight to the internet to learn everything I could about photography! Now, to be completely honest, although I had never owned a DSLR before, I did know quite a bit about photography from studying the subject in college as part of my Art History major and just being a general photography geek for years. But, being a photography geek with a new DSLR, I just had to immerse myself with as much information as possible, and let me tell you, it was like being swallowed whole by a leviathan! There is a lot of information out there on the web about photography, and it ain’t all pretty. Worst of all, there isn’t much out there geared towards helping bloggers or even Instagram enthusiast take better pictures. So, being a blogger, such as I am, I thought to myself that it may be helpful if I actually went ahead and shared the information I learned with my readers.
So, the first topic I want to tackle is my all time favorite photography subject: Bokeh!
What is Bokeh?
It’s just a term used in photography to describe the quality of the out of focus elements of a picture. Literally, it comes from the Japanese word ‘boke’, which means ‘blur’ or ‘haze’. If you have ever seen a picture with those little balls of light in the background, that is like the epitome of the word, but bokeh is so much more than great balls of light! So, if you would like to learn more about bokeh and how to achieve this affect in your own photography, you are in luck because this is going to be a fun little post!
Bokeh is All About Controlling Depth of Field
Notice that only the first pair of glasses on the tray is in focus, and the others are not, creating some nice bokeh balls towards the back of the image.
In order to get a good bokeh effect in your images (yes, there is good and bad bokeh, but we will discuss the difference later) you have to understand one of the major principles of photography, which is depth of field. Depth of field is the distance between the nearest and furthest objects in a scene that appear in focus. You can control depth of field three ways.
Aperture: Apertures of 3.5 or greater (3.5-1.2) normally create desirable blur
Focal Length: A 50mm lens is often considered a standard, but you can make do with other focal lengths thanks to the third point
Distance between the camera and subject (and the subject and the background): You can adjust your focal length by stepping closer to or further from your subject. This will help to create a shallow depth of field, but you should also consider the distance between the subject and the foreground or background that you want out of focus. This is less important when using a DSLR with a good lens, but more important if you have a point and shoot!
Don’t Forget Composition and Light!
The best type of background for a bokehful shot is one that would still be considered attractive even if it was in focus.
The composition of your image is very important when it comes to creating good bokeh. Remember, bokeh refers to the quality of the out of focus elements of the image and to a greater extent, how they interact with the in-focus elements. You may think your background doesn’t matter because it will be blurred out, but things like bright colors, lines or patterns in your background can be distracting even with a blur. The subject is always an important part of any image, and a distracting or overwhelming background can detract from your subject and create a mismatch between subject and background, thus resulting in bad bokeh! Try to think of your blurred background as a way of directing the viewer’s eye towards the subject and in turn, pointing the viewer’s eye from the subject back to the lovely blurred, bokehfull background!
And you also can’t forget the light! When it comes to creating great bokeh and especially bokeh balls, you need light in your image reflecting from your background. It’s a popular tactic in photography to use strings of fairy lights in the background of dark images to create an obvious bokeh ball effect, but you can still get great bokeh balls in broad daylight, as long as there is enough light bouncing off objects in the foreground and/or background of your subject. This is why thinking about your composition will help you find a great shot and create an image with awesome bokeh!
No DSLR, No Problem!
This tilt-shift style image was taken with a Canon point and shoot from the London Eye, illustrating that it is possible to get a beautiful hazy blur from a compact camera!
But what if you don’t have a DSLR? Well, good news! Although point and shoot camera’s don’t give you anywhere near the amount of control a DSLR does, they still have a few features you can use to control the depth of field! Many point and shoots come with various modes for shooting that can help you achieve a bokeh effect. Portrait modes are normally good for this because they expect for there to be a single object or person in focus and then, to help the subject stand out, the background is blurred. You may have to do some work adjusting your distance from the subject and the subject’s distance from other objects in the foreground or background of the scene, but portrait modes are generally a good place to start when trying to get bokeh from a point and shoot. A second feature of a point and shoot you can try is the toy camera or miniature effect. Canon point and shoots are notorious for having this setting, which basically blurs the top and bottom of the image for you, so that only the center plane horizontally is in-focus. This is like an instant bokeh helper because the camera goes ahead and adds a blur for you. A final trick you can try with your point and shoot is to shoot in macro mode. Macro mode is normally used when you are getting very close up to a subject and want to focus on detail, but it can also be used on a point and shoot to help you blur your background. Try taking shots with your macro option turned on and off and see what sort of difference it makes!
Software and Apps
This iPhone shot makes you question whether it was taken with a DSLR because of all the lovely blur and bokeh in the background created by using the Big Lens App.
Now, sometimes it just isn’t possible to get a nice natural bokeh effect from your camera. Either because you don’t have a DSLR with the proper lens to pull off the shot, or because you are working with a point and shoot or smartphone camera that just doesn’t allow you the control you need. So, the only way to get that awesome bokeh affect in your image is through software or apps!
Photoshop is probably the most popular way that even pro photographers edit and post process their images. But you don’t have to be a pro to own the application, and in fact, many photo and design enthusiasts already own this software. So, how can you use Photoshop to help you add bokeh to your photographs? Simple, go ahead and import the desired photo into the program. Use the Quick Selection tool to select the elements in your image that you would like to be out of focus and add a Lens Blur! Lens Blur is the preferred blur to use in Photoshop if you’re looking for a bokeh effect because it mimics the characteristics of a camera lens when creating the blur, so it seems more natural on the photo. You may also want to bump up the levels or brightness of the background as well before you add your lens blur so that you have more light to work with in your image.
For iPhone users, there is a great app that I often use to help me create the illusion of depth of field on my iPhone pics, and that is Big Lens. It’s basically a DSLR app for your iPhone that gives you the ability to select an area of your image to be in focus and then add a blur to the rest of the image. You can control settings like aperture, filter and lens to help you create an image that appears to have been taken with a DSLR!
Now, if big blurry bokeh balls are what you’re after, there are quiet a few apps available that allow you the control to add your own to an image, however, I like the app Bokehful. With this app you can load a photo and add custom colored bokeh balls to an image. One word of caution, however, if you want to go this route of adding artificial bokeh balls, is to make sure the image you are using has some bright spots and out of focus areas to begin with and then add the bokeh balls to those areas. If you don’t you will just be adding balls of fake light to your image and it will be extremely obvious (trust me, I made this mistake a lot in the early days of Instagram)! So, bokehful is definitely an app I would use as a final touch after you brighten up an image and then blur out sections with Big Lens.
Other Bokehlicious Effects
These lovely bokeh hearts were created using the DIY template for bokeh shapes linked below!
You have probably seen quite a few photos on Instagram and Tumbler where the bokeh balls aren’t actually balls, but hearts, stars or some other shape. Ever wonder how that effect is created? Well, there are two ways to add custom bokeh shapes to your images. The first is by using a custom template to cover your camera’s lens to adjust the shape of your camera’s aperture as it takes pictures. I actually found a great video on this topic on YouTube that also includes a link to some free templates you can download and make at home. Or, if you would prefer to purchase a complete die cut kit, you can purchase one here. It’s actually quite a fun little DIY for any DSLR owner, and you can create some fun and interesting portraits and even landscape photos using different designs and shapes for your bokeh!
The second, and probably easiest way to create these custom bokeh shapes is through an app! Again, Bokehful and Big Lens both give you options to adjust the shape of your bokeh, as do many other photo filter and lighting effects apps. You may already have such an app in your collection, or you could check out the apps I suggest!
I hope this has been a helpful and informational post for any bloggers or Instagram addicts out there who are as in love with bokeh as I am! If it was, please go ahead and leave me a message on Instagram or send me a Tweet to let me know what you thoughts! Although photography snobs will often say you need a full frame DSLR with a 50mm 1.2 lens to create the best bokeh, the truth is, even the best camera in the world can’t shoot photos on its own. It’s all about the photographer, their creativity and ingenuity in setting up a scene that will produce a beautiful image. So, make do with what you have and get creative. Don’t be afraid to think outside the box when you have a concept for a great pic! Your Instagram followers will thank you for it! So, what other photography topics can I help you tackle? Any burning questions I can help you address to help your photography reach it’s fullest potential? Let me know!