Happy first day of Autumn everyone! I am so glad that fall is officially here, although it does feel like it’s still summer, I’m just happy that I can start celebrating the season in full force! I thought it would be especially festive if we celebrated together today with a fresh installment of Starbucks @ Home, my recipe series where I teach you how to make versions of your favorite coffee house drinks at home! I have already covered how to make a pumpkin spice latte last fall, but this year I wanted to put together a skinny version of the drink because Starbucks does not have a skinny pumpkin spice latte. The Starbucks #PSL is made with a pumpkin spice syrup that is filled with sugar, very, very sweet and high in calories. As much as I love a good #PSL, I don’t need that sort of added sugar in my diet, so I would prefer to make my own skinny version at home!
Skinny Pumpkin Spice Latte Recipe
Coffee of choice (a pumpkin coffee would be perfect!)
2 packets of stevia (or other sweetener of choice)
A shake or two of Pumpkin Pie Spice
Sugar Free Creamer (I use hazelnut flavored because I believe it brings out the pumpkin flavor, but any dairy or non dairy creamer or milk of choice works)
Fat Free Whipped Cream (optional but exponentially more festive!)
So, let’s be honest, you don’t need me to tell you how to put together a coffee, so instead of writing a how-to summary, I thought it would be fun if I just made a little video showing you how I assemble my skinny #PSL! Below is a very short, but fun video walking you through the recipe! Enjoy!
I hope you enjoyed this video and my Skinny #PSL recipe! Are you a fan of the Starbucks #PSL? Are there any other Starbucks drinks you would like to see me make an at home version of? Let me know in the comments!
I have a lot of female role models that I love to read and learn about. What is their secret to success? How can I be more like them? What’s the magic formula that they have harnessed to make their lives so productive and interesting? Wouldn’t we all like to know? The truth is, as much as I look to other women, these role models for inspiration, I know deep down in my heart, that it really is just simple hard work that brings you from average to extraordinary. It’s all about the doing, making things happen and having the follow through to see a project from start to finish! You may be familiar with this popular quote seen all over the internet lately “You Have the Same Hours in a Day as Beyonce!” Yes, we all do, so it’s all about how you spend that time and making every minute count. So here it is, the not so secret 7 Habits of Highly Productive Women!
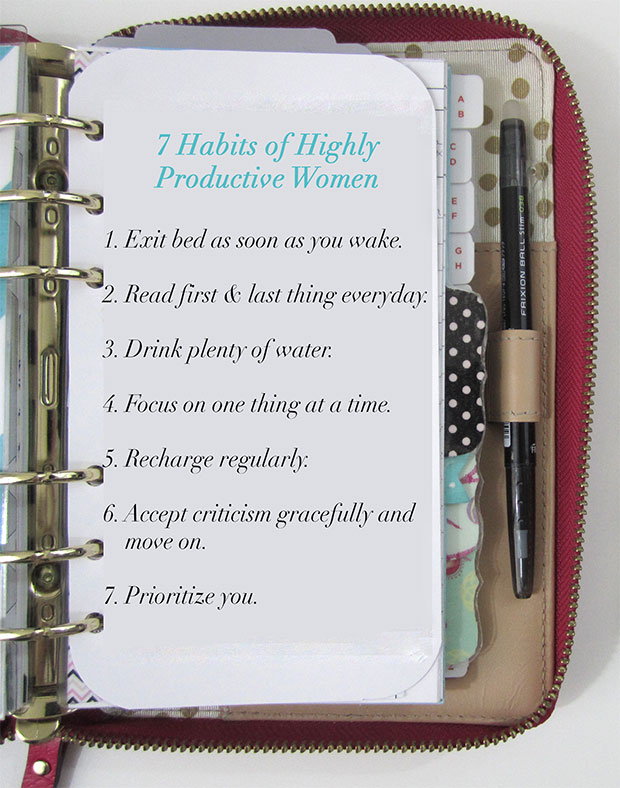
1. Exit bed as soon as you wake: How many times do you wake up in the morning and just lay around in bed playing on your phone or trying to catch a few extra minutes of sleep? I know I am very guilty of this one, but the truth is, when we wake up in the morning, it’s very important that we don’t waste those precious early moments. Get out of bed immediately to wake yourself up and just start your day without delay!
2. Read first & last thing everyday: The most productive women in the world all have something major in common. They are all readers. More specifically, they are all constant learners who read anything from the daily news, to industry updates, to popular literature on a constant basis. When you start to prioritize this sort of important knowledge, you begin to sharpen your edge and boost your personal productivity. For some, it can be a challenge, but give yourself a goal of reading something, even a short news story or a chapter of a book first thing in the morning and last thing before bed!
3. Drink plenty of water: Hydration really does play a major part in our overall wellbeing throughout the day. When I haven’t had a drink of water after a few hours I begin to lag and feel myself drying up, not just physically but physiologically! Although we are often told to drink 8-10 glasses of water a day, that is actually not a precise figure. To figure out how many ounces of water you need per day, take your body weight and divide it in half. That is how many ounces of water you need! So, get yourself a large water bottle or tumbler, keep it with you all day long and feel the energy and productivity boost a simple element like water can bring to your day!
4. Focus on one thing at a time: Although most women would consider themselves professional multi-taskers, when it comes to being productive, it’s actually better for you to focus on one thing at a time. Yes, we all have a lot on our plates, and yes, we will need to move between multiple different tasks and projects throughout our days, not just for work, but for many of us, home and personal obligations as well. But, when you go to complete a task or series or tasks, it’s much better if you onto do one thing at a time. This is precisely why I prefer to batch my work, taking care of all my calls at one time, my emails at one time, and doing certain receptive tasks in bulk, instead of moving from one thing to another more frequently. Give it a try to see how your productivity improves!
5. Recharge regularly: I think there is a major misconception out there that in order to be productive, you need to be focused on work. It’s all work, work, work, right? No time to dilly dally! Well, that’s not exactly true. You can’t expect to carry on non-stop forever, that would be a disaster, which is why it is so important to take time off and recharge your batteries. Throughout a busy work day, schedule in 5-15 minutes every 2 hours or so for you to just take a moment and gather your thoughts. Send a quick text to a loved one, play a quick game on your smartphone or browse a few pages of your favorite magazine, anything that will take your mind off of work and bring a little happiness to your soul. During days off, make sure you really spend a little time resting and relaxing. Go to bed early or schedule some time to sleep in, enjoy the company of friends and family, and just give yourself time and permission to turn off from work. It will do you wonders!
6. Accept criticism gracefully and move on: Everyone faces criticism, that’s a fact! And the truth is, the higher you rise the more criticism you are gonna get because more people are going to be aware of you and your work. Is that any reason to stop what you’re doing or spend hours of your precious time worrying about what other people are going to think? No way! The most productive women in the world face terrible criticism each and every day and they just smile through it and move on.
7. Prioritize you: As women, we are often lured into something of a mart complex, a sense that we need to put everyone else above ourselves in order to be successful and productive members of society. Let’s be honest, we all know women like this, or are ourselves striving for this delusional ideal that a women needs to be everything to all people, a wife, a mother, an employee, a student, you name it, we have to become it! With all that time spent focusing on the external elements of our lives, we often find that we put ourselves last. Unfortunately, this leads to some devastating developments for women, health-wise especially! We need to stop perpetuating this notion that women must do it all in order to have it all, so that we can start putting ourselves first! I’ve written about this before, but one of my favorite examples of why it is important to put yourself first, comes inside a little safety pamphlet found in each and every airplane. You’ve heard the phrase before, “secure your own mask first before attempting to help others.” That’s right, in the event of an emergency during air travel, you are directed to make sure you have taken care of your own safety before attempting to help those around you. Why? Because if you aren’t taken care of, how in the world can you be expected to take care of others? It’s common sense. So, seriously, start putting yourself and your needs first! Make sure you do all those little seemingly insignificant things that help support your well-being, because in the end, all those little things add up to something very, very important!
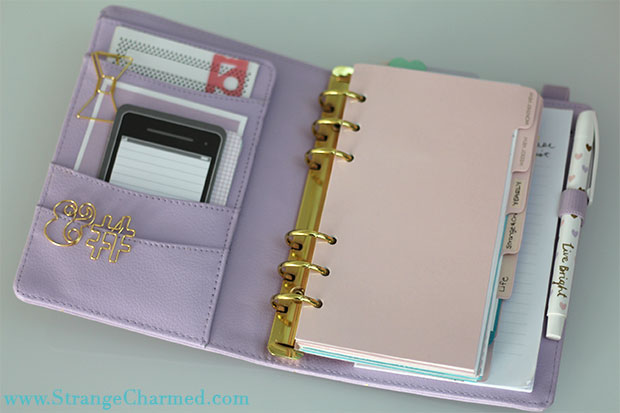
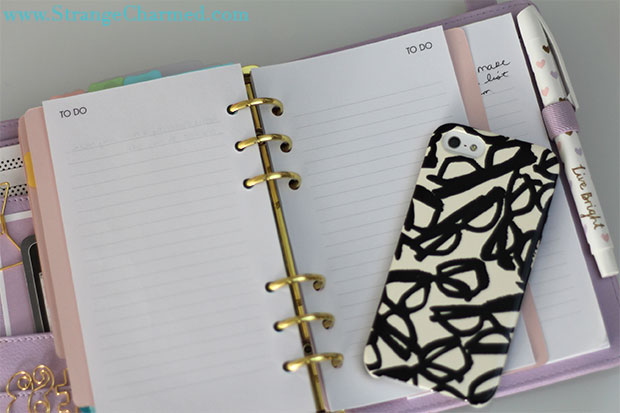
Some of you may recall earlier this year when I received my first filofax style planner, an A5 mint beauty from Kikki K that I wrote a rather extensive blog post about! I love my A5 Mint Time Planner, but after acquainting myself to the filofax and planner community, I began to realize that an A5 planner was just too large for my needs. Yes, it holds a lot of information and yes, the pages are much larger so you can really capture all the details of day-to-day life, but for me, it wasn’t perfect. When I moved onto my personal sized Kate Spade Wellesley Planner, I began feeling a little more at home in a 6 ring planner. It was more compact, easy to carry and write in while I was on the go and it fit nicely into more of my handbags. But still, it just didn’t feel 100% right to me. For a lot of us in the planner community, the search for that perfect planner is something that seems to elude us. Many of us have collections of planners that may seem frivolous to some, but those who understand know that our planners are like our babies. Okay, not literally, but like children or pets, our planners each seem beautiful and unique in their own way, and again, like children or pets, sometimes they just aren’t perfect and we try to work through issues to come to some state of balance. I have to say though, this last week I received a beautiful gift from one of my favorite stationery companies, Kikki K, and it has really been making me question my loyalty to my other planners. I was sent a Medium 2015 Lilac Time Planner (with a matching adorable pen!) and although it wasn’t something I was ever expecting to like, I have fallen head over heels in love with it!
There is something about the Kikki K planners that I just like. They are made from soft leather, have a nice rounded feel in the hands and the color, oh the color, it’s breathtaking! I’ve never thought of myself as a purple person, but this lilac is sophisticated and feminine, and surprisingly neutral! I also just love the dimensions of this planner. When I compare it to my Kate Spade planner, it’s slight wider and slightly shorter, but more of a square shape overall than the obvious rectangular shape of the Wellesley. To me, the proportions feel anatomically correct. Of course, there is also the elastic closure band, which I am a major fan of and was one of the reasons I purchased the mint A5 earlier this year. I think the elastic band is secure, but forgiving! You can stuff it with more inserts, stickers, notepads, and washi samples than a traditional planner with a button or zipper closure and it all holds together!
Another thing Kikki K gets right with this planner is the pockets! The inner cover has an array of pockets, from a large secretarial pocket, perfect for loose papers, cards, mail and more! Then, it has a selection of pockets, some deep, some small, but all have a variety of uses and can fit a plethora of planner goodies and decor! One thing I am very pleased about, in comparison to my mint planner, are the dividers! They are a lovely shade of peachy pink that work nicely with the lilac planner. They are so lovely, in fact, that I didn’t bother making my own personalized dividers, because I loved the stock dividers so much!
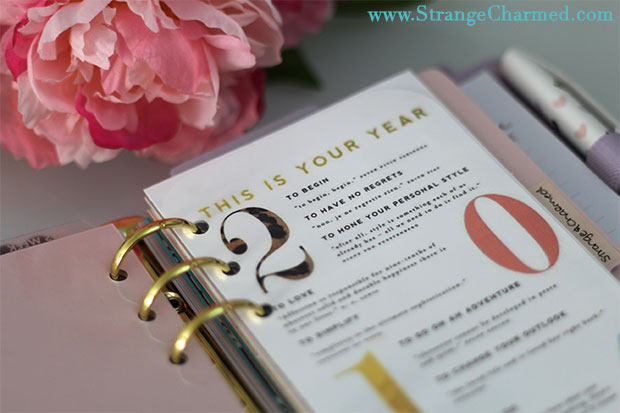
Now, on to the inserts and the various sections of this planner! The planner came with a variety of inserts: month on two pages spread, week on two pages calendar, address book inserts, birthday and anniversary pages, shops and restaurant tracker, to-do lists, and expense sheets. I love the Kikki K calendar inserts, however, the dates began with 2015 so they weren’t much use to me. So, I used some free printables from Philofaxy to hold me over until the new year! I also put aside the address book, birthday/anniversary, shops/restaurants, and expense sheets because they aren’t any use to me. Instead, I broke my planner down into the following sections: Monthly View, Weekly View, Yearly, Strange & Charmed, Life, and To-Dos!
My monthly view is my editorial calendar for my blog and YouTube channel, helping me keep track of posts and regularly scheduled content!
In my weekly view, I opted for a week per page layout paired with a custom Task List that I designed myself! These two together help me manage my tasks and important items throughout my week.
My yearly section is geared towards helping me organize big picture life goals and tasks. I use a variety of pages in this section to help keep my focused, breaking down my year by month and seasonally.
The Strange & Charmed section is devoted to my blog and YouTube channel. Here I keep track of blog posts and YouTube video ideas with custom trackers I designed for myself. I also keep a variety of loose notepaper here for taking notes or brainstorming.
The life section encompasses everything else in my life that I need to keep track of. This is my place for storing inspiration, my wish list, and taking extraneous notes.
Finally, the meager to-do section is where I keep a running list of to-do items that need my attention.
Overall, I am loving this little planner! I think the size is perfect for me as the planner fits everything I need, all in one place! I am obsessed with the color, which is such a random thing for me, but I just think its such a great shade! I am so excited and thankful that Kikki K was kind enough to send this planner to me, and if you have been thinking about this planner, I definitely think you should pick it up sooner rather than later, as these tend to go out of stock as we get closer to year’s end. Of course, if you want to see an even more in-depth look at my planner set up, make sure to check out my YouTube video below, which basically walks you through the entire planner! If you are interested in any of my custom planner inserts, feel free to visit my shop!
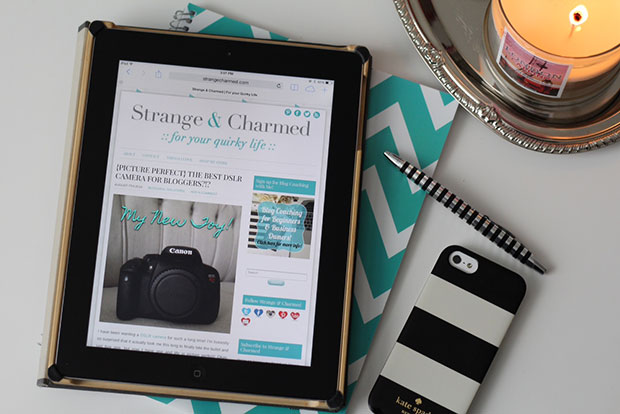
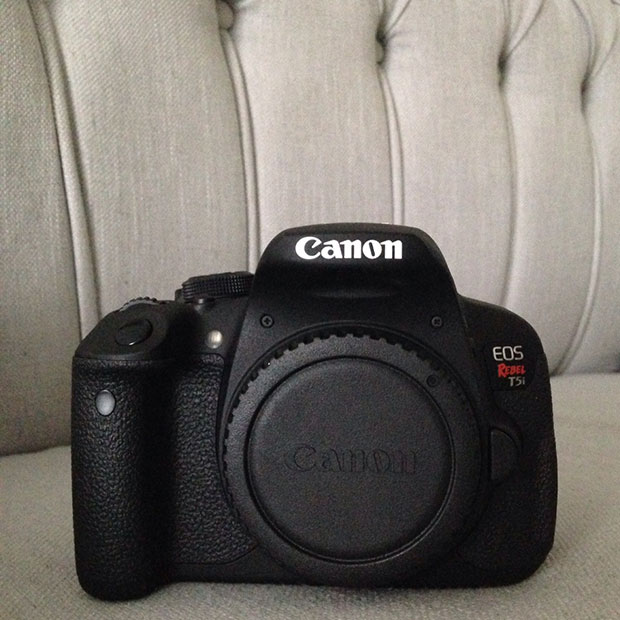
Ever since I purchased my new DSLR, the Canon EOS Rebel T5i, I have received numerous questions about how I’m liking it as my first DSLR experience. So, I thought I would go ahead and do a proper review for anyone who was considering their first DSLR, or may be looking to upgrade from an older model to something new! When I first introduced this camera on my blog, I made something of a bold statement. I suggested that the camera could possibly be the best camera for bloggers out on the market currently, and after weeks of using the camera and taking it on multiple day trips to get some good shooting experience in, I am actually prepared to defend this statement! But before I do, I am going to have to amend it. You see, the Canon EOS Rebel T5i isn’t just a great camera for bloggers, it’s also a great camera for scrapbookers, project lifers, parents, students, and anyone else who is looking to take great quality photos without having to spend extra time and money!
The Canon EOS Rebel T5i is an awesome camera with some very useful features that make DSLR photography seem simple, even for beginners or those who don’t have the time or interest in learning the ins and outs of photography, but still want to get the most bang for their buck when it comes to taking great photos. Here’s what I love about this camera:
3.0 inch Touch Screen LCD Display with Live View and Touch Shutter: The touch screen display on this camera is an absolute lifesaver and makes the T5i a breeze to use! First off, the display moves and tilts so when I am taking portrait shots of myself or using the camera’s video mode, I can keep an eye on everything and make sure I am in frame and properly composed. It also helps when I am taking shots from high or low angles because I can see everything in the shot from practically any position. The fact that this display is touch screen is almost an afterthought, something you wouldn’t necessarily mention, that is, unless you are using a previous generation model that lacks a touch screen. Then, you miss the convenience a touch screen display brings, especially now that we are all so used to touch screen devices- it’s like second nature to touch a display to manipulate it! Not only is this display touch screen, but it also has an awesome touch shutter feature which allows you to take a photo just by tapping on the display. It’s great when you are using a tripod to shoot and really using that display to compose your image, because it means you don’t have to wait to take the shot, you can just tap the screen and capture your image. Finally, the fact that this display has full live view preview means that what you see on-screen is what you get when it comes to your images. When using the creative filters built into the camera, you actually get to see those filters in action before you take the shot. Again, this sounds like child’s play to anyone who has an iPhone, but this sort of technology is still relatively new to entry-level DSLRs.
Built-in stereo mic: You ‘d think that a built-in microphone would be a standard feature in a digital camera that was made to capture video, but you’d be surprised at the number of DSLRs that actually lack them. Although I didn’t buy the Canon T5i to use for videography, it was definitely a feature I wanted in my camera for occasional use. Now, it’s not the greatest mic in the world, and if you do plan to use your DSLR for videography, you will certainly need an external mic if you want to get top-notch audio, but something is better than nothing when you are in a pinch.
18.0 Mega Pixel CMOS Sensor with Hybrid AF: The sensor of any digital camera is probably the single most important feature because it is what captures the images. 18 mega pixels may not be the highest number of mega pixels available, but it is more than enough and certainly nothing to laugh about! What is really important about the sensor, however, is the hybrid AF system that basically makes all the cool live view features possible. It makes live face detection and auto focus possible with nine all cross-type auto focus points.
Aspect Ratio Function: Now this function may be a minor one, but it tops my list of my favorite features on the Canon T5i because it makes my life as a blogger and Instagram enthusiast much, much, easier! The standard aspect ratio for a digital camera is 3:2 and that’s the ratio of the LCD display, however, through the magic of technology built into this camera, you can actually change the aspect ratio for your images to 16:9 or even 1:1. Why is this important? Why can’t I just crop my images in post production? Well, glad you asked. Yes, I can crop my images in post production, however, when it comes to properly composing an image, it’s much easier when you can see your final product while you are shooting. So, if I am taking a picture that I plan to use on my Instagram account, I can switch to 1:1 aspect ratio and compose an image that is perfectly square. If I were to take all my photos in 3:2 aspect ratio, I would have to make a visual guess as to whether or not my image is composed in a square, which I may or may not get right, it’s basically up to chance! Same goes with 16:9 aspect ratio that is standard for YouTube cover photos. Normally, I would crop those down to the right size, but thanks to the aspect ratio function built into my camera, I can take the right picture from the start and not have to mess around with the crop in Photoshop!
Compact body: DSLR cameras come in many shapes and sizes, but the Canon EOS Rebel T5i has a relatively compact body that contains all those glorious functions I mentioned above! Now, it’s not the smallest DSLR in Canon’s lineup, however, when you take into account the fact that it is such a full featured camera in such a compact body, you really begin to appreciate the fact that you get so much power without having to lug around a huge camera.
Overall, I am very pleased with this camera and I think I made an excellent decision with this purchase. It really is very easy to use and a great camera for someone looking for quality without needing to know the ins and outs of DSLR photography! If you are interested in picking up this camera, here is a link to where I purchased mine for a very good price! Also, in case you were wondering, I purchased the body of the camera alone, and then also purchased this 50mm 1.8 lens to use with it, since I knew the kit lens wouldn’t be useful to me. If you would like to know more about why I chose the 50mm lens, let me know in the comments or send me a tweet. I may very well make it the subject of a future post in this photography series, especially if I know people are interested in the topic!
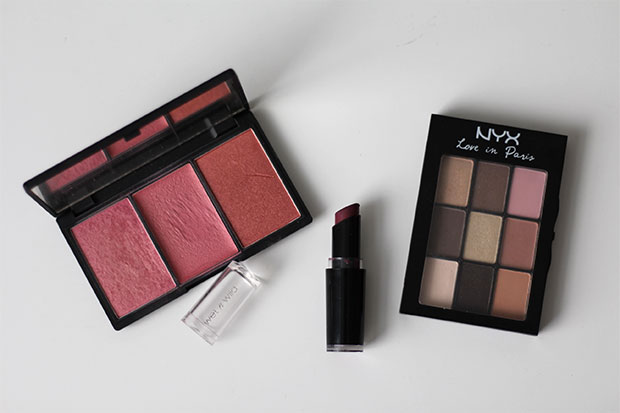
At the end of August, I picked up the NYX Love in Paris eye pallet and immediately knew it would be my go-to for fall! It’s a great neutral eye pallet with a selection of cool tones, some matt, some iridescent, that I couldn’t help but compare to the ever popular Urban Decay Naked pallets, but at a fraction of the cost. For me, it was perfect, and I immediately began experimenting with different looks for fall. Once I found the perfect fall eye look, something simple and taupe-y, I began messing with my blushes to find the right shade in my collection that would compliment the fall tones I was going for. Eventually, I settled on a creme blush out of my Sleek Blush by 3 Pink Lemonade Pallet because it was a matt, berry/rose color that was somewhat deeper than my normal rosy pink blushes of choice. Then, something funny happened. While putting on my makeup one day, I realized that the NYX Pallet I was using and the Sleek Blusher had a similar name; Macaroon! I thought this was highly ironic, because I love french macarons (although I normally spell the word with one “o” not two) and I was surprised that I hadn’t noticed the names of the colors before this! So, I immediately thought to myself that this was a sign that I should film a makeup tutorial for my channel based on the look, and viola, Macaron’s in Paris was born!
I think this is a perfect fall look because the taupe eye is slightly smoky and chic for fall, and works very well with the berry blush and purple shade of lipstick. To me, these tones are all very sophisticated and can be worn light (as I show you) for the day time, but can then be darkened and deepened for a show stopping evening look.
I hope you check out the video and see how I pull this look together using just a few drugstore items! Let me know what you think and if you’d like to see more makeup tutorials by me. I know I am far from a beauty guru, but I do get complimented on my makeup regularly, so I guess I must be doing something right!
“The opposite of love is not hate, it’s indifference. The opposite of art is not ugliness, it’s indifference. The opposite of faith is not heresy, it’s indifference. And the opposite of life is not death, it’s indifference.”― Elie Wiesel
“Death: Human beings make life so interesting. Do you know, that in a universe so full of wonders, they have managed to invent boredom.”― Terry Pratchett, Hogfather
“…the opposite of love is not hate — it’s apathy. It’s not giving a damn. If somebody hates me, they must “feel” something … or they couldn’t possibly hate. Therefore, there’s some way in which I can get to them.”― Leo F. Buscaglia
Not caring, apathy, indifference- it’s the plague of society. Isn’t it ironic that in a time where the Internet can bring you vast amounts of data and people are able to connect all across the globe, we are losing the essence of humanity at alarming rates. Christianity, Judiasm, Islam and all the major world religions profess caring about yourself, your world and your neighbors, and yet we are missing the message. We have become professionals at avoiding real human connection, not only with others, but most importantly, ourselves. Think about it, when was the last time you gave the excuse “I’m sorry, I am too busy to…(fill in the blank)?” Or started a diet or exercise plan only to buckle at the first sign of a challenge? We don’t even care enough to take care of ourselves. This is a major problem that really stems from a major malfunction in our own self value.
We cannot expect to care about anything truly until we care about ourselves first. Self esteem and self-love, or the lack of it, is a major player in why we cannot seem to commit. Caring is a commitment after all. It takes time and effort to care about anything, which is why I call it the art of caring. It all starts inside, within your own mind. You must silence the voice inside your head that is screaming out to you that you don’t matter. Because if you don’t think you matter, you won’t think much else matters! Indifference is bred out of fear. Fear that you will fail, fear that someone will not agree with you, fear that people are judging you for your opinions and for caring.
You’re not wrong after all. When you care about things people will judge you, you may fail, and people will certainly disagree with you, but that doesn’t reflect back on you. It’s just the way the world works. You can profess that 2 + 2 = 4 but some smart ass will argue some obscure piece of mathematical theorem that says it actually equals 5. These people don’t matter, and they don’t matter because there is always a dissenter. You’re allowed to not care about the dissenters. As for people judging you, yep, your right! When you care about something or even someone there is always judgement. Like the dissenters, these people also do not matter because someone always has an opinion and wants to share it. While I wish the world would abide by Thumper’s “if you don’t have anything nice to say, don’t say anything at all,” it’s actually more along the lines of “misery loves company.” Remember, other people who “don’t care” are going to be confused as to why you “do care,” and they are going to feel inadequate about your caring because they lack self-esteem enough to appreciate the fact that you care about something. It’s a vicious cycle, don’t get caught up in it, just ignore it! Finally, caring may also not work out for you. It is possible to fail at caring. This doesn’t mean that you shouldn’t try, if anything, it is all the more reason to give something a shot! Everyday is filled with failure. Things you were supposed to do, but couldn’t get to. New meals you attempted but ruined. Appointments you were late for. All of this is failure, we live with it everyday and it propels us forward. Think about it. When you are running late for an event do you just decide not to show up? Probably not. When you don’t complete a task today, does that mean you can’t try it tomorrow? Nope. When you burn dinner, does it mean you stop cooking? Not at all! You fail all the time and you get over it! You learn from your mistakes and try again. So next time you decide not to do something out of fear of failing, remind yourself that you fail all the time and life still goes on!
Once you have come to terms with your fear of commitment, you must begin to dismantle the barrier between yourself and the world. The biggest lie we tell ourselves to keep from participating in life is what I call “the busy trap.” You can’t do this or that because you are busy. Busy is a lie; busy is a self-made delusion; busy is the ultimate shield. Busy is our way of legitimizing our disinterest and indifference. People can hardly argue with it, as it almost gives the impression of interest while simultaneously disconnecting us. It’s as though your saying, “I would do this, if I had time” but when someone tells you they are busy or when you use the phrase yourself, remember, what you are really saying is “this is not worth my time and I refuse to prioritize it.” If you have friends who give you this excuse often, you may want to reevaluate whether you should remain friends with them. Consequently, if you give this excuse often, you need to confront yourself on why you refuse to participate in the world. Do you need to work on your self-esteem or do you need to cut off a relationship that isn’t working? You need to be honest with yourself and others because “busy” is a waste of time.
So, now that you know that you matter and that you have nothing to be afraid of and are understanding the barriers you have in place between you and the world, lets discuss why you should start caring about things and the benefits it will bring you. To summarize, caring opens you up to new experiences and new people. It brings you a level of fulfillment and accomplishment in your life that you have never felt before. Caring can sometimes lead you to hurt and pain, but through it also clarity and personal growth. If you talk to parents, they will often use this same language to describe their experience with their children. If you speak to an artist, the same words are often used. The same goes for business owners, writers, athletes, model train enthusiasts and so on! When you care about something, either a person or a passion, you awaken your human spirit. You may think there is a difference between a parent caring for their child and a girl who loves fashion but to each of them what they care about is important and valuable and gives their life meaning.
When you begin to care you begin to spend your time wisely, you learn to prioritize and you live your life more fully. Humans are intelligent and creative and when we engage this natural state our quality of life increases. Get into hobbies, learn new things, connect with people, care about the world, it’s intricacies and its oddities and live life. Don’t be too busy for it all.
If you remember, last September I challenged myself not to make any frivolous purchases for the whole month! It was actually a pretty successful endeavor for me, and to help keep my readers inspired to save their hard-earned dollars along with me, I spent the month writing about various money-saving techniques, tips and tricks! Well, fast forward a year and here I am this September doing an awfully bad job at saving money. So, I thought to give myself a little reminder of all the ways I should be saving my money instead of wasting it, I would do a quick little flashback of some of my favorite posts from that series! If you remember these posts, hopefully this will be a nice refresher for you to get your butt in gear and into money-saving mode, and if you missed it last year, hopefully this will give you a little inspiration to poke around these posts and learn some money-saving hacks!
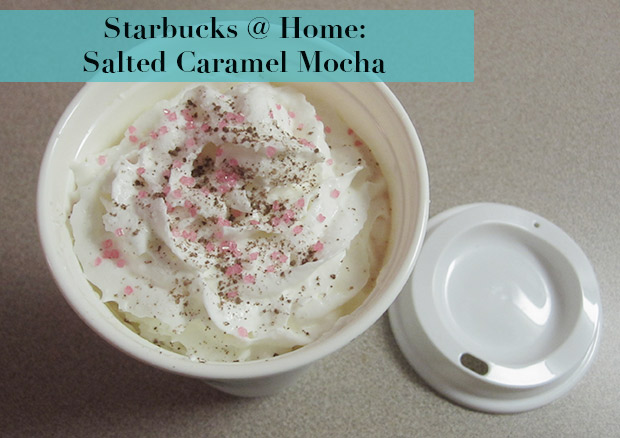
One of my first posts from the Commercial Detox series last year was one of my most popular! It was my first installment of my Starbucks @ Home DIY coffee recipes, a delicious Salted Caramel Mocha! So, if you have a Starbucks addiction that is costing you too much, you may want to give this recipe a try!
Although I am not normally a big clothing shopper, especially now that I work from home, I have been addicted to the boutique clothing site Jane.com for the past few months and just can’t say no to some of their amazing deals. Sales or no sales, however, I really need to reel it in when it comes to my spending on clothing because I know I already have too many items in my wardrobe! So, I think I will have to plan a day this month to clean out my closet using the tips from my Rediscover Your Wardrobe post! If you are a clothing hoarder, you may want to start with this one!
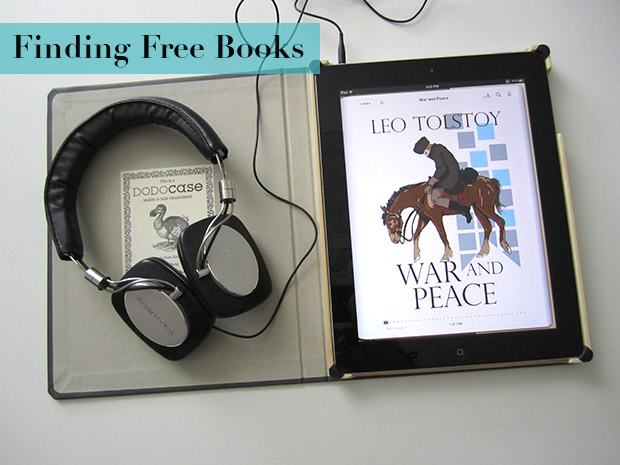
Entertainment is another area that I often find myself spending too much money on! With one-click purchases enabled on my iTunes and Amazon accounts, it often seems too easy for me to buy a book or rent a movie on my devices! So, if you are an entertainment junkie and over spender, you may want to check out Finding Free Books and From Cable to Netflix! Oh and if you already have a Netflix subscription, don’t forget to check out my list of YouTube Series’ Worth Watching!
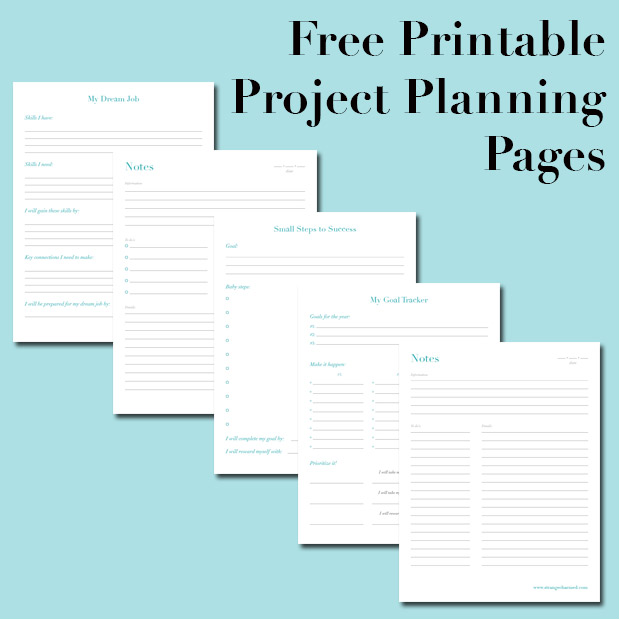
Last but certainly not least, I know I have a bunch of readers who are #plannernerds just like me! Did you know I created some custom project planning pages and made them available for download FREE on my blog? Yep, here is the link in case you missed it the first time around! You could even use these project planning pages to help you track a personal financial goal, smart eh? And if you are stuck with the basics of budgeting, don’t worry, I have that covered too! Happy Planning and Money Saving!
I hope this little blast from the past helped to inspire you to say NO to your frivolous spending habits! I know from time to time I need a reminder too! Oh, and of course, there were many more posts in my Commercial Detox series, so if you want to read them all, go ahead and click here! Tell me what you think of the series and let me know if you need any other more specific money-saving advice by sending me a tweet!
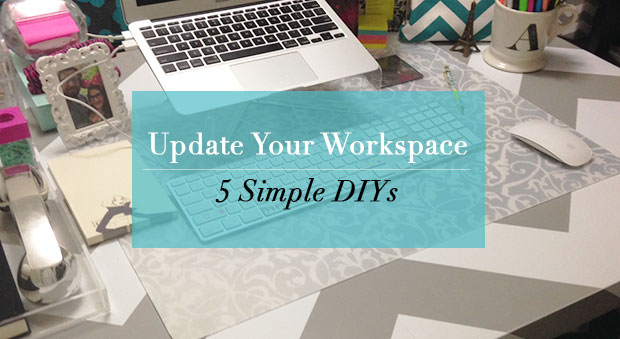
My office happens to be one of my favorite places to be, and for many of us, it happens to be a place we spend a good portion of our day. Whether your workspace is a nook at home, a cubicle or a corner office, it needs to feel like a comfortable and inspiring place to do work. There is nothing more un-inspirational than a bland office! So, what’s to be done when you don’t have the cash to purchase new furniture and art? DIY it of course! You don’t have to spend a lot of money to add interesting and functional elements to your office, all you need is a craft store and some creativity! So, to help you get inspired to add a little fun into your office space, I have put together a short video with 5 Easy DIYs appropriate for any workspace, guaranteed to make your work day a little brighter and a lot more stylish!
In this video I show you how to make:
A Custom Framed Cork Board/White Board Combo
A Personalized Desk Pad
A Colorful Keyboard
Inspiring File Folders
A Custom Floral Arrangement
Happy DIYing!
If you have any other ideas for some simple office or workspace DIYs, please make sure to share them in the comments below! And, of course, if you give any of these DIYs a try, make sure to snap me a pic and send it to me via Twitter, Instagram or Facebook, and use the tag #SandCDIY so I can find it!
As you may already know, back in July I purchased my first DSLR camera, then of course, being the internet loving, tech savvy chic I am, I went straight to the internet to learn everything I could about photography! Now, to be completely honest, although I had never owned a DSLR before, I did know quite a bit about photography from studying the subject in college as part of my Art History major and just being a general photography geek for years. But, being a photography geek with a new DSLR, I just had to immerse myself with as much information as possible, and let me tell you, it was like being swallowed whole by a leviathan! There is a lot of information out there on the web about photography, and it ain’t all pretty. Worst of all, there isn’t much out there geared towards helping bloggers or even Instagram enthusiast take better pictures. So, being a blogger, such as I am, I thought to myself that it may be helpful if I actually went ahead and shared the information I learned with my readers.
So, the first topic I want to tackle is my all time favorite photography subject: Bokeh!
What is Bokeh?
It’s just a term used in photography to describe the quality of the out of focus elements of a picture. Literally, it comes from the Japanese word ‘boke’, which means ‘blur’ or ‘haze’. If you have ever seen a picture with those little balls of light in the background, that is like the epitome of the word, but bokeh is so much more than great balls of light! So, if you would like to learn more about bokeh and how to achieve this affect in your own photography, you are in luck because this is going to be a fun little post!
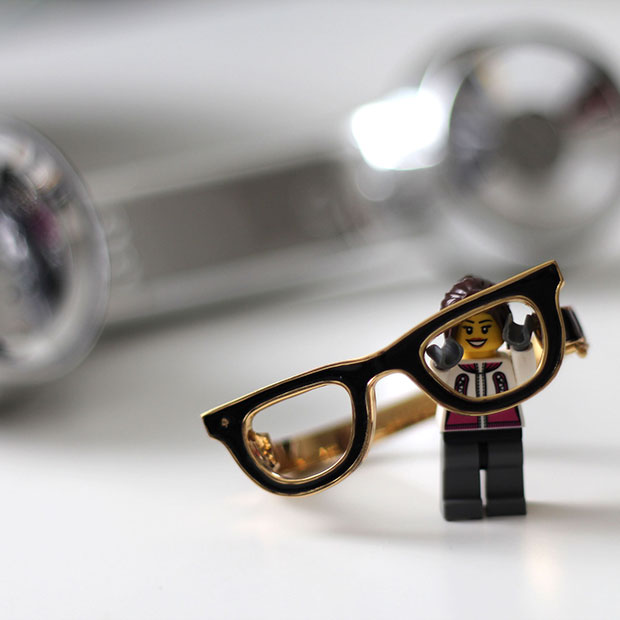
Bokeh is All About Controlling Depth of Field
Notice that only the first pair of glasses on the tray is in focus, and the others are not, creating some nice bokeh balls towards the back of the image.
In order to get a good bokeh effect in your images (yes, there is good and bad bokeh, but we will discuss the difference later) you have to understand one of the major principles of photography, which is depth of field. Depth of field is the distance between the nearest and furthest objects in a scene that appear in focus. You can control depth of field three ways.
Aperture: Apertures of 3.5 or greater (3.5-1.2) normally create desirable blur
Focal Length: A 50mm lens is often considered a standard, but you can make do with other focal lengths thanks to the third point
Distance between the camera and subject (and the subject and the background): You can adjust your focal length by stepping closer to or further from your subject. This will help to create a shallow depth of field, but you should also consider the distance between the subject and the foreground or background that you want out of focus. This is less important when using a DSLR with a good lens, but more important if you have a point and shoot!
Don’t Forget Composition and Light!
The best type of background for a bokehful shot is one that would still be considered attractive even if it was in focus.
The composition of your image is very important when it comes to creating good bokeh. Remember, bokeh refers to the quality of the out of focus elements of the image and to a greater extent, how they interact with the in-focus elements. You may think your background doesn’t matter because it will be blurred out, but things like bright colors, lines or patterns in your background can be distracting even with a blur. The subject is always an important part of any image, and a distracting or overwhelming background can detract from your subject and create a mismatch between subject and background, thus resulting in bad bokeh! Try to think of your blurred background as a way of directing the viewer’s eye towards the subject and in turn, pointing the viewer’s eye from the subject back to the lovely blurred, bokehfull background!
And you also can’t forget the light! When it comes to creating great bokeh and especially bokeh balls, you need light in your image reflecting from your background. It’s a popular tactic in photography to use strings of fairy lights in the background of dark images to create an obvious bokeh ball effect, but you can still get great bokeh balls in broad daylight, as long as there is enough light bouncing off objects in the foreground and/or background of your subject. This is why thinking about your composition will help you find a great shot and create an image with awesome bokeh!
No DSLR, No Problem!
This tilt-shift style image was taken with a Canon point and shoot from the London Eye, illustrating that it is possible to get a beautiful hazy blur from a compact camera!
But what if you don’t have a DSLR? Well, good news! Although point and shoot camera’s don’t give you anywhere near the amount of control a DSLR does, they still have a few features you can use to control the depth of field! Many point and shoots come with various modes for shooting that can help you achieve a bokeh effect. Portrait modes are normally good for this because they expect for there to be a single object or person in focus and then, to help the subject stand out, the background is blurred. You may have to do some work adjusting your distance from the subject and the subject’s distance from other objects in the foreground or background of the scene, but portrait modes are generally a good place to start when trying to get bokeh from a point and shoot. A second feature of a point and shoot you can try is the toy camera or miniature effect. Canon point and shoots are notorious for having this setting, which basically blurs the top and bottom of the image for you, so that only the center plane horizontally is in-focus. This is like an instant bokeh helper because the camera goes ahead and adds a blur for you. A final trick you can try with your point and shoot is to shoot in macro mode. Macro mode is normally used when you are getting very close up to a subject and want to focus on detail, but it can also be used on a point and shoot to help you blur your background. Try taking shots with your macro option turned on and off and see what sort of difference it makes!
Software and Apps
This iPhone shot makes you question whether it was taken with a DSLR because of all the lovely blur and bokeh in the background created by using the Big Lens App.
Now, sometimes it just isn’t possible to get a nice natural bokeh effect from your camera. Either because you don’t have a DSLR with the proper lens to pull off the shot, or because you are working with a point and shoot or smartphone camera that just doesn’t allow you the control you need. So, the only way to get that awesome bokeh affect in your image is through software or apps!
Photoshop is probably the most popular way that even pro photographers edit and post process their images. But you don’t have to be a pro to own the application, and in fact, many photo and design enthusiasts already own this software. So, how can you use Photoshop to help you add bokeh to your photographs? Simple, go ahead and import the desired photo into the program. Use the Quick Selection tool to select the elements in your image that you would like to be out of focus and add a Lens Blur! Lens Blur is the preferred blur to use in Photoshop if you’re looking for a bokeh effect because it mimics the characteristics of a camera lens when creating the blur, so it seems more natural on the photo. You may also want to bump up the levels or brightness of the background as well before you add your lens blur so that you have more light to work with in your image.
For iPhone users, there is a great app that I often use to help me create the illusion of depth of field on my iPhone pics, and that is Big Lens. It’s basically a DSLR app for your iPhone that gives you the ability to select an area of your image to be in focus and then add a blur to the rest of the image. You can control settings like aperture, filter and lens to help you create an image that appears to have been taken with a DSLR!
Now, if big blurry bokeh balls are what you’re after, there are quiet a few apps available that allow you the control to add your own to an image, however, I like the app Bokehful. With this app you can load a photo and add custom colored bokeh balls to an image. One word of caution, however, if you want to go this route of adding artificial bokeh balls, is to make sure the image you are using has some bright spots and out of focus areas to begin with and then add the bokeh balls to those areas. If you don’t you will just be adding balls of fake light to your image and it will be extremely obvious (trust me, I made this mistake a lot in the early days of Instagram)! So, bokehful is definitely an app I would use as a final touch after you brighten up an image and then blur out sections with Big Lens.
Other Bokehlicious Effects
These lovely bokeh hearts were created using the DIY template for bokeh shapes linked below!
You have probably seen quite a few photos on Instagram and Tumbler where the bokeh balls aren’t actually balls, but hearts, stars or some other shape. Ever wonder how that effect is created? Well, there are two ways to add custom bokeh shapes to your images. The first is by using a custom template to cover your camera’s lens to adjust the shape of your camera’s aperture as it takes pictures. I actually found a great video on this topic on YouTube that also includes a link to some free templates you can download and make at home. Or, if you would prefer to purchase a complete die cut kit, you can purchase one here. It’s actually quite a fun little DIY for any DSLR owner, and you can create some fun and interesting portraits and even landscape photos using different designs and shapes for your bokeh!
The second, and probably easiest way to create these custom bokeh shapes is through an app! Again, Bokehful and Big Lens both give you options to adjust the shape of your bokeh, as do many other photo filter and lighting effects apps. You may already have such an app in your collection, or you could check out the apps I suggest!
I hope this has been a helpful and informational post for any bloggers or Instagram addicts out there who are as in love with bokeh as I am! If it was, please go ahead and leave me a message on Instagram or send me a Tweet to let me know what you thoughts! Although photography snobs will often say you need a full frame DSLR with a 50mm 1.2 lens to create the best bokeh, the truth is, even the best camera in the world can’t shoot photos on its own. It’s all about the photographer, their creativity and ingenuity in setting up a scene that will produce a beautiful image. So, make do with what you have and get creative. Don’t be afraid to think outside the box when you have a concept for a great pic! Your Instagram followers will thank you for it! So, what other photography topics can I help you tackle? Any burning questions I can help you address to help your photography reach it’s fullest potential? Let me know!
Summer is unofficially over and now it’s back to school for some and back to work for the rest! Although we have all grown more than a little comfortable with the summer schedule of lazy days, long weekends, vacations, bbq’s and social engagements, one after another, it’s time to get ourselves back in gear! So, how do we transition from the slow pace of summer to the faster rhythmic grind of daily life in the fall? Well, I will tell you how we are not going to do it! We will not be drastically changing our sleep schedules to wake up even earlier and go to bed even later to shove more into our days. We won’t be working excessive overtime, or packing in the appointments, meetings, and too many tasks into our calendars. No, we need a more reasonable, sane way to go about increasing our productivity for a more efficient tomorrow, without sacrificing too much of today!
1. Lay out your clothes, pack your bag and plan your breakfast, lunch, and dinner the night before! One way to have a more productive morning may be setting the alarm clock earlier and actually waking up with enough time to do it all, but a better way around that without sacrificing pillow time is to just take care of some of your morning routine the night before. That way you wake up with a plan, and everything nicely laid out and prepared. So, prep your breakfast, pack your lunch and set up your crock pot and dinner ingredients before bedtime, so that in the morning you can breeze through your tasks with a productive pep in your step!
2. Do a brain dump before bed of all the to-dos and excess items clogging up your head, then ID your top 3 priorities for the next day. You’re never going to be able to sleep right with all that information active in your mind, so write it all down with a pen and paper so you don’t spend half the night awake worrying that you’re going to forget an important task or detail for the next day. Once you have everything out of your head, take another moment to think about tomorrow and which 3 tasks or items are your priorities for the next day. Make sure to write those down, underline and highlight them for reference tomorrow!
3. Pick up your pace in the A.M. So, you got a pretty good night’s rest and you know you have everything laid out and set up to make your morning much, much easier! But that doesn’t mean you get to sleep in an extra 15 minutes, or get to mozy around the house at a leisurely pace! Get up on time and hit the ground running! All those short cuts you gave yourself yesterday were to help you stay organized and productive today, so feel the energy and put your pedal to the metal! You will be twice as fast, and twice as productive if you make a conscious effort to hustle in the morning.
4. Look at your to-do list and tackle the scariest item first! Remember that brain dump list from last night? Now is the time to pull it out and get to work. But don’t start with some whimpy little to-do, instead go for the challenge bright and early. Whatever item on your list is the biggest, most daunting item, that is what you need to start with. Why? Because once its over and done with, everything else is going to feel like a piece of cake and you will breeze through the rest of those tasks like a champ!
5. Batch your work and to-dos on a list, tackling like items together and refer back to your list for your priorities instead of deferring and taking on new items as they come in. You have a lot of work today and chances are, much of that work was a spill over from yesterday or items you already knew about. Make a full to-do list and keep like items together so that you can do them all at once and save yourself time. Have a bunch of calls to make? Dial them one at after another. Have a pile of faxes to send? Take care of all of them at once to cut down on visits to and from the fax machine. And be sure not to start picking up new tasks and completing those ahead of tasks already on your to-do list! Unless something urgent comes up that needs your attention immediately, you can put new tasks as the bottom of the pile or slot them in a batch with other like items, but don’t prioritize them before items that have been outstanding for a longer period of time!
So, those five tips should have you kicking butt and taking names in no time! Remember, being productive isn’t about working more, its about working more efficiently! There are simple things you can do the night before and throughout your day to cut down on the amount of time you spend on your work, making your 8 hour work day as productive as a 10 hour one! It’s all about maximizing your time by strategizing your effort. So, what other tips and tricks do you use to stay productive and efficient? I would love to hear all about your time saving techniques, so feel free to send me a tweet and we can discuss!