Filofax

10 Ways to Personalize Your Planner

10 Ways to Personalize Your Planner

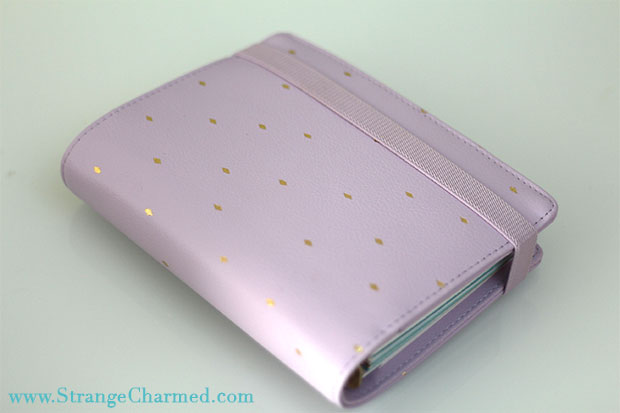
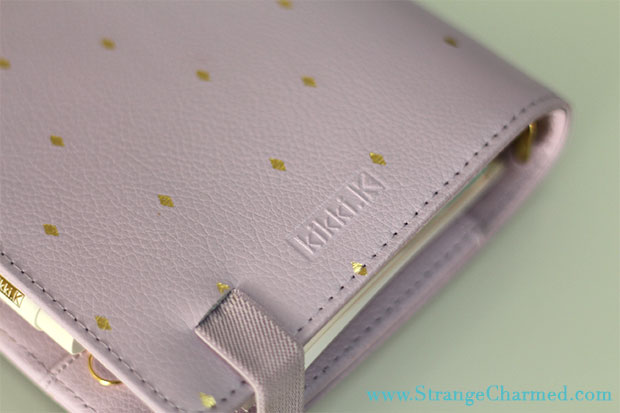
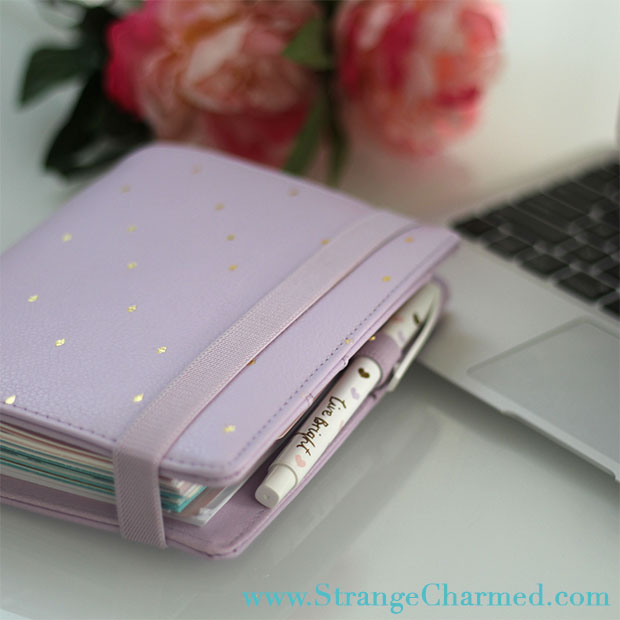
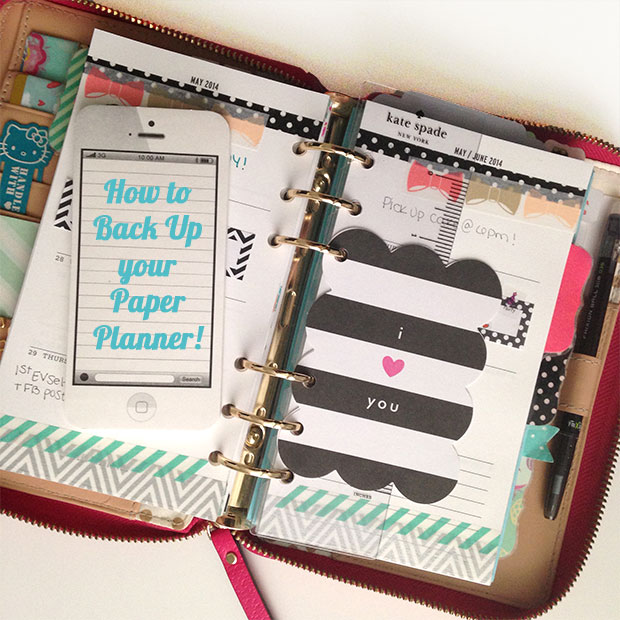
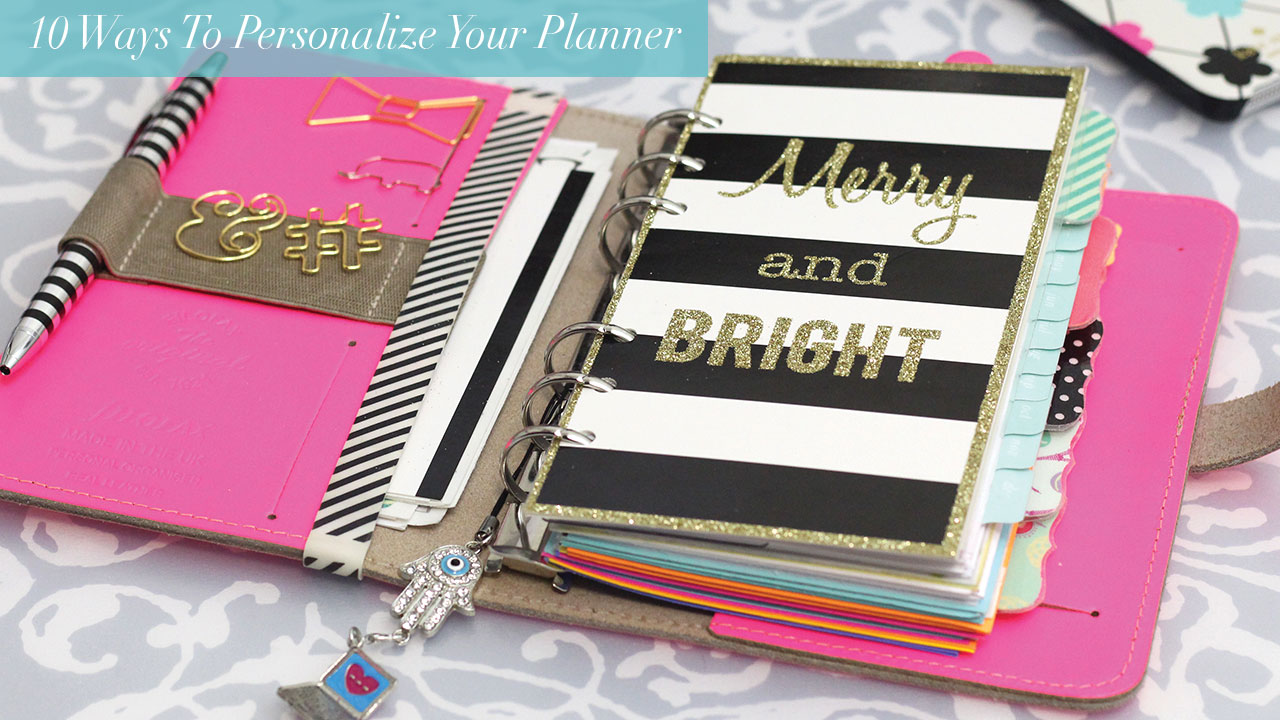
The great thing about planners is that there are nearly an endless amount of ways to customize them and add personality to keep you motivated with your daily goals and to-dos! I am asked all the time about my planner personalizations and so I thought it would be fun and helpful if I gave you a run down of 10 Ways to Personalize Your Planner! Although I use a Filofax Original Planner in Fluoro Pink, you can use most of these customizations in any planner you own and use, from a Kate Spade, to an Erin Condren and even a Sugar Paper planner!
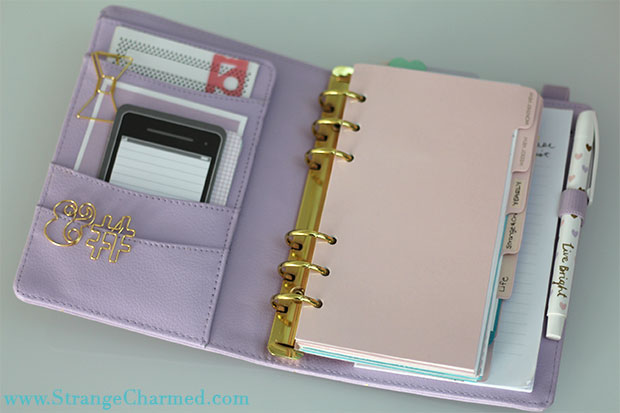
Personalize Your Planner with Pens

#1 Pens

A really cute and coordinating pen is must have item in my planner that I think adds a lot of personality to it. There are quite a variety of pens out there in planner world, and among them multipens like the Pilot Hi-Tech C Coletto are very popular because they give you the ability to write in a variety of colors! Friction pens as well are very popular because they are erasable and as a planner person, you know how scary it can be to write in an appointment and then have things change!
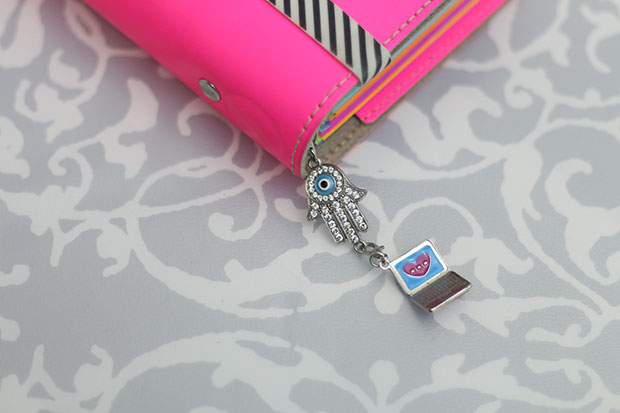
Personalize Your Planner with Charms

#2 Charms

Planner charms are a very fun way to add personality to your planner because you can literally use a wide variety of charms to coordinate with your interests. Although many sellers on Easy make custom charms in fun shapes like coffee cups, cute animals and even desserts, you can find charms at your local craft store or use ones off a keychain!

Personalize Your Planner with Dashboard

#3 Custom Dashboard

As one of the first pages in your planner, a custom dashboard can do a lot to help motivate and inspire you whenever you open it up! It’s simple enough to make your own dashboard by laminating pretty scrapbook paper or cutting down an acrylic screen print to size. I recommend using acrylic prints or laminating regular paper so your dashboard is coated and more durable- it also works well for holding and removing sticky notes!
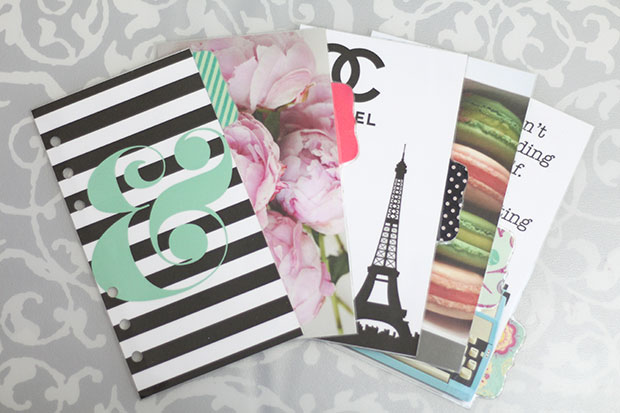
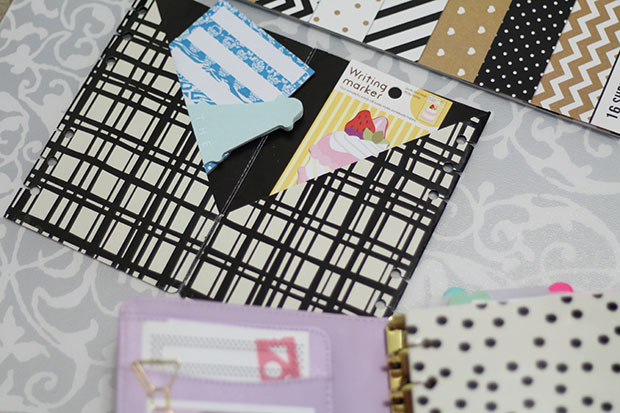
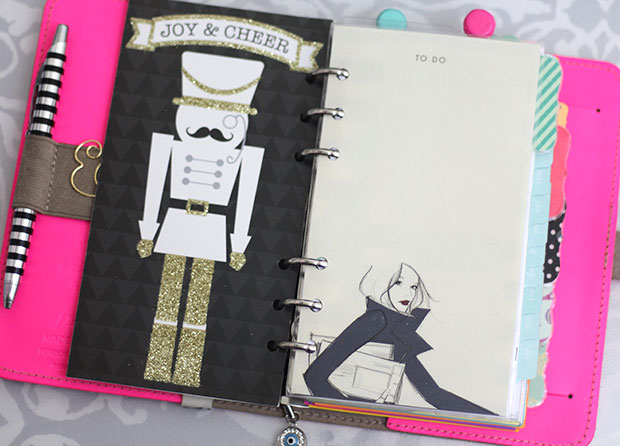
Personalize Your Planner with Dividers

#4 Custom Dividers

Custom dividers are an excellent way to create a theme for your planner. You can purchase sets of themed dividers on Etsy, but I like to make mine by printing out images and pictures, adding tabs and then laminating everything so it’s nice and sealed! Use your own pictures, quotes, and snippets from magazines to create a collage for your dividers or stick to pretty scrapbook papers if you like a simpler look!

Personalize Your Planner Page Markers

#5 Page Markers

I love to use page markers to help me quickly locate important notes and pages in my planner. There are lots of different varieties of page markers; magnetic ones, paper clips, and even adhesive tabs. They are a great way to add color and style to your planner that you can appreciate even when your planner is closed!
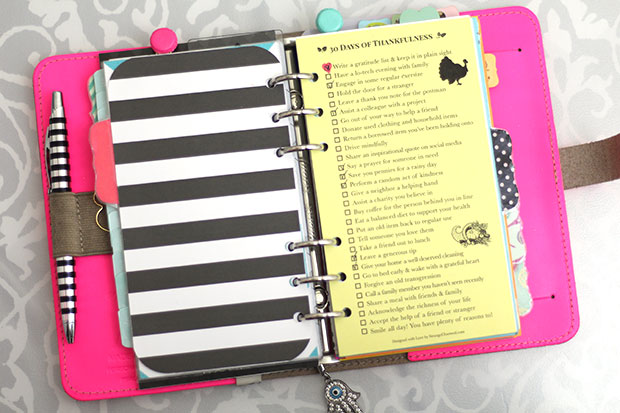
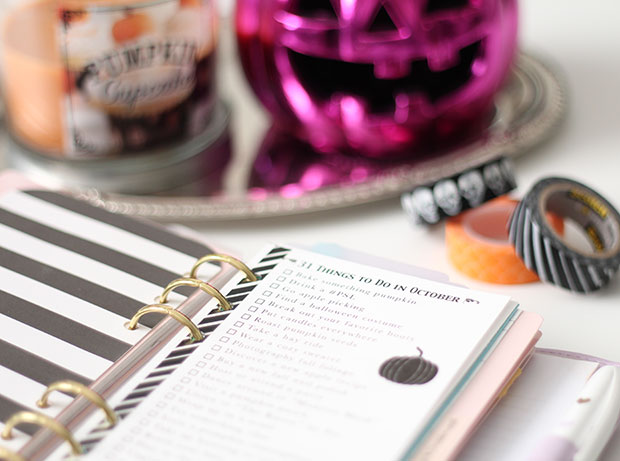
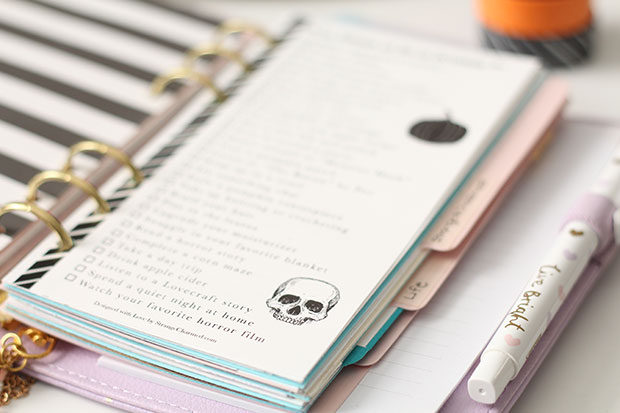
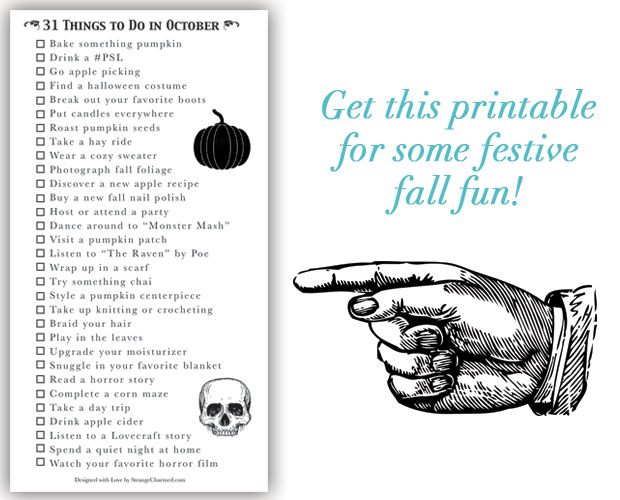
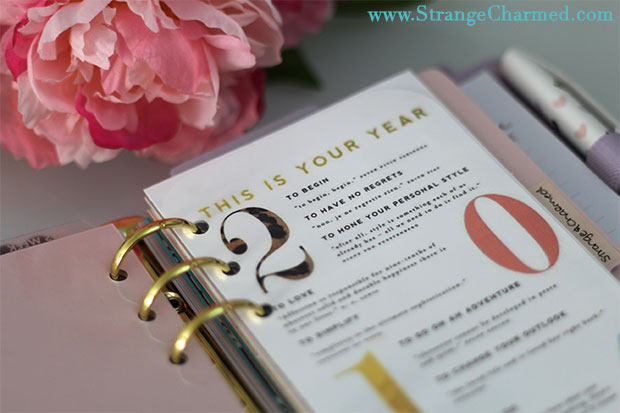
Personalize Your Planner with Inserts

#6 Printable Inserts

Although your planner may come with a set of dedicated inserts, there is always room for more, specifically, for fun and inspirational inserts that help to add personality to your planner and keep you on track with more than just your to-dos and schedule! The insert above is actually a free printable checklist titled 30 Days of Thankfulness that is available through my shop! Inserts like this are a great way to add inspiration to your planner and to add a little fun to your days!
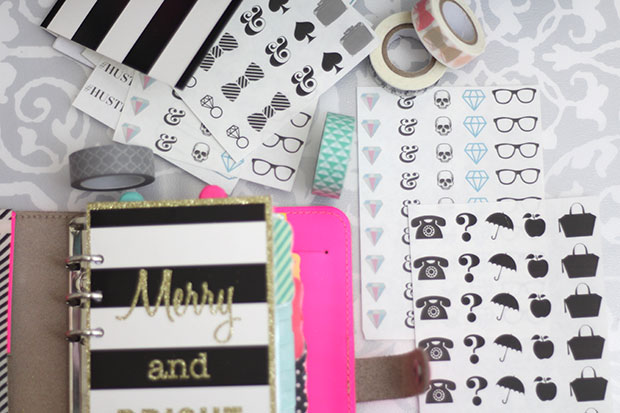
Personalize Your Planner Stickers and Washi

#7 Stickers & Washi

Although planner decoration isn’t for everyone, if you do want to add a little fun and interest to your planner pages, using stickers and washi tape is a fun way to do it! I have quite the collection of washi tape and I always have more than enough stickers around because I usually make my own and print them onto full sheet labels! The sets shown above are currently for sale on my shop, so if you want to print your own stickers at home and like these designs, feel free to check them out!
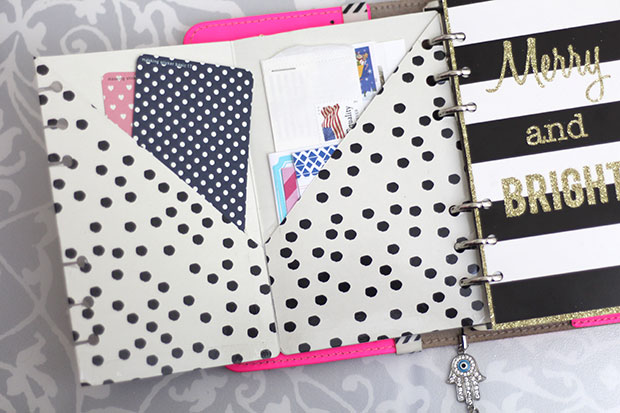
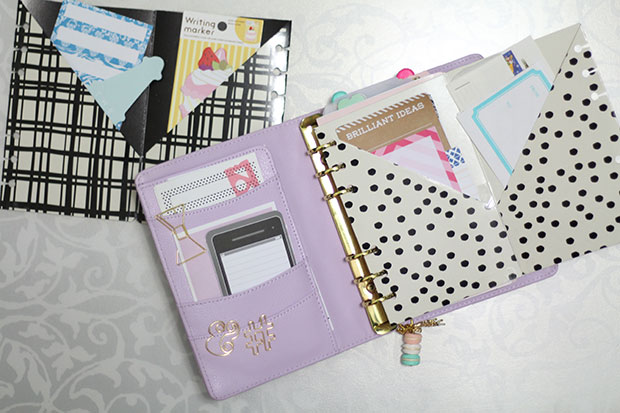
Personalize Your Planner with DIY Folders

#8 DIY Folder

Not all planners are created with equal amounts of pockets and storage, so if you need an extra space to store stickers and notecards or whatever else you need to keep inside your planner, check out my easy DIY Folder Tutorial that shows you how to turn a regular file folder into the perfect little storage solution for your planner!
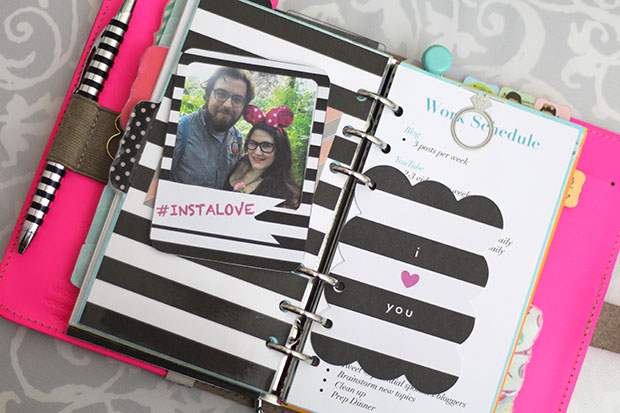
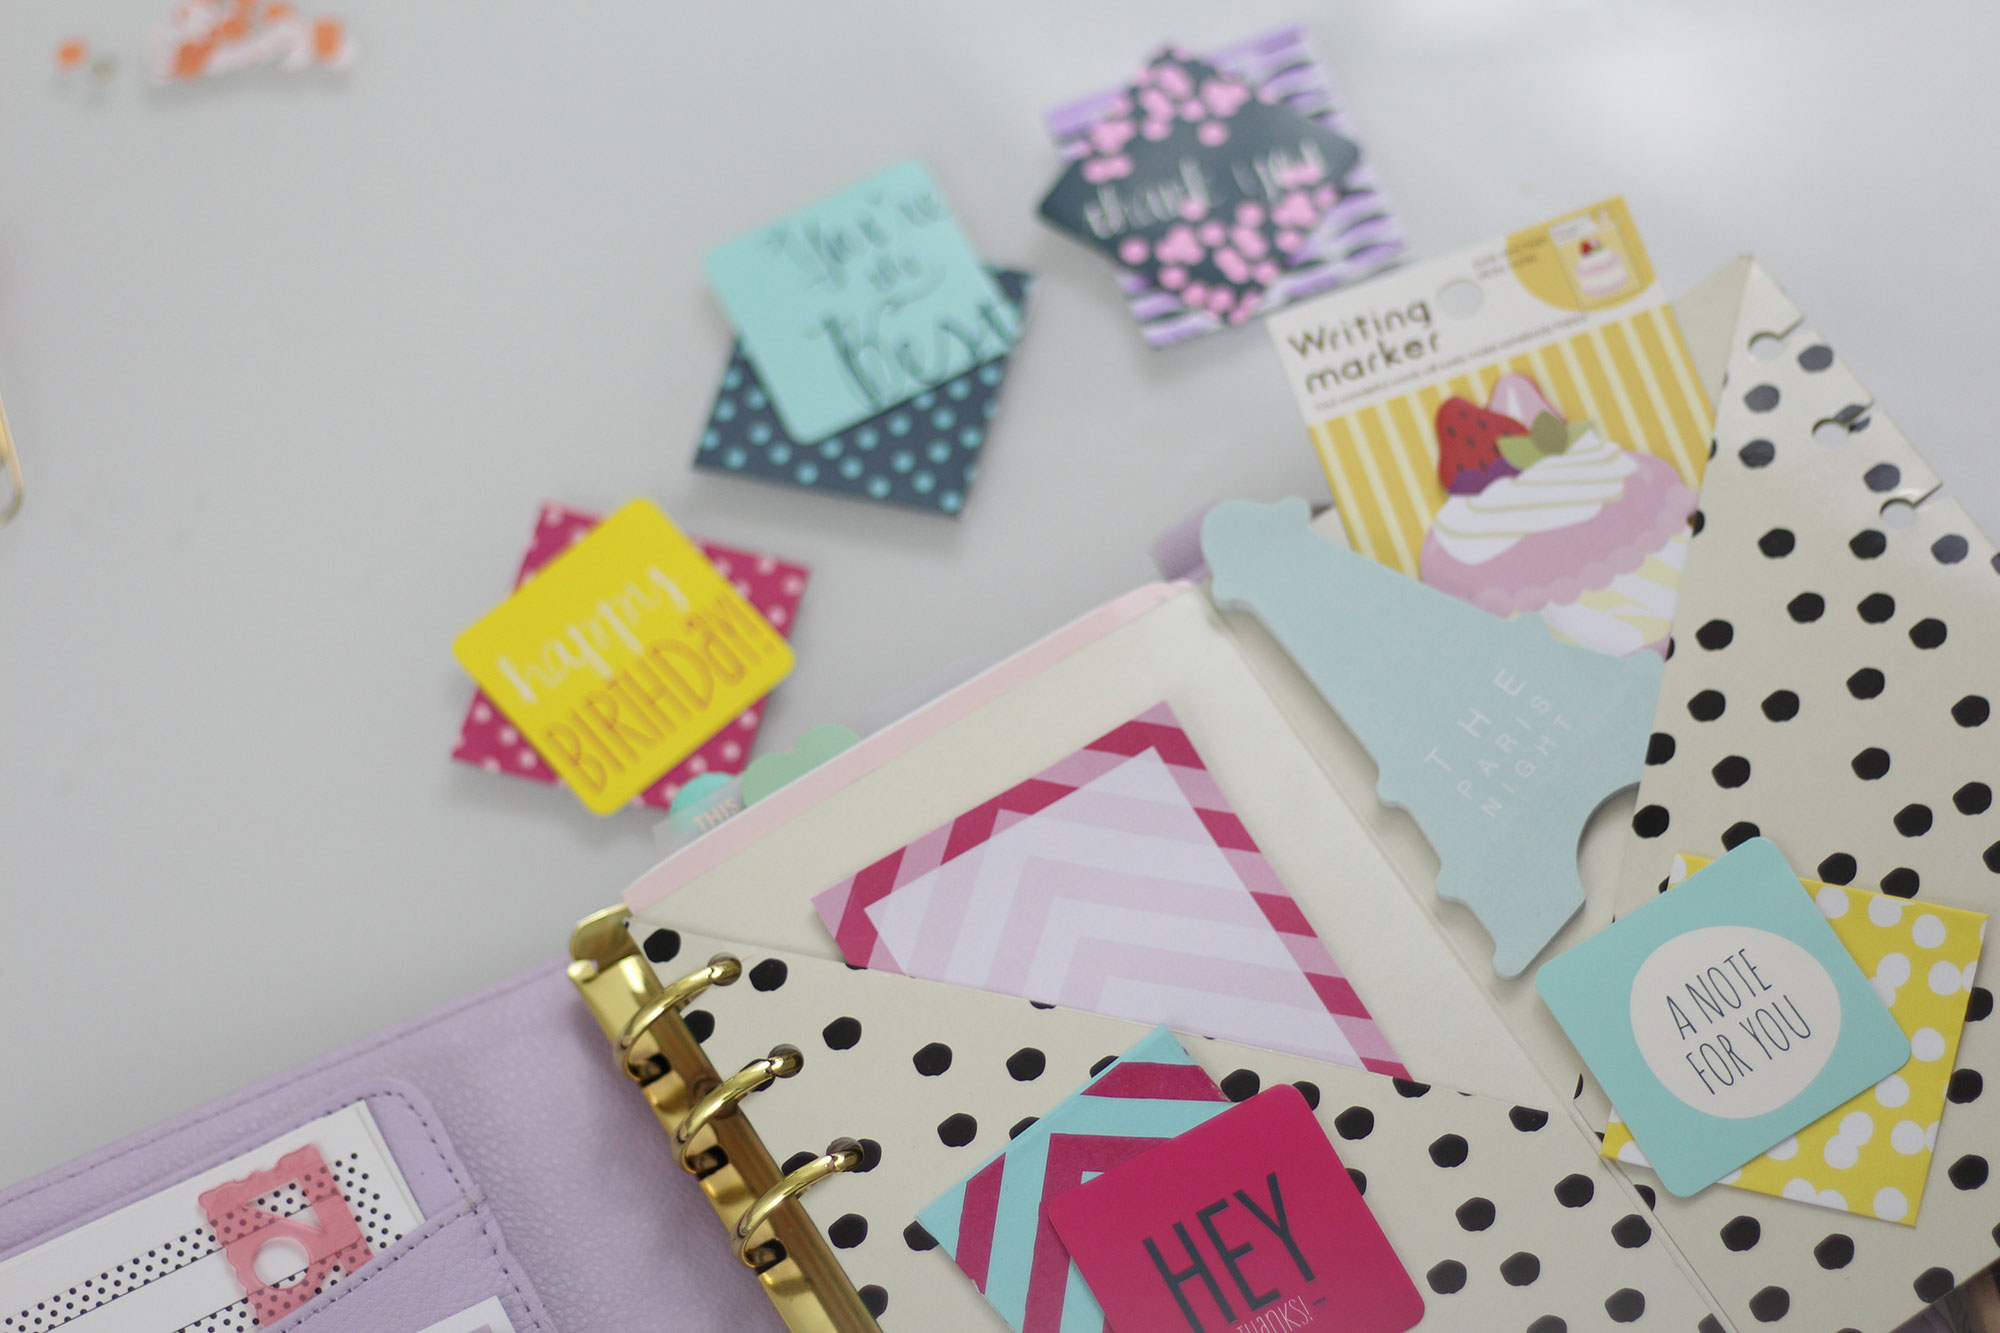
Personalize Your Planner with Journaling Cards

#9 Journaling Cards

Journaling cards are a great way to add instant decor and inspiration to your planner. They can even act as page markers, dashboards and even dividers! This #INSTALOVE card comes from my personal collection of printable journaling cards and is designed to be a frame for square, Instagram style pictures. This is a great way to keep photos of your friends and family with you in your planner! You can also use project life cards and MAMBI pocket pages like this striped card above!
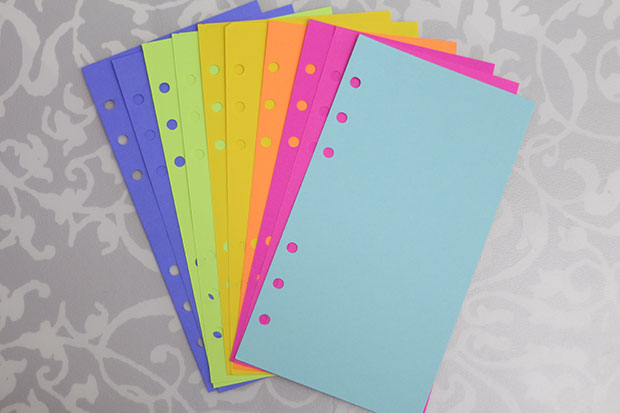
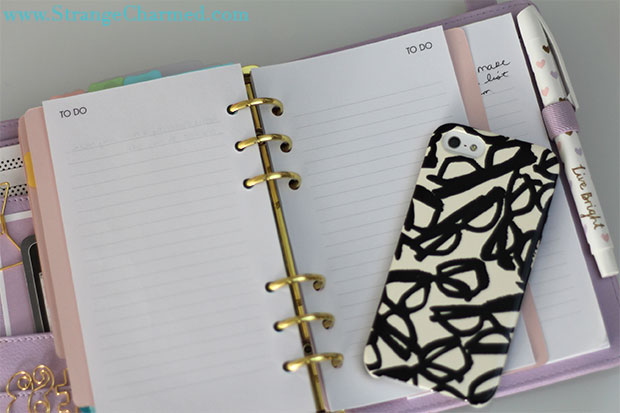
Personalize Your Planner with Colorful Paper

#10 Colorful Paper

Why use plain old white paper in your planner when you can quickly add interest to your pages by using rainbow-colored copy paper? I keep a stack of colorful papers around and cut them down to size and punch them in my planner. They are great for color coding notes or visually dividing up sections or just adding a little fun to your pages!

Of course, this wouldn’t be a complete planner post from me without a fun video to go along with it! If you would like more details on some of the items I have shown in this post, feel free to check out this video!

As always, I hope this post (and video) were helpful for you and gave you some ideas for your own planner! If you have other planner personalizations that I missed, please let me know about them in the comments. I’d also love to see pictures of your planners and how you customize, so please feel free to tag me @MissTrenchcoat in your Instagram pics!

xoxo,

Alexis-Signature

DIY Filofax Folder Divider!

DIY Planner Folder Tutorial

Immediately after I received my newest planner, the Kikki K Lilac and Gold 2015 Time Planner, I went through something of a Filofax revival! All of a sudden I was super obsessed with my planner again, I scoured the internet for new inserts and goodies and started watching way to many planner set up videos for new inspiration. At some point, I watched a video where a woman showed her setup and briefly commented on a DIY folder she had assembled for her planner. I remember thinking it was one of the cleverest things I had seen in a planner in some time, and made a mental note to attempt to DIY one for myself, not knowing exactly how she had gone about making hers. A few weeks later, I found a little note in my planner that referred to this file folder DIY, and feeling crafty, I decided to see what I could come up with!

DIY Target File Folder Filofax Insert

Many of you have seen exactly what the result of my labor was, and have commented on your interest in seeing a DIY on the topic. So, I went ahead and filmed a video where I walk you through how I made mine. As this wasn’t my original idea, I really wanted to find the source of my inspiration and link you all to the original video I had seen that had inspired this creativity, but for the life of me, I can’t find the video! I searched through my YouTube history, spent days searching videos trying to find the originator of this idea, but alas, I could not find it and thus do not know who I should credit for this idea, but thank you, whoever you are! I love this little folder I have made for myself and I think you guys will love this DIY because it’s really almost too simple!

DIY Target File Folder Filofax Insert

I considered whether or not I should write out the directions to this tutorial, but I know I will probably get a bunch of questions on the process because I feel like crafty tutorials like this need to be seen, not read. So, below is the video where I walk you through the process. Here is a list of supplies I used and suggest for this project:

  • A Target $1 Spot File Folder
  • A cutting mat
  • A metal ruler
  • An exacto knife
  • A permanent glue roller
  • Clear tape
  • Scissors
  • A single hole punch

I hope you all have enjoyed this video and this DIY! I think this little folder is great for storing a variety of different planner supplies like extra paper, sticky notes, page flags, stickers and more! It can also act as a divider as well or even a dashboard if you keep yours in the front of your planner like I do! If you have a planner that lacks lots of pockets or if you just need a more unique storage idea, definitely take the time to try this out and share it with your planner friends as well!

Looking for some more great Filofax inserts? Check out my 31 Things to Do in October Printable or visit my shop for more of my unique inserts and trackers!

xoxo,

Alexis-Signature

31 Things to Do in October {free printable}

31 Things to Do in October Free Printable

Well, surprise, surprise! I am writing to you mid-week in an unexpected extra blog post because I have created a fun little printable that I wanted to share with you all! I know many of my readers are Filofax and planner lovers, and we all love a good list! So, I have put together a list of 31 Things to Do in October and made it a convenient little free printable to celebrate one of my favorite months of the year! Now, I’m going to go into this a little more in my regularly schedule post tomorrow, but October, to me, means fall is really here and there are a plethora of activities that I enjoy taking part in throughout the month! Yes, a lot of my love for October comes from my love of Halloween, and yes, many of these activities are some of my favorite things to do to celebrate and get into the spirit of Halloween, but there is plenty else to do if Halloween doesn’t happen to be your favorite slice of cake!

To be completely honest, I am taking this 31 Things to Do in October list pretty seriously! In fact, it’s almost like a challenge to me to see if I can fit in all of these activities throughout the month! As an adult, currently without children, I find it hard to get myself into the spirit of a season because it’s not in my face everyday the way it once was when I was in school. So, for me, this is a way to activity participate in all of the fun that October has to offer! Now, I chose 31 Things to Do because there are 31 days in October, however, this isn’t necessarily about doing one thing per day, but you can certainly treat it that way if that is what you would find most exciting! Some things are super easy, some are a bit more involved, but everything is here to help you enjoy the season and add a bit of fun to your daily life!

31 Things to Do in October Free Printable

31 Things to Do in October

  1. Bake something pumpkin: It’s the season after all, but you don’t have to go all out. Try my Mini Pumpkin Spiced Cheesecake recipe if you want something simple and easy!
  2. Drink a #PSL: It’s the featured drink at most coffee houses, but if you prefer to brew your own, I also have a recipe for that!
  3. Go apple picking: You may have seen I already went on an Apple Picking adventure in September, but there is still enough time for me to go back!
  4. Find a halloween costume: Whether you go all out or just add a little halloween embellishment to your normal attire, get your costume plans in order!
  5. Break out your favorite boots: I am so excited to wear my knee-high boots, as soon as it gets cool enough that is.
  6. Put candles everywhere: In the fall, I make sure to keep candles in every room of the house for added ambience and warmth.
  7. Roast pumpkin seeds: These are some of my favorite healthy snacks for the season!
  8. Take a hay ride: What could be cozier than a hay ride with friends or a sweetheart!
  9. Wear a cozy sweater: Speaking of cozy, it’s time to break out your sweaters and integrate them back into your wardrobe!
  10. Photograph fall foliage: Who doesn’t enjoy documenting the changing color of the leaves?
  11. Discover a new apple recipe: After all, you’re going to need a few new recipes to use up all those apples you picked!
  12. Buy a new fall nail polish: Think deep taupes, burgundy, plum and more!
  13. Host or attend a party: Everyone needs a reason to celebrate fall!
  14. Dance around to “Monster Mash”: It’s a great form of aerobic activity I hear!
  15. Visit a pumpkin patch: Don’t forget to bring home a little orange friend or two!
  16. Listen to “The Raven” by Poe: I’ll have this rendition narrated by Christopher Walken on repeat this month!
  17. Wrap up in a scarf: I have a date with a blanket scarf as soon as the weather turns!
  18. Try something chai: It may not be everyone’s cup of tea, but it is a quintessentially fall flavor that everyone needs to incorporate into their October!
  19. Style a pumpkin centerpiece: No matter what your interior design tastes, a pumpkin makes for wonderful fall decor!
  20. Take up knitting or crocheting: It’s officially time for me to start crocheting again, yay!
  21. Braid your hair: Braids are definitely the most fall hairstyle, in my opinion!
  22. Play in the leaves: You’re never too old for this!
  23. Upgrade your moisturizer: Because winter is coming and you need to protect your skin!
  24. Snuggle in your favorite blanket: I think you can guess that I’ll be hanging with my favorite heated chevron throw!
  25. Read a horror story: Come on, it’s a necessity!
  26. Complete a corn maze: I haven’t done one of these in years, but I’m determined to get lost in a corn maze this month!
  27. Take a day trip: October is my favorite time of year for little day trips! Pack your picnic basket and hit the road!
  28. Drink apple cider: It’s a fall staple!
  29. Listen to a Lovecraft story: He’s one of the masters of horror, after all! I suggest Witch’s Hallow or The Thing on the Doorstep!
  30. Spend a quiet night at home: I like to light all the candles placed strategically around the house, turn off all the lights and listen to a scary story (like the Lovecraft tales above!)
  31. Watch your favorite horror film: Or just any old Halloween flick you prefer!

31-Things-to-Do-in-October


So, what do you think of that list? Awesome, right? Well, feel free to download this free printable from my shop and use it to track your fall fun! While you’re in the shop, if you see anything else you like, feel free to use the code SCSHOP20 for 20% off your total order! This code is only good during the soft release of my shop, so make sure to use it before it expires!


Anatomy of a Perfect Planner | Kikki K 2015 Lilac Time Planner Set Up

Kikki-K-2015-Lilac-Time-Planner-Personal-Medium-1

Some of you may recall earlier this year when I received my first filofax style planner, an A5 mint beauty from Kikki K that I wrote a rather extensive blog post about! I love my A5 Mint Time Planner, but after acquainting myself to the filofax and planner community, I began to realize that an A5 planner was just too large for my needs. Yes, it holds a lot of information and yes, the pages are much larger so you can really capture all the details of day-to-day life, but for me, it wasn’t perfect. When I moved onto my personal sized Kate Spade Wellesley Planner, I began feeling a little more at home in a 6 ring planner. It was more compact, easy to carry and write in while I was on the go and it fit nicely into more of my handbags. But still, it just didn’t feel 100% right to me. For a lot of us in the planner community, the search for that perfect planner is something that seems to elude us. Many of us have collections of planners that may seem frivolous to some, but those who understand know that our planners are like our babies. Okay, not literally, but like children or pets, our planners each seem beautiful and unique in their own way, and again, like children or pets, sometimes they just aren’t perfect and we try to work through issues to come to some state of balance. I have to say though, this last week I received a beautiful gift from one of my favorite stationery companies, Kikki K, and it has really been making me question my loyalty to my other planners. I was sent a Medium 2015 Lilac Time Planner (with a matching adorable pen!) and although it wasn’t something I was ever expecting to like, I have fallen head over heels in love with it!

Kikki-K-2015-Lilac-Time-Planner-Medium-Personal-Live-Bright-Pen

There is something about the Kikki K planners that I just like. They are made from soft leather, have a nice rounded feel in the hands and the color, oh the color, it’s breathtaking! I’ve never thought of myself as a purple person, but this lilac is sophisticated and feminine, and surprisingly neutral! I also just love the dimensions of this planner. When I compare it to my Kate Spade planner, it’s slight wider and slightly shorter, but more of a square shape overall than the obvious rectangular shape of the Wellesley. To me, the proportions feel anatomically correct. Of course, there is also the elastic closure band, which I am a major fan of and was one of the reasons I purchased the mint A5 earlier this year. I think the elastic band is secure, but forgiving! You can stuff it with more inserts, stickers, notepads, and washi samples than a traditional planner with a button or zipper closure and it all holds together!

Kikki-K-2015-Lilac-Time-Planner-Medium-Personal-Open-Dividers

Another thing Kikki K gets right with this planner is the pockets! The inner cover has an array of pockets, from a large secretarial pocket, perfect for loose papers, cards, mail and more! Then, it has a selection of pockets, some deep, some small, but all have a variety of uses and can fit a plethora of planner goodies and decor! One thing I am very pleased about, in comparison to my mint planner, are the dividers! They are a lovely shade of peachy pink that work nicely with the lilac planner. They are so lovely, in fact, that I didn’t bother making my own personalized dividers, because I loved the stock dividers so much!

Kikki-K-Time-Planner-2015-Lilac-Medium-Personal-2

Now, on to the inserts and the various sections of this planner! The planner came with a variety of inserts: month on two pages spread, week on two pages calendar, address book inserts, birthday and anniversary pages, shops and restaurant tracker, to-do lists, and expense sheets. I love the Kikki K calendar inserts, however, the dates began with 2015 so they weren’t much use to me. So, I used some free printables from Philofaxy to hold me over until the new year! I also put aside the address book, birthday/anniversary, shops/restaurants, and expense sheets because they aren’t any use to me. Instead, I broke my planner down into the following sections: Monthly View, Weekly View, Yearly, Strange & Charmed, Life, and To-Dos!

Kikki-K-2015-Lilac-Time-Planner-Medium-Personal-Monthly-Editorial-Calendar

My monthly view is my editorial calendar for my blog and YouTube channel, helping me keep track of posts and regularly scheduled content!

Kikki-K-2015-Lilac-Time-Planner-Medium-Personal-Weekly-Calendar-and-Task-Tracker

In my weekly view, I opted for a week per page layout paired with a custom Task List that I designed myself! These two together help me manage my tasks and important items throughout my week.

Kikki-K-2015-Lilac-Time-Planner-Medium-Personal-This-is-Your-year-insert

My yearly section is geared towards helping me organize big picture life goals and tasks. I use a variety of pages in this section to help keep my focused, breaking down my year by month and seasonally.

Kikki-K-2015-Lilac-Time-Planner-Medium-Personal-Blog-Posts-and-Youtube-Tracker

The Strange & Charmed section is devoted to my blog and YouTube channel. Here I keep track of blog posts and YouTube video ideas with custom trackers I designed for myself. I also keep a variety of loose notepaper here for taking notes or brainstorming.

Kikki-K-2015-Lilac-Time-Planner-Medium-Personal-Minimalist-Mantra

The life section encompasses everything else in my life that I need to keep track of. This is my place for storing inspiration, my wish list, and taking extraneous notes.

Kikki-K-2015-Lilac-Time-Planner-Medium-Personal-Todo

Finally, the meager to-do section is where I keep a running list of to-do items that need my attention.

Kikki-K-2015-Lilac-Time-Planner-Medium-Personal-desk

Overall, I am loving this little planner! I think the size is perfect for me as the planner fits everything I need, all in one place! I am obsessed with the color, which is such a random thing for me, but I just think its such a great shade! I am so excited and thankful that Kikki K was kind enough to send this planner to me, and if you have been thinking about this planner, I definitely think you should pick it up sooner rather than later, as these tend to go out of stock as we get closer to year’s end. Of course, if you want to see an even more in-depth look at my planner set up, make sure to check out my YouTube video below, which basically walks you through the entire planner! If you are interested in any of my custom planner inserts, feel free to visit my shop!


I hope you have enjoyed this peek into my new planner! Make sure to let me know if you have this planner and what you think about it by sending me a tweet or leaving me a message on my Facebook page

3 Simple Planner DIYs

3-Simple-Planner-DIYs

Today I’m mailing out a prize for a giveaway I hosted over on my Instagram account. I am not big on doing a lot of giveaways on my YouTube and social media channels because I always feel bad that there can only be one or a handful of winners. I would prefer to give prizes that everyone can benefit from, but those are usually harder to come by. At least in the example of this giveaway, the prize was a set of three DIY Planner embellishments that I had made during a tutorial I published on my YouTube channel a few weeks ago that were incredibly simple to make. So, I thought I should share them here on my blog for those of you who like stationery and planner DIYs. They were an embellished title page, a decorative page marker and a repositionable divider! For each DIY, I used Project Pages from the Me And My Big Ideas line of stationery, as well as some stickers and embellishments also from the line.

If you haven’t seen the video, I will link it below so you can watch the tutorials. No matter what your skill level, these 3 Simple DIYs are something anyone can accomplish using a few key items and they can add a lot of personality and personalization to your planner system. Although I used MAMBI stationery accessories, you could easily substitute these for Project Life cards or even printed images you found online! If you like these tutorials and give them a try on your own, I would love if you shared pictures of your DIYs with me via Twitter or Instagram! Also, if you have any other planner hacks or tutorials you would like to see, make sure to leave me a comment below!

How to Back Up Your Paper Planner

How-to-back-up-your-paper-planner

I have to admit, one of the major benefits of using a digital planning system is that, for the most part, they are easy to back up. Using a calendar or to do app on my iPhone means I can sync with the cloud, have my information on not only my phone but also on my iPads and my laptops as well. If I accidentally delete something in one place, I always have a backup somewhere else. It’s convenient and secure, two very important things that paper planners lack. It’s a critical flaw of Filofax’s and other physical planners, but one that can’t be avoided. It’s paper after all. Paper burns, rips, decomposes if touched by water, and a paper planner can be lost entirely. Even if I lost my iPhone, I wouldn’t have to worry much about my information. Lists would be retrievable, information can be restored and my phone could be instantly whipped of all information if I was concerned about sensitive information getting out (because you know, being an international blogging sensation, I have lots of sensitive and top-secret post information that people are dying to get their hands on… LOL, please note the sarcasm!) Jokes aside, though, you know what I mean! Even though paper planners have their fatal flaws, however, there are some things we old-fashioned analog planner users can do to keep our information backed up, in case any terrible tragedy should strike our organizational companions!

The simplest and easiest way to back up a paper planner or Filofax is through the use of photos on our smartphones. It may be an extra step to take when we make important notes in our planners, but if something were to happen to our planners we would at least have some form of backup for our information. And with the superior quality of smartphone cameras these days, you can capture all the details on a planner page or spread with great clarity in case you need to refer back to it later. Since i use an iPhone, I like to use the app DocScan to back up any important lists or notes in my planner. DocScan is great because it uses the camera on your iPhone to “scan” documents, physical pictures and notes, allowing you to then save the information in a multitude of different formats. Its like having a portable scanner with you at all times! Another popular application, Evernote, does much the same. Evernote is a great note taking application, but it’s also great for storing and saving information via pictures taken on your smartphone! Evernote allows you to synch your notes through the cloud and access them from a variety of different devices, even through the web directly!

So, if you’re concerned about backing up your paper planner or Filofax, give this method a shot! Start getting into the habit of taking a quick pic of your planner pages as you fill them up or make new notes. If you ever, heaven’s forbid, loose your planner or an important page goes missing, at least you have some sort of backup stored away for digital reference.

How to Start a Filofax!

How-to-Start-a-Filofax

Ever since I became involved with the Filofax community, I have been asked tons of questions about how to start with a Filofax or similar ring bound planner system! It’s such a complicated question, mostly because the experience of using a Filofax is so highly personalized, which is exactly why I like to use a Filofax over any other sort of planner system. You can set up a Filofax in an uncountable number of ways, whatever suits your needs. I will say, however, that there is a basic process that everyone can use to start themselves off with a new planner, and if you’re thinking about getting a Filofax and want a general idea of how to start personalizing your own experience, this should help!

1. Pick out a planner that suits you: Filofax has a number of planners in a variety of styles and sizes to suit a variety of needs. If you’re not sure where to start off, I would suggest a personal sized planner because it’s the most portable, but if you know you need tons of space to write and don’t have a problem with carrying around a larger planner, go with A5. Once you know what size planner you want, it’s up to you which style and color you choose, whether it be leather or cloth, a bright color or a neutral. That part is entirely up to you and your style!

2. Pick a calendar/diary refill: A new Filofax will come with a calendar/diary insert (different styles come with different layouts, so be sure to check which comes with yours) but if you want a specific layout you may need to buy it separately. There are all sorts of monthly calendars, weekly and even daily layouts available and if you would like the chance to try out one without committing to buying a refill pack, you can always check out the free printable diary refills from Philofaxy! Generally speaking, may people use a combination of a month on two pages calendar with a week on two pages in order to get a monthly view and a weekly view of their schedule, but if you have lots of to-do items that you need to schedule, you may require a day per page or a day in two pages layout! Make sure to check all available options to understand what’s available and how you could make use of each type.

3. Purchase refill scrap paper or to do lists: Like I said, Filofax planners come with a variety of paper already depending on the type of planner you buy, however, I love to find additional pads of paper to use as scrap paper in my planner since refills from Filofax are usually pretty expensive. Once you know the paper dimensions of the planner you are going to use, you can easily find notepads that are compatible with your planner. These may require you to do a little hole punching on your own, but I find the effort is always worth it because you save yourself money and open yourself up to a variety of different paper for your planner. I love scouring the Target dollar bins for paper pads, as they often have ones closely compatible with a personal sized Filofax that I can punch and use in my own planner!

4. Get yourself a nice pen: Technically, you don’t need any sort of fancy pen to use in a Filofax, however, many planner enthusiast prefer to use erasable ink pens in their planners in case they need to remove scheduled events or to do items. The Frixion Pen is a very popular option and comes in a variety of ink colors and pen sizes! I love the .38mm Frixion Slim Pen shown above!

5. Find yourself some decorative sticky notes and cute stationery accents: I love cute sticky notes, page markers and paper clips in my planner, although you can technically use any old stickies and clips! I find that with the variety of affordable decorative stationery available online and in craft and hobby shops, you can really personalize your planner to the next level with very little effort. Cute stationery extras are a simple way to keep yourself motivated to stay organized with a planner, while also playing a functional role in your planner system!

I hope these tips help you to get started with your first Filofax planner system! The sky is the limit with how you can set up your own planner and all the different additions and personalizations you can put into your planner to make it unique and functional for you. If you need more inspiration for starting your first planner, feel free to check out my Filofax and Planner series on my YouTube Channel where I show you my own planner set ups and hauls filled with different stationery and accents I use in my planners!

5 Things I ♥ about the Filofax Community

5-things-i-love-about-the-filofax-community

If you have been reading my blog for a while, as in before March, you have probably been wondering what the heck is up with me and being obsessed with Filofax planners and stationery! Seriously guys, I am feeling you if you have been a little confused about this whole new world I have decided to incorporate into my life and into the blog. I know it’s hard to explain personal obsessions to those looking in from the outside, but being organized is sort of my thing, or at least it used to be my thing back in college, high school, middle school and beyond! Life after college changed the way I organized myself. I stopped being hyper organized and became more strategically organized, spending time on the things that mattered and not everything as a whole. But as life progresses, I find that more and more things become important enough to need a specific place in my life and I need to keep track of it! So, enter Filofaxes, Kikki K planners, washi tape, etc. Once I started researching planners, I uncovered the whole online Filofax and planner community that is down right amazing! I even started using Facebook again just to be part of the groups (and that’s saying a lot because I have not used Facebook for like two years!) I know its not for everyone, but I like the sense of community and sharing of ideas because all that jazz really makes me feel supported and helpful, so I gave some serious thought to why I love the Filofax community so much as a way to give you all an understanding of my obsession. This is what I came up with!

1. RAKs: I know some people may see me use this term on my blog or on twitter/instagram, but RAK stands for Random Acts of Kindness. Within the Filo community, this term refers to people send others a small letter or package with positive words of encouragement or gifts of stationery supplies. It is also known as Happy Mail and it can be anonymous or not. There are a few groups on Facebook dedicated to this precious act of giving and it is definitely one of the big reasons I like to participate in the groups. It’s not that I am looking to receive things from others, but I am obsessed with sending out RAKs and sharing with people I have never met. I honestly think it’s a beautiful example of the human spirit and an example that the internet can really help to bring people together from all over the world.

2. Pen Pals: Another popular activity within the Filofax community is pen paling. Now, I do not have a letter writing pen pal (although I have more than a few people I message and email with) but many people in the stationery groups are involved with it and I think its amazing! The act of letter writing is such an ancient and lovely practice that I am glad to see its resurgence in these communities. You know how I feel about hand written thank you notes, and in so many ways this is again an amazing way that the internet is bringing people together.

3. Positivity: I cannot get enough of the Filofax groups, pictures and posts because they are bursting with positivity. This community is one of those few places online where I truly feel safe and protected from the dredge of the internet. That’s not to say that everyone is always happy and upbeat, but the general culture is one of inclusion, support and self-betterment. The community members are always promoting each other, sharing ideas and always have kind words to share. It has such a positive vibe!

4. No lack of content: From the multiple Facebook groups to the Instagram hasthtags to the endless blogs and websites to the YouTube videos and the Pinterest boards, there is such a wealth of content within the Filofax community that you can immerse yourself in it and always find something new. This is probably why I am so obsessed, because the more you dig the more you find and uncover and suddenly hours have passed and you walk away feeling like you have learned so much and felt all the positive energy!

5. New Friends: Out of everything I have dabbled with online, nothing has yielded so many personal connections as this community. I have made a bunch of new online friends, some bloggers, some just enthusiasts, but all of them wonderful. It really is amazing how a subject like a planner would draw people together in such a profound way, but it has and I am so glad that I discovered this little pocket of the internet where I truly feel at home!

Feng Shui Your Filofax

Feng-Shui-Filofax-web

My Filofax is my happy place. To me, its like a secret hiding spot that a child might find to store secrets and goodies from their day-to-day lives and retreat to when they want to be in their own little world. Since I have began using my planner(s) I have felt this huge sigh of relief in my life because I have this physical location (not inside a phone or computer) where I can keep my schedule, to do’s and all the other information that I need to keep my life in order. Since I have begun my Filofax obsession I feel like my life has had this sense of order, even if my days are chaotic, because no matter what is going on, my planner is a place where I can go to think, download my thoughts, and gather strength and inspiration. To me, my planner has this aura that I psychologically assign to it, a sort of reverence I apply to it, so it dawned upon me that I should start applying Feng Shui techniques to keep it filled with this positive energy, or chi! So, I did a little research and came up with a few little things I could do consistently to keep the positive energy rolling in to my life via my planner and since I know so many of my readers also feel this way about their planners, I thought I should share these tips with you!

1. Clear out clutter: a main principle of Feng Shui is to keep your spaces clean and neat. Positive energy can’t flow in a hoarded room, nor can it flow into a hoarded or messy planner. I regularly remove unnecessary pages from my Filofax and either discard them if they are not needed or save them in a pretty box that I use for the express purpose of achieving old pages.

2. Keep your planner open whenever possible: If you are working at your desk, keep your Filofax open, even if you are not actively using it or referring to it. This helps to clear the air around your planner and attract chi.

3. Store your planner in a clean and well lit space: Don’t keep your planner shoved in your bag or in a drawer for hours on end, leave it in a place of respect out in the open where it will not get damaged and will be like an ornament in your life.

4. Fill your Filofax with beauty and happiness: Make sure you leave pictures of friends and loved ones in your planner and keep tokens of happy memories tucked inside extra pockets or punched inside your planner. Taking notes of achievements and positive events will also help to make your planner a destination for positive energy.

Click here to download a high resolution PDF of the above image in the Filofax personal size to keep inside your planner!