Filofax

How to Organize Your Filofax like a Productivity Genius!

5 Tips for Organizing your Planner like a Productivity Genius!

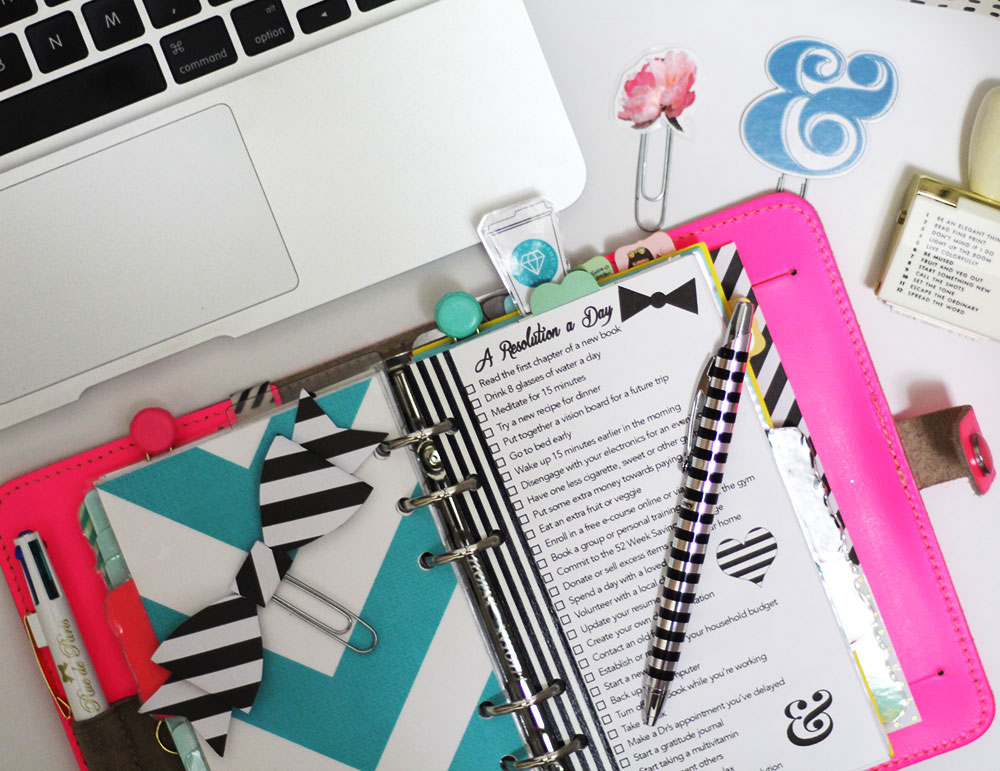
Ask yourself, what is keeping you from being as productive and efficient as possible? If you are a Filofax or planner user, you may be thinking that you have the tools to be organized and efficient, but if you aren’t using that tool wisely, it’s just another collection of random paper weighing down your life. There really is only one thing that is separating you from being a productivity genius in your own right, and that is clarity. Clarity in what you are supposed to be doing and when you are supposed to be doing it. This is where your Filofax can be an asset or a liability. Making sure your planner is set up for maximum productivity isn’t always an obvious thing, but here are my top 5 tips for organizing your Filofax like a productivity genius.

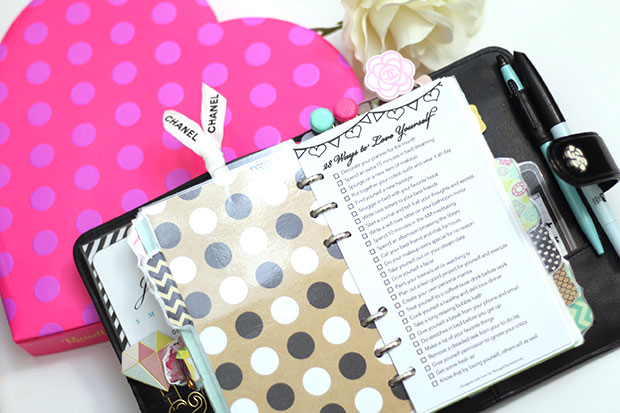
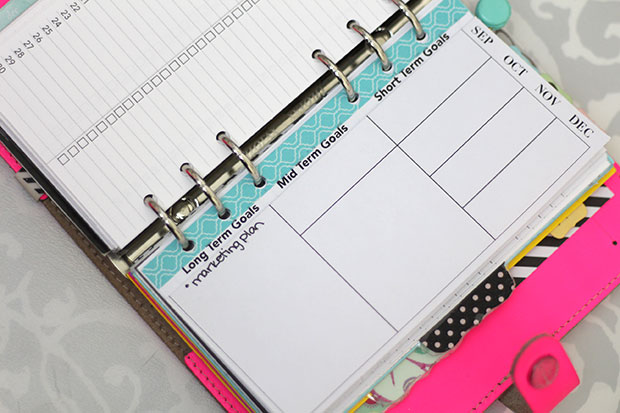
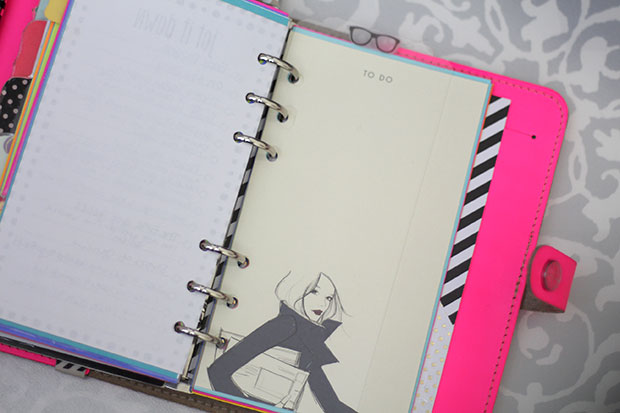
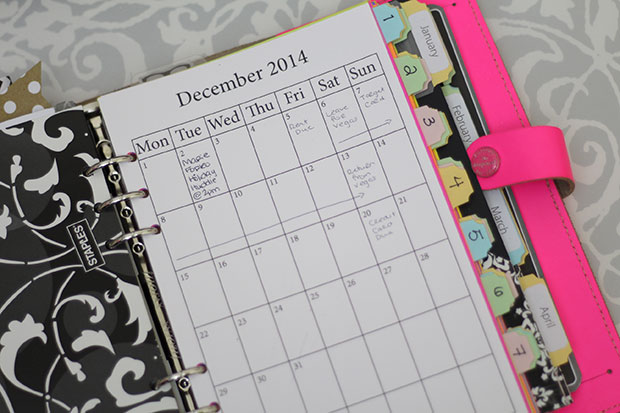
1. Use dividers and page markers to quickly access sections

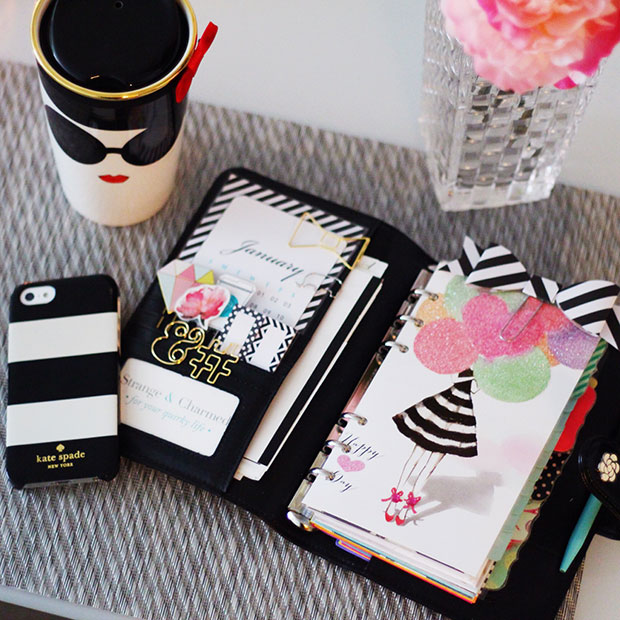
The concept of using dividers in your planner is nothing new. They help you to keep your information sorted and arranged so that everything is easy to find with a turn of the page and the flick of your wrist. Make sure you have all your information properly divided out and that any and all pages of importance are marked within those sections so that you can quickly access information you need at a moments notice.

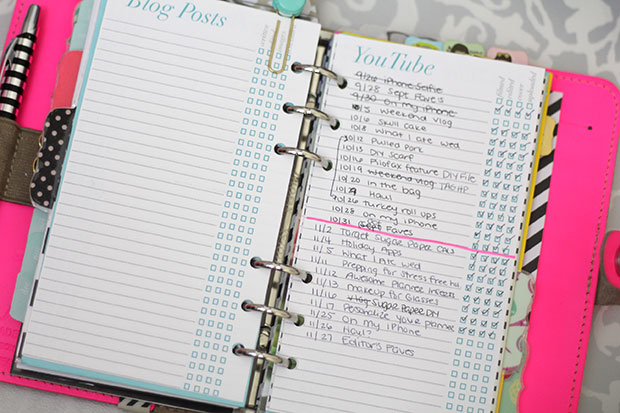
2. Keep a running list of tasks by context

Through the study of David Allen’s Getting Things Done, I learned about this concept of  “contexts” for the tasks we need to complete. Essentially a “context” is the setting or set of circumstances that apply to your task. Many tasks that we complete regularly have the exact same context and therefore should be grouped together so that when it comes time to take care of a task, instead of doing one single task you have a group of like items to work on at one time. This inevitably saves you time because you aren’t jumping back and forth between different contexts and situations and therefore are able to batch your work. So, if you have an inbox full of emails to respond to, don’t just write one email and then move on to a completely different task in a completely different context. Instead, complete a batch of emails at one time while your mind is in “email mode”. Obviously, email or digital tasks don’t necessarily need to be listed out on your planner as individual tasks unless they are very important, but for other tasks that you may deal with often, keep a running list by context on individual pages in your planner. That way, when it comes time for you to run a report on x, you can refer to your planner and see a running list of all the reports you need to run so that you can batch the work and cross a number of items off your list at one time!

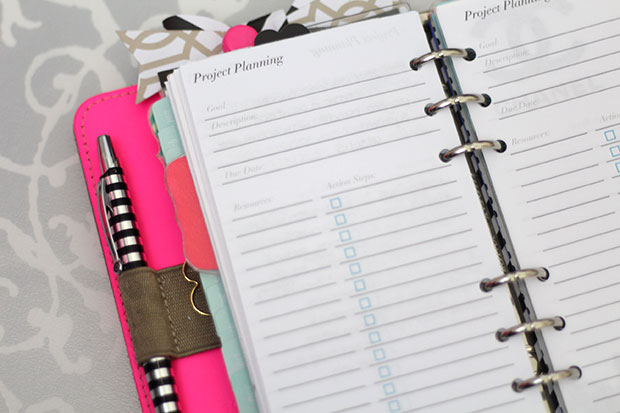
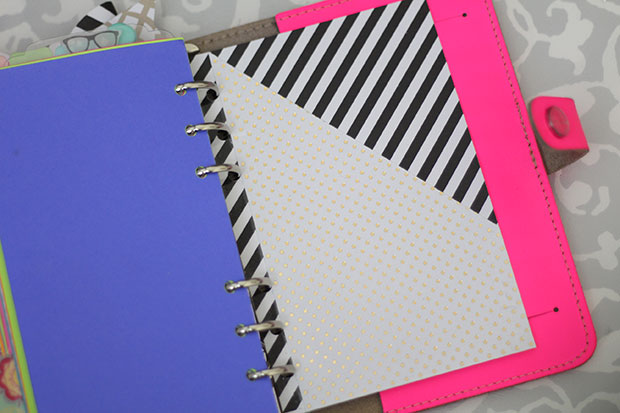
3. Organize Projects into their own dedicated section

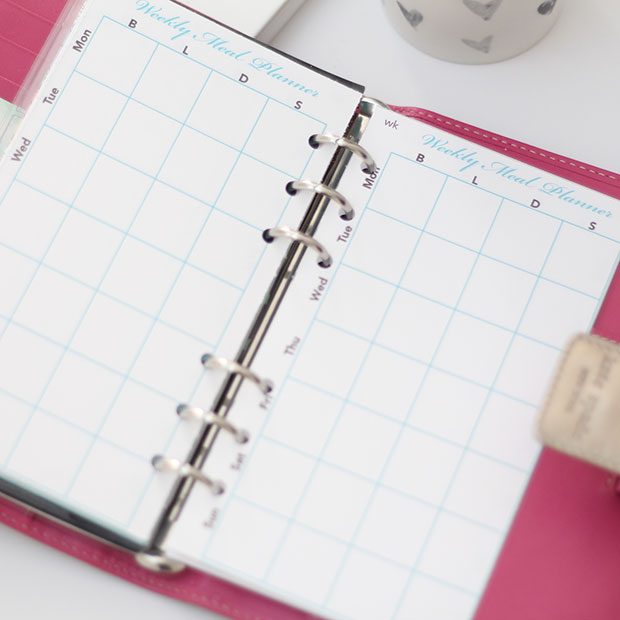
Keeping a dedicated project planning section is a great way to keep related tasks clearly organized. Often times when it comes to organizing and managing projects, we start with a list of obvious tasks and then new tasks pop up as we progress. So keeping a page for your project with notes and space for additional tasks and items to be added is a great way to keep organized and stay efficient. Obviously you will want to group these project planning pages all together in one section of your planner so that when the time comes to review the overall progress on all your projects, you just need to flip through this section and take note of any gaps in your projects and outstanding items that need to be completed. If you are looking for some Filofax specific project planning sheets, make sure to check out these from my shop!

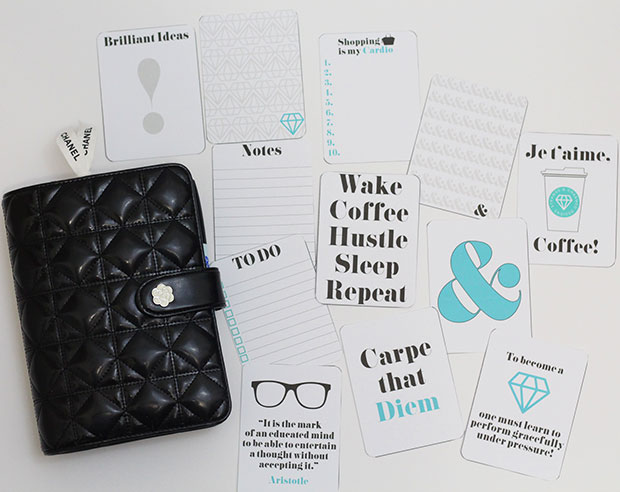
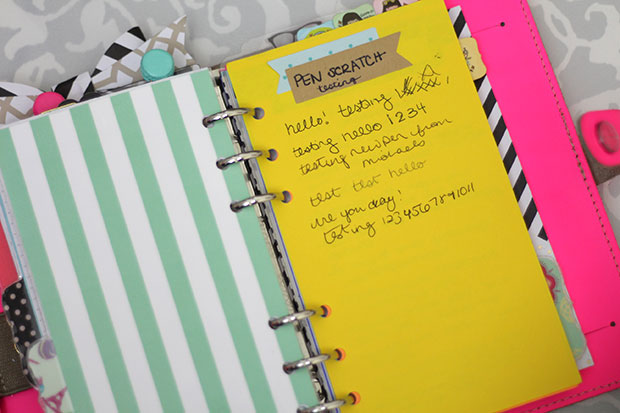
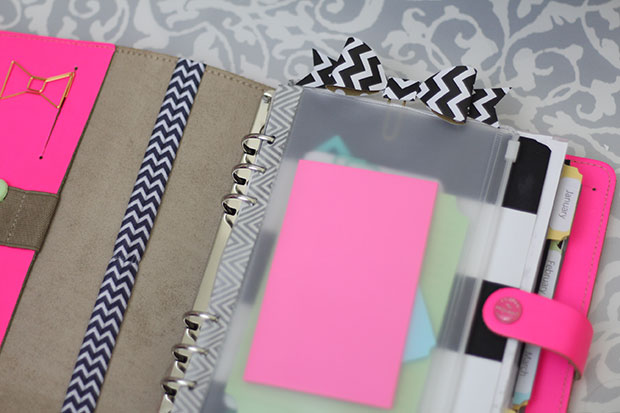
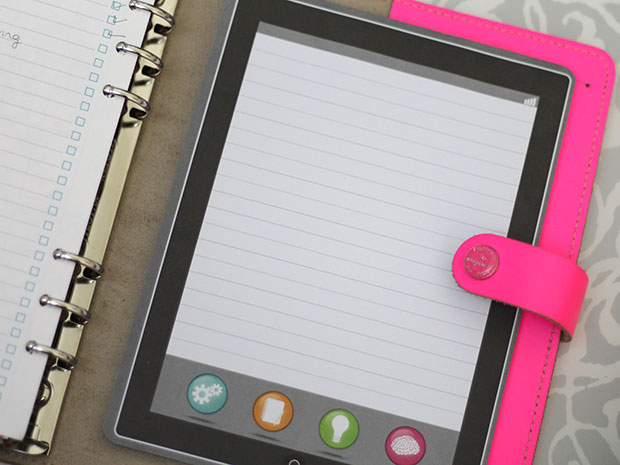
4. Keep spare notepaper and sticky notes in the front of your planner

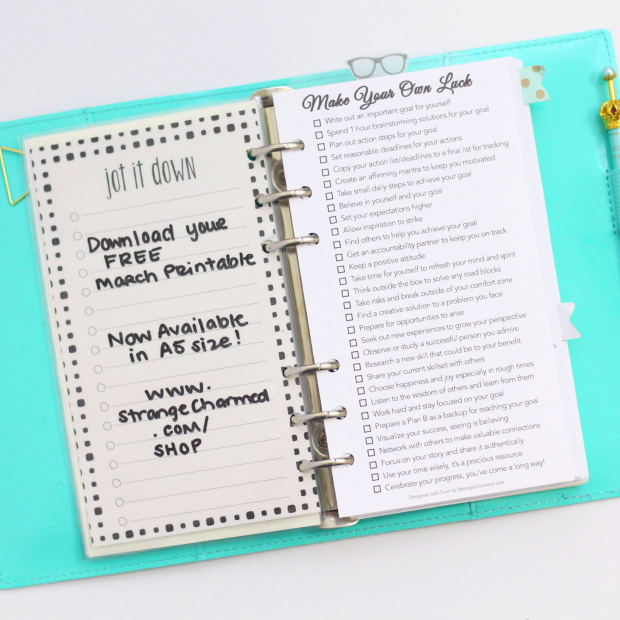
When it comes to my planner and the frequency of it’s use, by far the number one task I use my planner for is to jot down quick notes. Because of this, I like to keep spare pieces of notepaper towards the front of my planner so I can easily jot a note down for future reference or review. I also like to keep spare sticky notes in the front as well, that way I can make a note and stick it to a particular page in my planner that it applies to or use those sticky notes to quickly flag a page that I may need to reference. Remember, it’s so important that you are capturing all the tasks, information and ideas that come to you in a day that you want or need to act on, so these simple tools can be productivity gold!

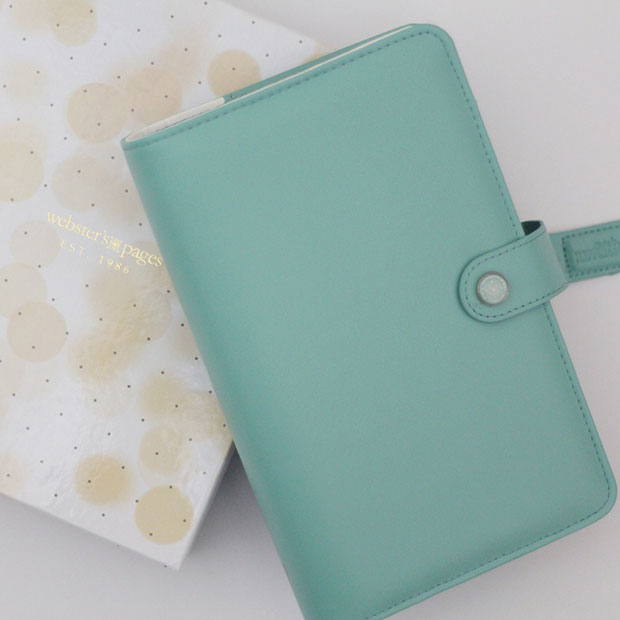
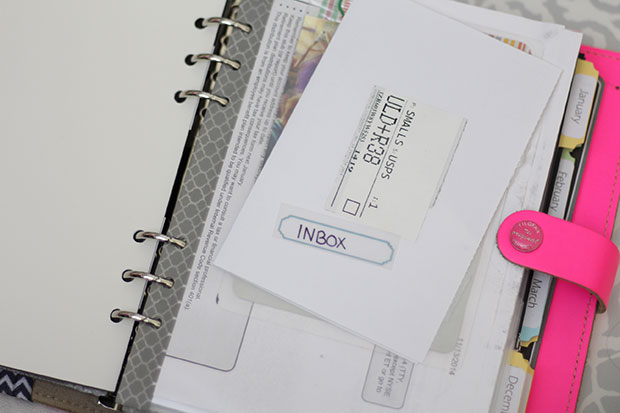
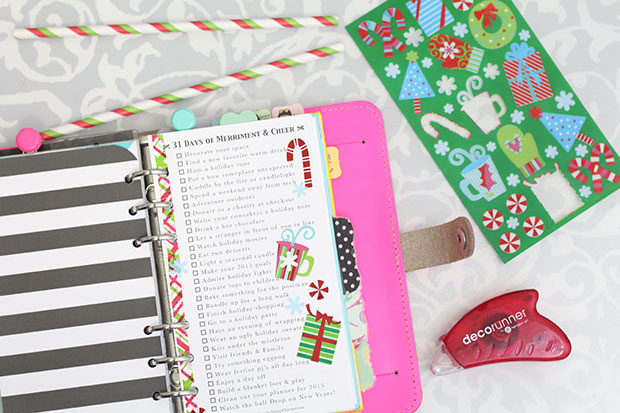
5. Store useful extras in a pouch or DIY folder

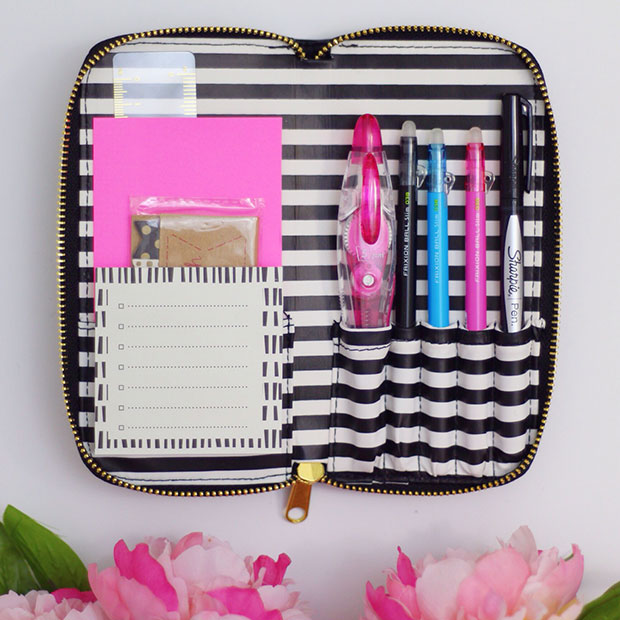
One of the hallmarks of a productivity genius is that they are prepared for anything! So, make sure you utilize your planner as a toolbox of sorts, storing extra supplies and tools in a dedicated zip pouch or DIY planner folder! Tools like a small pair of scissors, postage stamps, paper clips, and writing utensils can help to keep you organized and productive in the office or on the go when you know you have everything you need stored neatly away in your Filofax. DIY folders, like the ones I have made tutorials on, are also great places to store extra notepaper for jotting down and sharing notes, as well as great storage solutions for receipts and paperwork that you may need to fold up and keep in your planner. Make sure your planner has all the storage you require so that you can keep important and frequently used items with you at all times. I know many people use a separate pen case for these sorts of extras, but that pen case is one more thing to have to take care of, and a productivity genius knows that it’s important to keep your supplies lean so you can keep focused on your tasks!

I hope these tips help you to set up your Filofax in the most productive manner possible so that it becomes an essential tool that keeps you on track instead of being a time waster and a major liability to your efficiency! Remember, if your planner is taking too much time to use, you really want to reevaluate your system and decide which areas are causing you the most strife and adjust as necessary! I’d love to see your planners set up using these methods, so please snap a picture of your planner, post it to Instagram and be sure to tag me @MissTrenchcoat so I can see them!

xoxo,

Alexis-Signature

Make Your Own Luck {Free Printable}

Make-Your-Own-Luck-IMG

The time has come once again for me to announce my Free Printable for March and this month I have decided to something a little different! First of all, this month I have created my monthly free printable in both personal and A5 size! I know this has been a request from many of you, so when you download the insert, you will actually have access to two inserts, one for each size! So, the second thing that is a little different this month is that I have created a 31 step process for creating, following and executing your goals, so you can Make Your Own Luck from now on! Don’t wait around for your life to change and your big dreams to just magically happen, you need to do the work yourself if you want it done! Luck is something you control when you work hard and make a game plan!

March-Make-Your-Own-Luck-Printable

So if you would like to download these free inserts, click here to hop on over to my Shop where you can access and print them immediately!

If you do download these free inserts, please let me know about it by taking a picture and tagging me on Instagram with the special hashtag #MakeYourOwnLuckMarch so I can see how you are making use of these inserts in your own planners. I love seeing your pictures, and I can’t wait to like them and interact with you on IG! Make sure you’re following me @MissTrenchcoat!!

xoxo,

Alexis-Signature

Meal Planning with a Filofax

A5-Weekly-Meal-Planner-Insert

Although there are many things that we Filofax lovers plan and track within our binders, there are few things that can have such a major impact in our quality of life as meal planning. For a few years now I have been dabbling with creating meal plans for myself and my husband. I have gone through periods of great meal organization, where I have had dinners planned out for the month ahead, cooked in bulk to save myself time and money and felt in total mental and physical control! I have also gone through times where I felt too busy to plan meals, wasted hundreds of dollars a month on groceries just to turn around and order take out for dinner, leaving me feeling stressed, bloated and out of control! Now, I’m not saying that meal planning is the key to all of life’s problems, but as a planner, it’s certainly an important part of our day-to-day lives that can easily be organized in such a way that we are saving money, eating better, and reducing stress on multiple levels.

Like I said, I’ve gone through the spectrum when it comes to meal planning, and I recently decided that I was going to light a fire under my butt and jump back in. Of course, now with the help of my trust Filofax, I needed a set of meal planning inserts that could help me get the job done quickly and efficiently. So, I made myself a set of meal planning inserts that I thought I would share with you now. If you are looking to get into meal planning, I hope these inserts help you get organized and on track, as they are available for sale in my Shop in both A5 and personal size. However, even if you don’t have any interest in my inserts, I hope that this post will give you some insight into meal planning using a Filofax, and inspires you to get started if that is something you believe would be helpful in your life as well!

A5-Meal-Master-List-Insert

Okay, so to start off, lets talk about the inserts that I made that are available in my Meal Planning Bundle! There are three inserts total, a Meal Master List, a Grocery List and a Weekly Meal Planner! The Meal Master List is what I consider the HQ for my meal planning process. It contains all the meals I like to make for breakfast, lunch, dinner and even snacks/desserts all listed out so when I sit down to create my meal plan, I have a variety of options for meals sitting in front of me. To me, this is step one of the meal planning process because when it comes to creating a successful meal plan, having a variety of options available helps create diversity in your meal plan, so that you don’t get bored with your food options and resort to take out!

Personal-Grocery-List-Insert

The Grocery List insert is pretty straight forward. It’s a simple checklist where you can write down all the groceries you will need for your meal plan and of course any extras you need to pick up at the store as well. Having a complete grocery list may seem like a no-brainer, but your grocery list can be a make or break for you while you are at the store. Having a complete, well thought out list helps you to prevent missing any key items you need for your meal plan, and having that list helps you to excercise your self-control, teaching you to stick to the items on your list and not stray! Although this may be tough at first, an important element to the success of any meal plan is the ability to control your groceries so that you are buying only what you need and avoiding any items that may sabotage your meal plan by creating diversions for your appetite throughout the week. Making a complete grocery list and sticking to it has helped to save me hundreds of dollars a month on my grocery bill. Why? Because when you feel confident that you have made a complete list and know that you only need to purchase the items on said list, your mind begins to turn to autopilot and you don’t get any wild and crazy last-minute ideas for extra meals or new recipes you want to try while perusing the aisles of your grocery store! So get into the habit of creating a complete and thorough list for yourself and you will see that in the end, you will save time, money and a lot of hassle!

Personal-Weekly-Meal-Planner-Insert

My final meal planning insert is the Weekly Meal Planner itself, broken down into a grid format so that you can easily plan out your meals, breakfast, lunch, dinner and of course snacks, for your week! Now, I think one of the great things about using print at home meal planning inserts like these, is really that you have an unlimited supply of these sheets on hand. Although the Weekly Meal Planner is roomy, even in the personal size, there are always situations where you may need to create more than one meal plan, especially if you have a large family to plan for or special dietary restrictions you need to keep in mind for separate meals. You could also use these inserts to actually track the food that you do end up eating, if for instance you don’t stick to your meal plan but want to track exactly what you consumed, in the form of a food journal. Again, just another reason why having a printable insert is so much more of a value than purchasing pre printed inserts or using separate journals or notebooks!

Meal-Planning-Journaling-Cards

So now that you know about the meal planning inserts, let me give you a brief description of how I use them and my process for meal planning! Of course, you may use your inserts differently or have your own process, but this is what I do! First of all, when I am sitting down on Sunday to organize my grocery list and create my meal plan, the first thing I do is take stock of the items I already have in the house. I compare that with my Meal Master List and decide if there are any meals I want to make for the coming week that include those ingredients. If so, I make a note of the meals on some small sticky notes or page flags and then I add any missing ingredients to my grocery list. After I have decided on meals that are already stocked (or mostly stocked) at home, I check my master list to see what else I want to eat for the week. I consult with my husband and see what he has been craving and then we pick out the rest of the meals for the week and write them out on their own sticky notes. Again, I will add any items to my grocery list that I may not have in stock for those meals. Then, I will add any other miscellaneous items I know I need to buy before heading out to the grocery store! Finally, I will take the sticky notes with each meal listed on it and map out my meal plan for the week. I do this on sticky notes because often, my husband and I will change our minds about when we want to have a meal, and that’s absolutely fine, but I need to be able to switch around my meals so that I know what I have left to make if I bump up a meal that may have been scheduled for later in the week!

That, in a nut shell, is my meal planning process. Like I said, you could do it differently to suit your needs, but this is what works for me! I love having these inserts in my Filofax, in their own dedicated section, because it helps me to keep my meal plan at the top of my mind, making it harder for me to just ignore it and order take out! I was previously using a small Sugar Paper for Target bound notebook to house my meal planning/food diary, but I found that because it was separate from my planner (that houses everything important to me and current in my life) I found it easy to forget about it, forget I had a meal plan and forget I was prioritizing this process! Now, that leads me to the final little portion of this post, which is keeping inspired to continue on with your meal planning! The final goodie that comes in my Meal Planning Bundle is a set of journaling cards that you can use in your planner or around your home to keep this process on your mind. There are four designs of journaling cards in the kit, one is a great little portable recipe card that you can keep in your planner in case you hear of a great recipe while you are out and about and want to write it down (how often have you found an interesting recipe in a magazine in a waiting room but couldn’t rip it out and take it with you? Happens to me all the time)! The second card is a hydration tracker where you can track how many glasses of water you have drunk each day in a week! I know there are a lot of folks out there who track their water or want to do a better job of tracking their water, and this little journaling card is the perfect thing to get the job done- and it fits nicely into a planner pocket or can be punched and inserted into your calendar pages so you see it frequently! Finally, the last two designs are two inspirational quotes that I think sum up meal planning perfectly! I absolutely love these cards, having punched them and inserted them into my planner as a daily reminder of my meal planning process!

Well, this was a very comprehensive blog post and I hope it gave you some good inspiration for beginning your own meal planning process with your Filofax or planner system! In case you found this post too long to read, I also filmed a video on the topic that I will go ahead and link for your convenience! If you are currently meal planning in your planner, please let me know about your system in the comments or if you would like to start, feel free to ask me any additional questions and if I can help, I certainly will! 

xoxo,

Alexis-Signature

{Filofax Coffee Break} DIYs & New Accessories!

Filofax-Coffee-Break

Hello my Strange & Charmed Ones! Good morning and happy Monday! It’s time again for another Filofax Coffee Break, where I catch you up on my planners and productivity as we sit around with a nice cup of our favorite hot beverage. Now before I officially start talking about what is new with me, I wanted to follow-up with a loose end from my previous post in this series. As I told you last time, I recently received a Webster’s Pages Planner and since then, I wrote up a review for the planner and posted it to my Facebook page! If you would like to check out the review, please head on over to my Facebook page here, give it a like and enjoy! From now on I am going to be creating exclusive content for my Facebook community, things like product reviews, behind the scenes sneak peeks, and personal/life updates, so if you want more dedicated content, make sure you are following me on Facebook!

Okay, so let’s jump into my latest updates! Over the last few weeks, I have made a couple of awesome planner related videos including a few new DIYs! Click below if any of these titles pique your interest.

How-to-Make-a-Reusable-To-Do-list-for-filofax

These videos are filled with a lot of great information, tips and tricks, so I highly suggest checking them out. Specifically, I have been obsessed with making myself Reusable To Do Lists for my planner, and if you can only watch one video, this is the one I would recommend. With this simple method, I have been able to create a number of reusable task lists to organize my work, plan my meals, organize my groceries and even do a bit of mind-mapping! They are very easy to make and even easier to use because they are essential white boards for your planner!

kate-spade-striped-iphone-case

Also, if you are new to my blog and videos and just getting started with the planner community, you may want to start with my How to Get Started with a Filofax Style Planner video! Here I outline the basics of choosing, organizing and using a 6 ring style planner. The video has been very popular and I’ve been receiving many messages from viewers who have told me how helpful it has been, so definitely check it out if you are getting your first Filofax and want to learn the basics.

Gem-Clips-Filofax-Stationery

Now, let’s move on to some awesome Filofax accessories I have been loving lately! First and foremost, I have been making embellished paperclips for quite some time. I know I shared a few that I had made in my previous post, but I have seriously stepped it up a notch in recent weeks with these gemstone clips pictured above! These are very easy to make, using some gems I purchased from my local craft store (AC Moore, also available at Michaels and I assume all general craft stores). To make them I used my very simple DIY Paperclip method outlined in this video and voila!

Forever-21-Stationery-Pouch

The final Filofax accessory item I have to talk about is a new on the go stationery pouch I have been using. You may have seen this image above if you follow me on Instagram, and ever since I posted it I have been getting many questions about where I purchased it. This awesome little pouch is actually from a makeup brush kit from Forever 21. I think this pouch is perfect for me because it’s nice and small, but it contains dedicated spaces for pens, as well as a nice little pocket to store sticky notes, page flags, and other flat accessories! The exterior of the pouch is a simple black faux leather, but inside, well, inside is like a dream come true for me with a bold print of black and white stripes! Stay tuned to my YouTube channel because I have a feeling this little pouch will most likely make its way into a video or two in the coming weeks, seriously, how can it not, it’s absolutely adorable!

Well, those are all the updates that I have for now! Make sure to stay tuned to my Facebook page and Instagram account for up to date information on my planners, supplies and productivity! Please let me know what you have been loving and playing around with in your own planner recently! I would love to hear about any new DIYs or planner projects you have undertaken and of course if you would like to share pictures of your planner or projects with me, feel free to tag me @MissTrenchcoat on Instagram so I can like your pictures and comment! Until next time loves!

xoxo,

Alexis-Signature

28 Ways to Love Yourself {Free Printable}

28 Ways to Love Yourself February Free Filofax Printable

February is right around the corner, and so it is of course time for another Free Filofax Printable themed with a monthly checklist and made especially for you! So many of you have been reaching out to me to ask me about this month’s printable and it was so difficult for me to keep the details under wraps! I get so excited about each new insert I make, and I on one hand I want to scream it from the rooftops and see what you guys think, but then on the other hand I want to keep it secret until the very special reveal day! As you can tell from the title of this post, the free insert is themed for Valentine’s Day with a checklist of 28 Ways to Love Yourself. So this isn’t your traditional Valentine’s Day, lovey-dovey romance sort of list, this is all about you focusing on the number one person in your life: YOU! Yes, that is right, I said you! You are such an important person and without you, your whole world would go upside down! So, for February I thought it would be rather appropriate for this insert to focus on ways that you can show yourself love and focus on important self-care items!

February Free Filofax Printable Insert

To download your FREE copy of my 28 Ways to Love Yourself Personal Sized Filofax Insert, click here to head on over to my shop! As always, I do only have this insert available in personal sized dimensions, however, it is easy enough to scale the image up to fit into an A5! To print in personal size, make sure you are printing at 100% scale,  and then increase or decrease the scale as necessary to fit larger or smaller planners!

Girl-of-all-trades-journaling-cards

While you are also over on my shop, make sure to check out another new printable, my newest set of Journaling Cards Titled Girl of All Trades! This beautiful set of 12 unique designs is inspired by the #GIRLBOSS inside of each and every busy women, and includes a variety of lists, quote and inspiration cards, as well as a few unique designs echoing the elegance and femininity of a woman who knows how to #HUSTLE! Download your set today for your planner, desk or project life collection at a special reduced price for a limited time only!

Of course if you do download my 28 Ways to Love Yourself OR the Girl of All Trades Journaling Cards, I want to see pictures of these beauties in your planners! Feel free to add washi tape and stickers to your insert, snap a photo to Instagram and make sure to tag me, @MissTrechcoat so I can like and comment on your photos! As always, I hope you enjoy your free insert, make sure to check out my shop if you are still on the hunt for some wonderful new inserts for your planner, and I hope you have a wonderful start to February!

xoxo,

Alexis-Signature

{Filofax Coffee Break} New Binders

Franklin-Covey-Macaroon-Binder

Hello my Strange & Charmed ones! I feel like every time I chat with you about my planner, it’s always in the form of a long formal post, but sometimes I just want to give you all a casual update to let you know about anything new in my planer. Hence, I am starting this little series called Filofax Coffee Break! Just something light and informative to read over a cup of coffee or another hot beverage of your choice! I hope you enjoy it!

Okay, so for today’s update I just wanted to fill you in on some new binders I recently received. If you are caught up with my YouTube channel, you would have already seen that I posted a video on my new everyday binder from Franklin Covey, this beautiful blank faux leather binder called the Macaroon!It’s gorgeous and I moved in as soon as I received it, which really surprised me, because I never thought it would be that easy to get me out of my Fluoro Pink Filofax, but this new binder is just so beautiful and elegant! If you would like to watch my overview video, I will go ahead and link it here so you can check it out if you haven’t seen it already!

Webster-pages-color-crush-planner-light-teal

The second and final new binder I received recently was the Webster’s Pages Color Crush Planner in Light Teal. I had preordered the Color Crush Planner a few months ago and they were set to ship in December, but after some delays they finally shipped towards the end of the month and I received mine last week. The Color Crush Planner is a great new addition to the planner market. It’s very affordable, I believe I paid under $30 for the planner alone, but if you wanted additional inserts, it’s only a few dollars more! It comes in a variety of colors with nice large rings and is personal sized equivalent in Filofax terms.

DIY-page-clips-paper-clips-page-marker

So, that is that in terms of the new binders I have acquired recently! Other than that, the only other planner related news I have for you guys is that I have been obsessed with making cute paper clips for my planner! In case you missed it, I will go ahead and link you to my DIY on how to make your own. Not only have I been using my regular method to make bow clips and chipboard peieces into cute deco clips, but I have also started using puffy stickers like these cute cupcake paper clips pictured! The options truly are endless when it comes to making these paper clips, just take a good look at the objects and items you have in your stash and figure out if you can turn them into paper clips and page markers- it’s super fun and a great way to add unique personalizations to your planner!

I hope you all have enjoyed this post and if you would like me to continue to give you these sorts of informal updates on my planners and supplies on a regular basis let me know in the comments below! Stay tuned to my site and channel because next week I should have another fun DIY for you guys that has also been very highly requested! I won’t spoil the fun, but go ahead and leave me a guess down in the comments below!

xoxo,

Alexis-Signature

{How to} Project Planning & Goal Tracking with a Filofax

Project Planning & Goal Tracking with a Filofax

Since we are now in the very beginning of January and I know many of you are probably pondering resolutions for the year as well as any projects and other goals you want to accomplish throughout 2015, I thought now would be the perfect time to share with you all my project planning and goal tracking process. As you may already know, I do use my personal sized Filofax planner to house and organize all my projects and goals for the year. You may even be familiar already with my printable project planning bundle that I sell in my shop and designed specifically to help myself (and others!) outline and monitor their projects in a productive way. If you haven’t seen my project planning bundle yet, feel free to check it out for yourself.

Now, when it comes to projects and goals, I think people tend to approach each of these items differently because they do tend to be different in nature. When it comes to projects, I view them as a collection or series of tasks necessary to complete in order to come to a desired outcome. In my opinion, projects usually arise as a result of external factors in our lives that prompt us to undertake these tasks. For example, you may find that the majority of your projects come from places like work, your household or even community needs. Since projects are often externally driven, I believe that we often feel a lot of pressure or stress to complete these tasks because usually someone other than ourselves is counting on the completion of the project. Goals on the other hand are things we as individuals work towards with the hopes of accomplishing. I find that goals are usually internally driven and very personal in nature and because of this, I believe we often put our own goals aside or on the back burner to other projects because the completion of our goals only affect us on a personal level. Therefore, I find that goals are usually the first thing to fall to the wayside when life gets busy because they can sometimes feel like something of a selfish pursuit. The truth of the matter is, that both projects and goals should be approached with the same system of organization in order to identify, plan and execute them to completion. No matter whether you are working on a project for work or trying to reach the goal of running a marathon, the same basic planning structure applies and neither a project nor a goal is any less valid no matter the factors surrounding it’s existence!

Okay, so let’s move on to the nuts & bolts of my project planning system. This isn’t any sort of revolutionary system by any means, and I certainly can’t take credit for doing anything other than developing it to fit my own needs, but it does work very well for me, and I thought if it works for me, it could work for you!

Reach-for-the-Stars

Step 1: Brainstorming

The first part of my project planning system is brainstorming. This shouldn’t be confused with brain dumping, because in a brain dump you are simply moving information stored in your mind onto paper (or another trusted input system) in order to store the information, reflect and review later. Brainstorming is like the opposite of a brain dump, because with a brainstorm you start with an empty mind and actively populate ideas. In order to do so, it can often help to first complete a brain dump so that your mind isn’t focused on holding on to any other ideas or plans already stored there, and you can focus simply on the act of creating ideas.

Tip 1: Define your problem

When you begin a brainstorm it is important to ask yourself what you are trying to achieve or what problem you are trying to solve. You need to be specific here and think about the who, what, where, when, why and how of your problem so that you can approach it from every direction.

Tip 2: Envision the ideal outcome

When brainstorming, it is important to know what the ideal outcome is for your problem. We are talking best case scenarios only! Don’t negotiate your ideal down to something diluted, but focus on exactly what it is that you want to happen. Don’t be afraid to dream big. As one of my favorite quotes says “Reach for the Stars, for even if you fail, you’ll land amongst the Heavens.” When you are brainstorming it’s a great idea to think like an overachiever! I follow this rule of thumb myself and I never fail to produce great things even if I don’t quite make it as far as I dared.

Tip 3: Track all thoughts

Start writing down any idea that comes to mind, no matter how small, how right or how wrong it sounds. I suggest doing this with sticky notes or index cards, because these will help you to organize all your thoughts later.

Tip 4: Brainstorm early & often

It’s never too early to brainstorm solutions to a problem that may have just arisen or even to brainstorm solutions to problems that you are anticipating. The more time you spend brainstorming and the more sessions you undertake, the better your ideas will get and the more prepared you will be to undertake the project!

Kate Spade iPhone Case

Step 2: Organizing plans and ideas

Once you have spent a sufficient time brainstorming, it’s time to organize your ideas! If you used sticky notes or note cards as I suggested, this process will be easier for you, but make sure to keep a few extra supplies around because you may still have some more though processing to do!

Tip 1: Lay it all out in front of you

Literally, lay all your cards with ideas and plans and information in front of you and take a good hard look at everything.

Tip 2: Discover the Hierarchy of Ideas

Once you have spent time reviewing your ideas, you will start to notice a natural hierarchy of ideas emerge from your notes. You will see ideas you like, ideas you don’t like and you can begin the organization process by grouping these items into a logical order. Ask yourself as you do this if you see any gaps in information, if so, pull out another sticky note or index card and fill in the blank!

Tip 3: Do not discard any ideas

It is very important that during this process you do not discard any ideas, no matter how bad they may seem. Why? Sometimes good ideas can spring forth from bad ideas. Often time I find that by looking at the wrong answer, your mind naturally comes to understand what the right answer is, almost like a process of elimination. When you know what doesn’t work, you have eliminated a possibility and can therefore focus on what does work! Another reason to keep around those seemingly bad ideas is because although an idea may be bad for one project, it may actually work for another or give you a great idea for a totally different project. While you’re brainstorming, you seriously have no clue what is going to pop up but your brain gave you the idea for a reason, so give it some time before you decide that it’s not worth pursuing.

Tip 4: Give your ideas time to process

Project planning and organizing ideas isn’t something that should be rushed. I say to brainstorm early and often for a reason, because thoughts need time to process and stew in your mind. Even after your ideas have been organized into their proper hierarchy and gaps have been filled, you still never know what inspiration is going to pop up once you give your ideas time to grow. So, how do you know when you have given enough time to your ideas so you can begin to project plan? Well, I find that there are two things that happen to me when I am ready to move on to the next phase in this process. First off, I find that I begin to feel confidence in my ideas. It’s like a gut check with me, if I feel uneasy with my ideas, they need more time, but if I start feeling confident and excited, I know it’s time to move forward. Finally, when I begin to see that my ideas are following a very logical order, I know it’s time to move on because my ideas make sense, and that is really what you want from this process.

Project Planning & Goal Tracker

Step 3: Planning

Once your ideas are in order, you can proceed with the actually planning portion of the project planning system. Novel, ain’t it?

Tip 1: Process your ideas into actions

Once you have all your good ideas in front of you, you need to process them into actual actionable items. After all, a project plan is nothing if you don’t have actions associated with your ideas.

Tip 2: Fill out a project planning page

I like to keep track of my projects with a project planning page because it provides a nice overview of your project at a glance. The project planning pages I use come from a set on my shop that are sized for a Filofax, either personal or A5! The project planning page houses all the important information regarding the project.

Tip 3: Note deadlines and timeframes

On the action list of the project planning page, I make sure to note deadlines for tasks as well as provide a general time frame for their completion. This helps me when it comes time to undertake a task to understand the time commitment required.

Tip 4: Keep track of resources

When it comes to project planning, we often need outside resources or other materials to reference in order to complete tasks. The project planning pages I use have a special section for this so I can list out everything I need to reference or anyone I need to contact or work with to complete tasks.

Tip 5: Move projects to the Yearly tracker

My project planning bundle also includes a yearly tracker broken down by month of the year as well as spaces for short-term, mid-term and long-term goals. I consider a short-term goal to be something that can be completed in 1 month, a mid-term goal to be something I can complete in 1-3 months and a long-term goal to be something I need 6 months or more to complete. Once my projects are outlined in the project planning pages, I move them into my yearly tracker in their appropriate time frame so I can see everything I have going on in my life, project wise, throughout the course of the year.

 Filofax Project Planning & Goal Tracking Process

Step 4: Implementation

Once your project or goal is planned out and organized, the most important part is still ahead of you and that is actually getting things done!

Tip 1: Schedule action steps into your calendar

I use a specific month at a glance insert to track my project tasks. This page (which is available alone in my shop or as part of the project planning bundle) is broken down into two parts. On one side of the page are the days of the month listed out one per line, and on the alternate side is a column of task boxes. I use the dated side to track tasks that have a specific due date or deadline and the side with the check boxes to list out all other tasks that belong to that month. That way when it is time for me to work on a project, I have a list of my next actions ready to go and I don’t have to spend any extra time looking up what I have to do! When an item is completed from this list, I check it off on the monthly page as well as on the project planning page.

Tip 2: Transfer tasks to a weekly or daily spread as needed

Sometimes tasks are very important and I need to make sure I don’t miss them, so I will move them onto my weekly pages to ensure completion. This is just an additional step I take that helps me to plan my workload for the week. Normally I will either add these items to a specific day that they need to be done on or leave them as a general task to be completed at some point during the week. Either way, having it front in center on my weekly view keeps it on the top of my list!

So that is my project planning and goal tracking system in a nutshell. This is quite a long post, so I won’t keep you any longer. If you didn’t happen to make it through the whole post, don’t worry, I did make a YouTube video on the subject as well to go along with this post in case you preferred to watch me in action instead of read a long form article!

Of course, if you did make it through the post, let me know what you thought of my process. Is this something that you may find helpful to you as you begin to plan your projects for the year? Do you use a similar method or another system all together? I would love to hear about how you plan out your projects especially if you use a Filofax based system as well!

xoxo,

Alexis-Signature

A Resolution a Day {Free Printable}

Resolution-a-Day-Full

I have been getting a ton of questions from you all lately asking me if I am going to do another Free Filofax Printable for the month of January, and the answer is OF COURSE! I have actually been incredibly excited for this printable for a while because it is totally New Year’s themed.

A-Resolution-A-Day-Printable

Since January is right around the corner, I thought this insert would be the perfect opportunity to give you guys the task of testing out a different resolution each day of the month! Whether you are trying to get healthy, manage stress, change your job or save some cash, this insert has you covered. I don’t know about you, but I am definitely someone who has a hard time sticking to a resolution, so consider this your opportunity to try before you buy! Accomplish one task per day and by the end of the month you should have a better idea of which resolutions you want to stick with and which may need to be saved for next year! So what are you waiting for? Hop on over to my shop and download your free copy of A Resolution a Day and get your year started off with a bang!

Of course, if you do download my printable I would LOVE to see a picture of it at home in your planners, so make sure to snap a pic, upload it to Instagram and tag me, @MissTrenchcoat so I can check it out and leave you a like! I hope you all enjoy the printable and that all your wishes and resolutions come true in 2015! Cheers!

xoxo,

Alexis-Signature

Reaching Planner Nirvana with 2 Fluoro Pink Filofaxes!

2015 Planner Setup Fluoro Pink Filofax

With 2015 right around the corner, I thought it was about time that I shared with you all my planner setup for the upcoming year. Ever since the beginning of 2014 when I purchased my first filofax style planner, the large Mint Kikki K Time Planner, I have been searching for the ever elusive concept of Planner Peace. If you are not familiar, planner peace is essentially a state of organizational bliss where you have found the planner system that works best for you and are regularly using it to keep yourself organized! Well, it has been a long year, but I found peace at last with my pair of Fluoro Pink Originals; one in personal and the other A5. To go along with my two planners, I also have a supplementary third planner from Sugar Paper for Target, this lovely gold python number pictured above, that basically completes my planner needs for 2015! So, without further ado, let’s jump into my setup!

Planner-Setup-2015-2

Let’s start smallest first, shall we? Although the Sugar Paper for Target pocket sized planner is the littlest member of the group, she certainly isn’t the least! This planner has a very specific purpose for me in 2015 as my only bound planner. This is going to be my food journal for the year!

Planner-Setup-2015-3

As someone who tries to make sure they are keeping a food journal, I have found that I tend to keep my food journal entries all over the place, but now I have one dedicated spot with space enough for the details of my meals that is bound together in one compact little planner!

Planner-Setup-2015-4

Next, moving on into my personal Fluoro pink, which is my every day carry planner! As I have explained in previous setups, my personal sized is my main planner, housing all the information for my in progress projects as well as keeping track of my tasks and calendar schedule! If you are familiar with my previous setups, you will know that not much as changed, but I would like to point out a few new additions! First of all is this custom personal information page I made for myself! I think it’s much cuter than the run of the mill info page I was using before.

Planner-setup-2015-5

The next major change to my personal sized is my calendar pages! I am currently using a month on two pages of my own design that you can purchase in my shop, as well as my custom week on one page insert. These two calendars contain my daily schedules with important information I need to keep track of.

Planner-setup-2015-6

After my calendar section, comes my yearly overview. For 2015, I made this lovely little printable filled with quotes and reminders to keep me on track and focused on what is most important to me throughout the year. If you would like this printable, click here to download your copy now!

planner-setup-2015-7

The next major element of my yearly overview section is this year at a glance calendar that I downloaded from Philofaxy.com! Philofaxy is a great resource for planner lovers and they keep a library of free inserts that I love to use whenever I am interested in trying out a new layout or style! This yearly page is something I use to keep track of health related items like my workouts and weight.

Planner-setup-2015-8

The final element in my yearly overview section is my project planning and tracking inserts. They start off with a month on one page insert of my own design (available on my shop alone or as part of my project planning bundle). This insert keeps track of date specific as well as month specific tasks that relate to projects I have on my plate!

Planner-setup-2015-9

The next insert which is also part of my project planning bundle is my yearly goal tracker. This insert is another trifold like the year at a glance page, and is a place for me to keep track of my short-term, mid-term and long-term goals for the year!

Planner-setup-2015-10

Once my yearly goals are tracked in my yearly page, I break them down into manageable action steps within my project planning pages which round out my project planning bundle of inserts! If you like these inserts, feel free to check them out in my shop, they are available in both personal and A5 sizes.

Planner-setup-2015-11

After my yearly overview section comes my work section. The main focus of this section is my Blog & YouTube tracker pages that help keep me organized and focused on content for my blog and youtube channel. These inserts are also my own design and available on my shop as well! Other than these trackers, I also keep pages with lists of blog post and youtube video ideas within this section, as well as other work related items such as inserts and designs I want to create for my shop.

planner-setup-2015-12

The next section of my planner is filled with miscellaneous and personal information and inspiration! Not much as changed in this section in comparison to previous set ups, however, one notable addition is my Pen Scratch Testing sheet, which is essential a piece of personal sized paper that I use to test pens when they stop writing. I have that problem a lot with my pens for some reason, so it is good to have a dedicated page in my planner where I don’t feel guilty scribbling to get my pens to start again!

Planner-setup-2015-13

The final section of my planner is a lists section where I keep, you guessed it, lists! Anything I need to write a list for is here in this section, and so I keep this divider stocked with a variety of notepaper and inserts. This To Do list above comes from a Garance Dore for Rifle Paper Company notepad that I absolutely adore!

Planner-setup-2015-14

Now, at the very end of my planner, I also like to keep a custom file folder in case I have any loose items that I need to store quickly! I used to use a two-pocket folder that I have a DIY File Folder video on, however, when I moved into my personal original, I found that it took up too much space so I made a slimmer pocket instead.

planner-setup-2015-A5-43-folders-1

Well, now we have made it to the final element in my 2015 Planner System, my A5 Original! If you have seen my video on How to GTD with a Filofax & 43 Folders, you already know that I use this planner as a storage and organization system using the 43 Folders method.

planner-setup-2015-a5-43-folders-2

Of course, technically, this is a 45 folders system because, as you can see in the image above, I actually have added two more folders to the mix; one as an inbox, and one as an outbox! The inbox is just a place for me to quickly stash away papers that I will later file into my 43 folders system when I am in a rush, and the outbox is a place where I keep things that need delegating or mailing.

planner-setup-2015-a5-43-folders-3

So, after those first two folders, I actually have 12 file folders that I made using standard paper files, one for each month of the year. These folders act as catch alls for any paperwork or items that need to be processed in the month before I schedule the tasks to be completed on a specific day.

planner-setup-2015-a5-43-folders-4

Following each monthly folder is also a custom made month on one page calendar where I can keep track of important events and information. On the flip side of this calendar I also have a master monthly checklist that helps me to keep track of items I have processed like bills and items that I need to remember!

planner-setup-2015-a5-43-folders-5

In addition to the 12 monthly folders, I also have 31 tabbed pages, one for each of the maximum number of days in a month. Although these would also be files in the 43 Folders system, to save space in my planner, I just use a single sheet of A5 sized paper to represent each day of the month. Here I will stick notes or insert important paperwork that may be date sensitive. I will also distribute any items from the monthly folder to days of the month in order to manage and organize my workload! As you may be able to tell, this planner is less about tracking, and more about storing and organizing information that is not yet actionable, or is simply too large to be kept in my personal sized planner.

planner-setup-2015-a5-43-folders-6

The final little touch in my A5 is one of my favorite notepads, this iPad tablet style notepad that I purchased from Walmart! I use this as extra notepaper if I need it, its a great size for this planner as it is about A5 size!

Now, of course I made a complete setup video on all of my planners! Here is the video linked above, and if you are interested in seeing a page by page flip through of these planners, feel free to check it out! I go into much more detail about elements in the system within the video, so definitely give it a watch when you have the time! Just a warning, it is a longer video because I am covering three planners within my system, so keep that in mind!

Well, that is it for my 2015 Planner System! Like I said, this is the system that has brought me to Planner Nirvana and I am so excited that I have a great system set up for 2015! If you have found planner peace, please let me know down in the comments what your setup is like or feel free to tag me in Instagram photos and even send me the link to your own setup video! I can’t wait to see what your planners and setups look like!

xoxo,

Alexis-Signature

31 Days of Merriment & Cheer {Free Printable}

31 Things to Do in December

Hello Friends & Happy Thanksgiving Eve! It’s Wednesday and I am here in a special mid-week extra blog post to share with you all my latest free Filofax printable insert! As I have been doing in previous months, I created a monthly to do list filled with seasonal and holiday driven items called 31 Days of Merriment & Cheer! This personal sized insert is now available over on my Shop as an instant download! I wanted to make sure I got it up before the hustle and bustle of Thanksgiving started, so that you had the time to print  and decorate yours before December begins!

31-Days-of-Merriment-&-Cheer-Printable

Now, after creating my first two monthly printables, I received some good feedback from some of you that you preferred for me to leave off the seasonal icons and images I was including in these printables because for some of you the images didn’t pertain (i.e. Turkeys and Cornucopias on my 30 Days of Thankfulness Printable, since those of you outside the U.S. don’t celebrate Thanksgiving). Since December is a time of multiple holidays and many seasonal events, I thought it would be best for me to leave this insert blank of any decorations, as you had suggested, leaving room for you to break out your own washi tapes and stickers and add whatever special icons and images help you to express your love of the season in your own way! Now, I don’t plan to leave extra decorations off all of my future printables, but I am going to make sure I give more thought to my global audience for these inserts from now on! Again, thank you all so much for your feedback, because it really does help me to create things that are more useful for you!

So, go ahead and jump on over to my Shop and get your free printable now! And while you are there, make sure to take a look around at my other printable inserts because I am constantly adding new designs and you may find something new that you haven’t seen before! Enjoy the printable and for all of you celebrating Thanksgiving tomorrow, I wish you a happy and safe Thanksgiving!

xoxo,

Alexis-Signature