With July 4th right around the corner I thought it would be a great time to discuss some of my favorite Summer Tech Tips. Some of these tips you may already be familiar with, others, not so much, but I keep all of these tips in mind when it comes to the summer because tech, gadgets and the summer time all have a very precarious relationship. After all, no one wants water damage on their tablet or to drop their iPhone off a roller coaster! So, here are my 10 Summer Tech Tips to get you and your gadgets through the summer months!
1. Keep your earbuds safe by keeping them wrapped up in a dedicated cord organizer or in a small contact lens case.
3. Use a dedicated hand cream like my favorite Caudalie or JR Watkins hand creams to prevent smudging on your touch screen devices.
4. Give your devices a deep clean every now and again by using anti-bacterial wipes. I use Wet Ones, and I always may sure my device is turned off before I begin cleaning it and always avoid any openings in the device housing!
5. Use a waterproof bikini bag to store any tech gadgets like phones or tablets when you are going to the beach or too the pool.
6. Use dedicated dust plugs to close up any openings in your device while you are at the beach. After all, sand always finds its way into the most unexpected places!
7. Use a heavy duty case for your smartphone while out and about this summer. Some brands even make waterproof cases that are perfect for those hiking and white water rafting adventures!
8. If you plan to use your devices outdoors this summer, make sure to invest in an anti-glare screen protector for the best viewing on your smartphone or tablet.
9. Pack a backup battery for long days out of the house or away from outlets.
10. Make sure to password protect your devices and activate any device location services you have available. Summer is a heavy season for theft and you don’t want to loose your device to crooks or the casual opportunist!
I hope these tips have been helpful to you! Hope you guys have a great summer and make sure to keep your gadgets safe and sound!
With July 4th coming up, I thought I would take a moment to talk to you about drinking, or rather, how to avoid drinking in social situations. This information doesn’t just apply to July 4th weekend, but can be applied all year round if you are someone who prefers not to drink but finds it had to avoid drinking while others are indulging.
Reasons to avoid alcohol
While you certainly do not need a reason to avoid drinking, there are many legitimate reasons why one would choose not to drink in a social situation. You may be in a recovery program in which you are voluntarily prohibiting yourself from alcohol, in which case you have made a commitment and would not want to stray from that. You may be on certain medications that interact negatively with alcohol, or you may be the designated driver for the evening. These situations tend to have the least amount of pressure from others to drink. Usually, people who know this information will not offer you drinks or try to compromise your integrity or health while out at a bar or a barbecue, but what about other reasons when your avoidance of alcohol is not so clear cut?
I for one, generally do not drink when I am out, even if I am with friends who are drinking. I have no problem defending my position that I don’t like alcohol and the affects it has on my demeanor. I find that alcohol makes me feel tired and gives me a stomach ache, and even if I keep my drink count low, having alcohol in my system usually makes me feel laggy for days. I personally also do not like to drink my calories in alcohol or any other beverage for that matter so that factors in as well.
The Stigma of Sobriety
For me, its not hard to avoid drinking because most people know this about me and will not offer me drinks, but what if you were someone who usually drinks with friends but now, for whatever reason, has decided to stop?
The first thing you have to know is that sometimes people find it hard to understand why someone would not be drinking alcohol if it was offered. People almost take it personally or feel like they are being judged when someone suddenly stops drinking. There is definitely a stigma around sobriety and it usually leads to the assumption that you are recovering from an alcohol addiction (whether you are or not) or that you’re pregnant (if you’re a woman). These questions can lead to a feeling of peer pressure that could cause you to fall off your own wagon in a way and choose to drink just to fit in.
I know some people who end up doing this. They may want to avoid alcohol for one reason or another but when they get together with their group of old drinking buddies, they find it hard to avoid drinking and since they don’t have a strong reason to withhold they end up imbibing. I think this stigma sucks, but luckily there are some things you can do to avoid it!
Tips to Avoid Alcohol
If you feel like you cannot survive the stigma around sobriety, there are a few things you can do to avoid suspicion. If you have an event at a bar or restaurant, I would suggest arriving a bit early before the others and talking to your bartender or waitress. If you let them know you are not drinking this evening, but you don’t want anyone to know, they can make you fake drinks that appear to be alcoholic beverages, but are really just club soda or mixers without the alcohol. Many times, the glasses they use at bars and restaurants denote alcoholic beverages from non alcoholic beverages, so if you arrive ahead of your friends and they see you with a clear glass filled with ice and garnished with a lime, they will just assume its your usual gin and tonic, even if its clear soda or seltzer water.
Just make sure if someone wants to try your drink you keep it to yourself. Its easy enough to make up an excuse like “I think I may be coming down with something so its probably best if you don’t drink from my glass.” And if you can’t make it early to to location, don’t fret, just try to pull your waitress or bartender aside and discreetly let them know your preference for the evening. Bartenders especially will understand this and are usually more than willing to oblige. Just make sure you pass them a good tip at the end of the night for keeping your secret safe, after all, you are saving a good amount of money if your drinks are dressed up sodas without the shots of alcohol!
Now, these tips may work when you are out with friends, but what about when you’re at someones home or a barbecue? Obviously, its a little harder to control this situation, but there are things you can do to avoid alcohol without people pestering you about it. First, I suggest bringing some drinks of your own. Usually, if your attending a barbecue or a party at someone’s house, or at a public place like a camp site or local park, you would bring something like a side dish or a bottle of wine etc. Well, make sure you bring yourself something to drink without alcohol in it.
I suggest one of three things. First, if you are normally a beer drinker, I suggest picking up a 6-pack of a micro brew root beer or ginger ale that you can find at your local grocery store. Often times these microbrew non alcoholic drinks appear to be actual beers as they are packaged like them. You don’t need to say anything about what you brought, but if someone asks you and notices its not a beer, you can say something like “I really love this stuff, its my new addiction!” People may offer you something alcoholic, and you can politely pass on it with the legitimate excuse that you brought your own. I find with situations like this, people aren’t so concerned with what you are drinking as long as you are drinking something that looks familiar.
My second suggestion would be to bring a pitcher of a beverage that looks like a mixed drink. Remember in college when you used to drink “jungle juice” and it was basically Kool Aid with tons of clear alcohol in it, but for some reason you couldn’t taste the alcohol? That’s the concept with this one. Make a colorful beverage and stick to it for the event. If someone asks for a sip, let them have it and revel with them in amazement at the fact that you just can’t taste the alcohol! “Maybe I didn’t put enough alcohol in,” you can suggest. Your not lying and your friends will probably end up avoiding your beverage for something stronger anyway. In the end, everyone wins and you most of all win for avoiding alcohol without feeling the peer pressure of your friends.
My final suggestion would be to use a colored solo cup or your own opaque pitcher to drink from during the event. At parties, the non alcoholic beverages are normally sitting right next to the alcoholic ones, so its easy enough to fill your cup with a soda or juice instead of the hostesses homemade sangria. As long as they can’t see whats in your cup, no one can notice what you are or are not drinking. If comments arise as to the quality and taste of the sangria, make sure you give your thumbs up to be polite to your host. She certainly won’t know you didn’t try it!
Conclusion
Even though you may find yourself in social situations where you would normally enjoy a drink with friends and family, its often tough to avoid alcohol even if you want to. Compound that with the fact that many people find it odd when friends suddenly change their drinking behavior, and certain social events can turn into a pressure filled time instead of a fun event! Although honesty is always the best policy, what your friends and family don’t know won’t hurt them, and its not like your hurting yourself by not drinking. So, with a little forethought, you can make sure you look and feel like you fit in with your crowd while also maintaining your personal integrity. After all, alcohol is a tricky thing. It may be fun to loosen up with a drink, but it can also have short term and long term affects to your well being that just aren’t worth it to some people. So make sure you’re doing what you need to do to get by and I hope you have a great July 4th wherever and however you are celebrating!
I absolutely love my Kate Spade iPhone hard case, but when I first purchased it, I will admit, I couldn’t figure out how to install or remove it! The case did come with a short set of directions, however, I found those to be utterly useless, so I headed to YouTube to find the answer. There weren’t many videos on the subject but I eventually found one that helped me get my case up and running. Recently, I decided to return the favor and filmed my own “How to Install and Remove a Kate Spade iPhone Case” video that shows the best way I have found to deal with the case. Above is the video in case you want to watch it, but I thought I should give a brief written overview in case your not able to watch the video.
To Install the case
The Kate Spade Hard Cases come in two pieces, a front section that includes the front lip and sides of the case and a back section that is just a flat backing with raised grooves that will lock into the front portion. To open the case for installation, simply push the backing out away from the inside out. Make sure to firmly hold onto the front lip of the case and push the back plate out of place. This made be hard to do initially, so don’t be afraid to use force.
Once the two parts are separated, you will drop your phone face first into the front portion of the case and then fit the back plate in behind it to close it up. You will then need to push firmly all around the back edges of the case to get the back plate to snap in. If any sections around the sides seem to be lifting away from the case, push firmly on those side sections while also pushing down with on the backplate until you hear that section snap into place.
On a side note, these cases are so well fitted that you cannot use a thick screen or back plate cover while using this case. For example, I had one of those thick mirrored screen protectors when I received this case and it wouldn’t go on properly so I had to switch my screen protector out for a simple thin one. Just keep that in mind when using a Kate Spade hard case!
To Remove the case
Removing the case is the tough part, especially since you are going to feel like you’re breaking the case, so this next part is not something to rush through without thought. The best way I have found to remove the Kate Spade Hard Case is by pushing the front portion away from the back portion at the cut out for your volume rocker. That is really the only spot on the case where you can get a good grip with your thumb.
So holding the case face down in your hand so that you are looking at the back plate, position your thumb into the opening for the volume and begin to firmly pull it down away from the back plate. You will see a little section pop up away from the front portion and with that you will use your fingers or finger nails to peel the back plate away from the front section of the case. The first few times you do this may be difficult and if you are having trouble definitely watch the video to see how I do it, but this method is the easiest, you just need to do it carefully because you don’t want to break the casing around the volume rocker because it is thinner plastic, so it could break theoretically with too much force.
I hope this information was helpful to anyone out there who has a Kate Spade iPhone Hard Case or was thinking of buying one! If you are interested in the case I have, I have included a link to mine through Amazon where you can buy one pretty inexpensively!
{Click through the image to get to product information}
As I am now using my ClamCase Pro keyboard and iPad full time as my portable writers desk, I have been working on finding a solution that will complete the loop of writing between my iPad and MacBook Pro. When I first received the ClamCase Pro, I was using a multipart system, using the PlainText app on my iPad to write, then using Notational Velocity on my Macbook to sync with my PlainText documents and finally, moving the files over to Scrivener on my Mac where I organize all my writing. It was a reliable system thanks to Dropbox, and it worked, but it was only a one way street. It was a great way for me to import documents I wrote on my iPad back to my Mac, but I could not call up existing files sitting in my Scrivener project back to my iPad to be completed. I suddenly realized that my ClamCase Pro was so powerful that I did not need the crutch of my Mac to assist my writing, instead what I needed was complete access to my Scrivener project files in an infinite loop between my Mac, Dropbox, and iPad, then back to the Mac.
So, I started looking into alternatives for how to Sync my Scrivener folder with my iPad, because ultimately that is what I want and need. I do love Scrivener because its organizational ability is outstanding and if it had an iPad app that mirrored my Mac and my iPad that would be ideal! Sadly, it does not currently as I am writing this, perhaps in the future it may, but I won't hold my breathe in the meantime. Scrivener does, however, sync to Dropbox, also to a few iOS apps, and has built in functionality to work with SimpleNote- but I don't use SimpleNote. I know many people like it, but once I found PlainText I was in love and really don't want to keep switching around between iOS apps.
Luckily, in my research I did find a way to make my Scrivener/PlainText relationship work. Scrivener has an option to “Sync to Folder.” This option allows the user to sync all or some of the files in your Scrivener project to a specific folder and if I were to sync to my PlainText folder within Dropbox, well then, that may actually solve all my problems! So, I gave it a try and I am glad to say it actually works! On the iPad's end, its not the prettiest sight, but the files did show up in the order they appear in my Scrivener file, so I am now able to reference back to previous articles or in progress works between my iPad and Mac. If I create new documents on my iPad, it syncs those back as well and although they fall into a catchall folder, all I need to do is drop them in the correct place to remain organized (upon syncing Scrivener the document then falls into the correct order on my iPad.)
Step-By-Step Guide to Syncing Scrivener with PlainText on the iPad
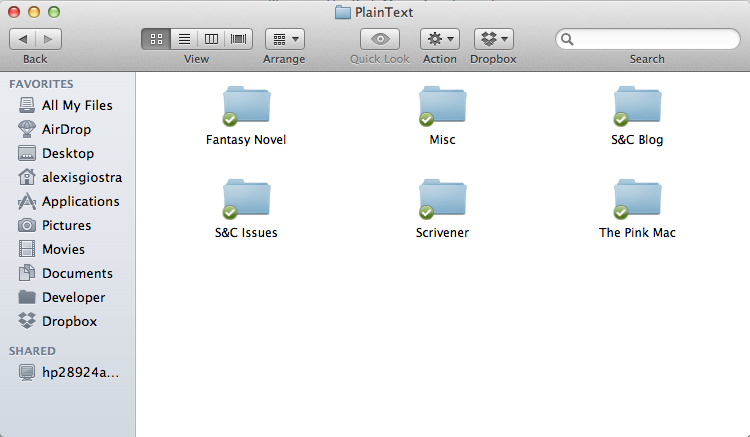
Step 1: Make sure all your connections are in place. In order for this to work, you need to be syncing PlainText to DropBox. This means your PlainText Files are actually stored in your DropBox file. Even if you do not sync your PlainText across numerous devices, this is necessary. Simply open the system preferences (the cog wheel) within PlainText and use the DropBox option to sync to your DropBox account. You can verify that this has happened by opening up your DropBox folder and seeing the PlainText folder inside. If you open this folder it will show plain text documents of any documents you have created within the app. I suggest creating a folder called “Scrivener” or some equivalent within the PlainText folder so that you have your Scrivener documents separated from your other PlainText documents.
Step 2: Select the Scrivener project you would like to sync. With this process you can only sync one .scriv file at a time to your PlainText, so open up the project of your choice. Give it a once over and make sure that all your text documents and folders are organized the way you want them. This will dictate the order in which the files will appear in your PlainText folder.
Step 3: Getting to the Sync with External Folder Option. From your File Menu hover over the Sync option and then choose with External Folder. See image for details.
Navigate to the Sync with External Folder option from the File menu.
Step 4: Set up your External Folder Options.Within the dialog box that appears, you must first choose the shared folder you would like to sync to. In this option you are going to navigate to your DropBox folder and open the PlainText file that you have stored there and finally select the “Scrivener” file you created in Step 1. By doing this you will have a separate space for your Scrivener documents, which will come in handy for organizing all your PlainText documents. Once your shared folder is selected, I recommend using the settings I have selected as illustrated in the below image. If you are using PlainText you need to make sure your files are formatted as Plain Text files instead of the default Rich Text.
Choose your options in the Sync with External Folder dialog box.
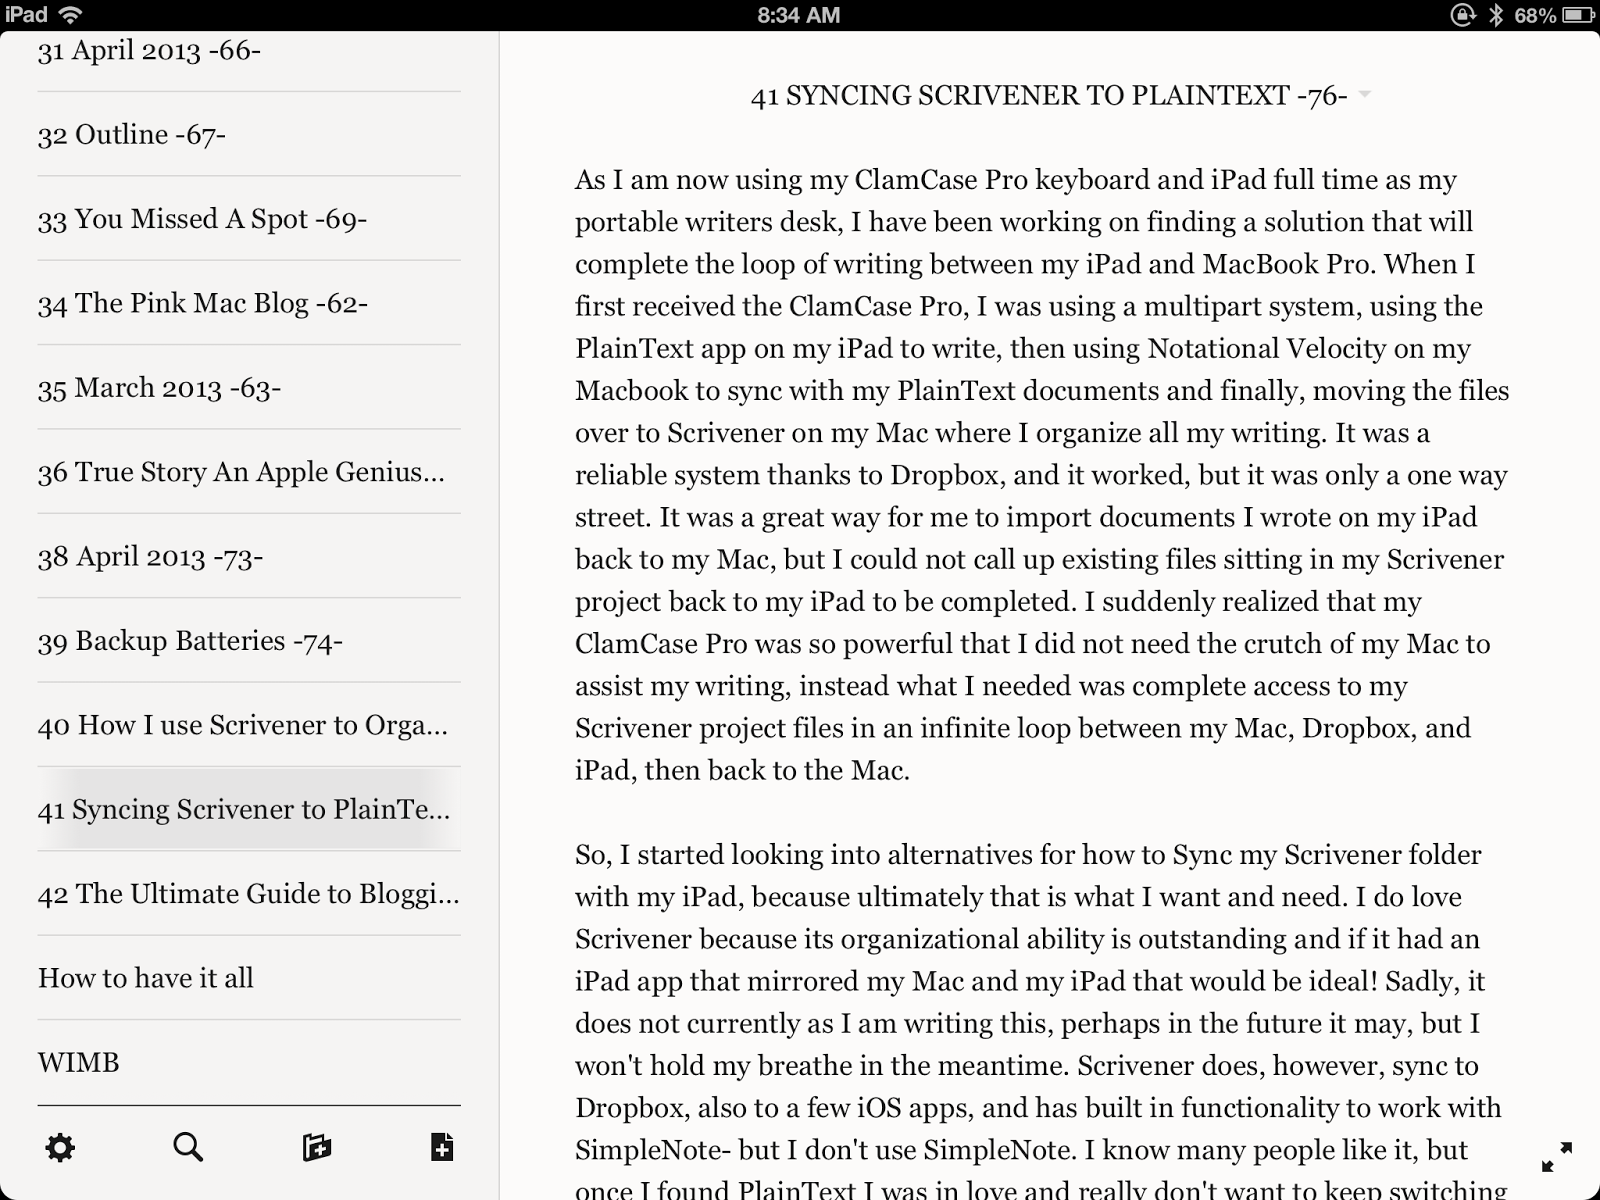
Step 5: Sync. Once everything is set properly, you can select the Sync option. Once the sync is complete you should be able to turn on your iPad, open PlainText and see a new folder called Scrivener organized amongst your documents. If you navigate into this folder you will then seen a subfolder called Drafts and another called Notes. Open the Drafts folder to see your Scrivener writing project laid out in the order in which they appear in your Scrivener file. Folders will be empty documents (this is for organization) but text documents will show content so long as their had been content in the files on your computer.
Upon Syncing you will find the Scrivener file among your other files and folders in PlainText.
Navigate through the files Scrivener > Drafts until you come to your Scrivener files organized in their original order.
Now you are free to continue writing and editing your Scrivener project on your iPad. PlainText automatically syncs back to your DropBox folder when changed are made to your documents so the next time you open your Scrivener project on your computer it will ask you to sync and it will import all the changes made through your iPad. Because your iPad does have complete control over your Scrivener file, I suggest that you keep your project backed up in case you delete something important from your iPad. The Automatic back up options are found in the File Tab under Back Up for your reference.
If you enjoyed this post, I suggest also reading my previous article on How I use Scrivener to Organize my writing for a short overview on organizing files within Scrivener. Enjoy!
With the end of summer nearly upon us, these next few weeks of August will see college and high school students on their way back to the daily grind of classes and coursework. If you are one of the many students heading back to the classroom, you may be in the market for some new tech gear. The start of a new school year has always been ceremoniously entangled with the concept of the “new,” and the prospect of new gadgets can always make for an exciting start. However, if you are one of the many students who will be dragging around an old laptop or iPod, don’t worry, because I have some tips for making your old tech feel new again to get you pumped for your upcoming semester.
Add a little spring to your gadget’s step
Although your laptop may be well equipped with a fast processor and a large hard drive, it may not be as snappy as it once was. This is a common issue with computers in general, but luckily it is an easy issue to fix as it is most likely related to a clogged hard drive. Months or years of accumulating files and viewing web pages can cause your computer to run significantly slower, so to fix the problem, you will need to start cleaning out your files.
1. Start by going through your documents, pictures, music and movie files and getting rid of any files you no longer need. For files you don’t use but need to keep record of, move those to an external hard drive to free up space.
2. Next, try clearing your web browser’s cache. This will take care of old web page information that is stored on your computer and eating up memory. To do this, go to your browser’s preferences or settings and look for the option.
3. Finally, delete unused applications. To do this on a Mac, you simply need to drag the application to the trash can, however, to insure you have removed all the sub files of the application from your hard drive, I suggest downloading an application such as AppCleaner or AppDelete to help you remove all associated files. On a PC, use the application uninstaller in your Control Panel found in ‘Add or Remove Programs’.
4. For an iPod that is beginning to lag, I suggest that you do a factory reset of your device, then, make sure you have the most up to date firmware installed, before restocking your device with new tunes and videos for the school year. Although iPods tend to have a shorter lifespan than laptops, with proper care and maintenance, you can keep yours up and running for a long time. (I still have an iPod Mini from early 2005 in good working condition.)
Give your gear a bath
Although they are electronic devices, computers and mp3 players still need proper cleaning from time to time to keep them not only looking good, but also working well. When dirt or dust gets inside a gadget, it can start causing issues like overheating and lagging that shorten the life of the device. So, a regular cleaning is always a good idea.
1. The first thing to remember before you begin to clean any electronic device is that you must turn the device off. Skipping this step could cause major harm to yourself or the device. So, power down and unplug all wires.
2. I tend to begin cleaning my laptops keyboard area first. This is usually a source of much dust and dirt that should be cleared out of the way first. Use a can of compressed air, or, if you know how to remove your keys individually, do so slowly and carefully. I like to use q tips to get into the nooks and crannies of the keyboard, myself.
3. Next, clean off the casing. Depending on the outer material of your laptop, either plastic or metal, you may want to use a dedicated electronics cleaner like iKlear, but I find that soap and water or antibacterial wipes do a universally good job. If you are using soap and water, just make sure that you only slightly dampen the towel you are using to make sure you don’t get liquid into the delicate parts of your computer.
4. Finally, clean the screen of your computer with an appropriate cleanser. To be prudent, I would check with the manufacture of the computer to see what solvents are safe to use on the computers screen. Although Windex is always a safe bet, you may prefer to use electronic screen wipes or another popular brand of computer screen cleaner if your screen has any sort of sensitive coating.
5. Follow a similar method to clean an iPod or mp3 player, making sure to also clean your earbuds with a q tip or cotton ball slightly moistened with alcohol to remove bacteria.
Update your electronic wardrobe
You’re not the only one who could benefit from a wardrobe upgrade for the new school year. A great way to make your old tech feel new again is with some upgraded cases, covers, and skins. There are a wide variety of retailers that sell these items, most specified to the specific device you own, so I will not list them here, but I will say that a new sleeve for your laptop, or a new case for your iPod can be an inexpensive way to add excitement and interest back to your gear. Not to mention upgrading the protection will extend the life of your device!
Now that the holiday season is finally here, it is time for The Pink Mac’s Holiday Gift Guide. This year has been groundbreaking in many ways in regard to consumer electronics, and especially Apple products. We have seen some amazing bumps in product standards and at the same time some big price drops which have made gadgets and accesories even more affordable! So, I have put together a list of some of the best and most interesting Apple related accessories and products out on the market today, taking into consideration quality and price to ensure that you are giving only the best and most unique gifts this season!
Gifts for Mac’s
Hu2 Design Laptop Decals: These vinyl laptop decals are unique and durable; a sure way to brighten up any Mac user’s holiday!
Fabrix Laptop Cases: The usual brand of laptop cases can get boring, so instead, consider Fabrix cases; they’re handmade and made from unique fabric designs that are sure to spread the holiday cheer!
Apple’s Magic Mouse: For any mouse using Mac user in your family, Apple’s Magic Mouse has all the familiar gestures of a trackpad with the functionality of a mouse!
Gifts for iPod’s
iSkin Nanovibes: Give the gift of unique iPod protection with these interesting patterned cases!
Richard Solo 1800 for iPod: For the avid iPod user in your life, consider this backup iPod power source- small and compact- perfect for the ipod user on the go!
Belkin Rockstar: Does your ipod lover like to share their music? Then this is the perfect gift for them, allowing for up to 5 users to experience the tunes!
Apple Sidekicks
Nook: This well designed e-reader looks the part of the Apple lineup, and with it’s simple touch screen design, it puts other e-readers to shame!
Canon Powershot: There is no doubt that Canon makes some of the best compact digital camera’s out on the market, and this compact design is the perfect gift for any photo lover!
Bose Headphones: What is all the great audio technology good for if you can’t experience it full throttle? These bose headphones are compact enough for use at home or on the go and will surely strike a chord with any music or movie lover in your life.
Stocking Stuffers
Monster Screen Cleaner: Keeping your gadget’s LCD screens clean is always important for frequent users, so stuff some of this in their stockings to keep all their gadets looking new!
Pogo Sketch: Whether it is the touch screen of a iPod or trackpad of a Macbook, this inexpensive accessory is a perfect stocking stuffer for your gadget lover, and cheap enough for you to splurge on yourself!
Netflicks Gift Subscription: Who needs on-demand movies and expensive extra channels when, for less than the price of a single DVD, you can have access to an entire movie library and streaming DVDs online?
So, I have been noticing this weird issue my Macbook Pro has been having- basically, every once in a while when I am on battery power and I leave my computer idle for a while, when I get back the colors on the screen are messed up. This doesn’t happen every time I leave the computer unplugged and out of use, but it has happened a few times and so I wanted to make you guys aware of how to quickly fix it!
Now that fall is in full swing, it is the perfect time to organize your digital life. So, I have put together a list of 5 easy to implement tips to help you clean out your computer and reorganize your files, a must on the To Do list of any student, working adult, parent or retiree this season!
{Note: Before you begin the process outlined within this post please make sure to back up your computer files using Time Machine or whichever method you prefer. The tips here are only suggestions and this blog is not responsible for any files you may mistakenly loose or delete in the process of implementing them!}
Let’s begin, shall we…
1. DELETE, DELETE, DELETE
If you want to clean out and reorganize your Mac, the first and best thing to do is delete all unnecessary files, folders, programs, ect, from your hard drive. This could take time depending on how much you have stored on your hard drive and how much you want to erase.
For applications, I recommend using a program like AppCleaner to get rid of the program and all associated systems files in one action. It is a free download, so you might want to hang on to it for future use.
It might also be a good idea for you to clear your Safari cache as well. To do this, open Safari and from the menu select, Safari > Empty Cache > Empty. If you use another web browser you should still be able to do this, but consult their help menu for proper instructions.
2. File Away
After you have deleted the files you no longer need, you must reorganize the ones you still want to keep. Although OS X does a great job of providing a built in organization system for different types of files like movies, photos or documents, it is still up to you to keep these files straight within their selected locations.
For instance, if you took a trip to France and you have a bunch of photo’s just sitting in your Pictures file, organize them by creating a new file called ‘Trip to France’ within Pictures to keep them together for easy location later. It is easier to store photos in a named file then to put names on each individual photo, as you can always add those later after you have them organized into a group.
3. Put it in Storage
There may be some files you want to keep as a backup, but don’t want taking up space on your hard drive, so to solve this problem I use an external hard drive. I do this for all my iMovie projects once I have uploaded them to the web, because I want to keep copies of them as a backup, but I don’t need hundreds of movie files crowding up my hard drive. By storing them on a separate hard drive, I know I can retrieve the files whenever or if ever I need them.
4. Become an Avid Reader
If you’re like me and like to read a wide variety of websites and blogs, you probably also have a mass of links bookmarked in Safari that you just sift through as you’re surfing. Well, to make this process easier and much quicker, you may want to download an RSS/Atom reader like NewsFire.
With this simple application, you can add a long list of RSS feeds and just click through each article you want to read. This saves you the time of having to load up each page and gives you the benefit of having the title of each article laid out so that you can pick and choose which you would want to read without having to scroll through multiple pages of a blog or site. Using a RSS reader like this also gives you the ability to read your favorite sites while you are offline as well, so long as you refresh your feed before you go offline!
5. Get Things Done
Many of us use our computers to organize not only our work but also our family and personal lives simultaneously. This may result, however, in a chaotic mess of information, to do’s, links, recipes and whatever else you need scattered throughout multiple places on your computer.
So, to get all your tasks done and all your information in one place, use a program like iGTD. With iGTD you can organize your tasks by context or projects, separating work tasks, home tasks, family tasks, etc, with a built in organization system of calendars, places for notes, web links, and whatever other information you will need to complete your tasks.
{Congratulations! If you have followed these 5 tips successfully, you now have an organized Mac fit and trim to see you through all the hard work of fall!}
After painstakingly choosing which type of Macbook you want, the next most difficult decision is how to keep said Macbook protected. There are so many options out there, ranging from no protection to complete protection, and in many different forms, that sometimes it can become difficult to decide. Well, don’t worry, because this easy guide will help you to choose between the many options and levels of protection out there for your Mac.
The Birthday Suit
Perhaps one of the many reasons you decided to purchase one of Apple’s beautiful Macbooks was because you were in love the form and finish of the machine. Perhaps you love the glossy white of the Macbook, or the sleek aluminum of the Macbook Pro and you are not about to cover that up! So, what are your options? Let’s discuss.
Zagg’s Invisible Shield
Leaving your Mac naked is not the best idea to prevent from scratches or dents, but if you want to let the natural beauty and sleek physique of your notebook shine through, you might want to think about using a clear protective film. BodyGuards and Zagg’s Invisible Shield are two highly recommended brands of full body clear protection. These military grade films are easy to install and removable in case you need to, and for about $50 for complete coverage, they are a great way to protect the natural beauty of your machine from scratches. Downside, however, is that they do not protect against dents to aluminum models, so as long as your careful not to bump your Macbook, this protection could work for you.
Sticking to It
So, you bought your Macbook because you are one of those expressive types that likes to show off your individuality, creativity and genius, and the best way to do that is through a computer that is designed just like you. You don’t just want your Macbook to create but you also want it to be a creation. Well, they make an App for that, err…. well, they make as skin for that at least!
GelaSkins makes a full line of protective sticker skins that provide an excellent source of protection for the lid of your Macbook for about $30. Only thing is, it provides no protection to the sides or bottom of your notebook, leaving it vulnerable to scratches and dents. You may want to use this option in conjunction with another form of protection, like a hard shell or one of the previously mentioned protective films. BodyGuardz actually sells their protective films by the piece so you can buy exactly the protection you need.
GelaSkin for Macbook
By the way, if your not happy with the choice of artwork offered at GelaSkins and other similar skin manufacturers, you can always create your own skin at Skinit ($34.95).
Protection, in a nut Shell
Scenario: You purchase a shiny new Macbook pro, stick a nice colorful skin on it to protect it, but one fine day you drop it as you’re pulling it out of your bag. It has only fallen a few inches, but UT OH, you dented it! It is one of the worst things that can happen physically to the aluminum Macbook casing and after checking the machine to make sure it is still working properly, you are left with a fully functional, but physically deformed, Mac.
Speck SeeThru Hard Shell
How could this scenario have been avoided? Well, since the exterior casing of the Macbook is metal, denting is an issue you may run into, but one that can be curtailed to an extent by using a hard shell case. Hard shells are made by a variety of manufacturers, however, the two most popular and highly recommended brands are Speck and Incase. Coming in a variety of colors, these hard shells are an excellent source of dent protection for your Macbook when it comes to short distance falls or things falling onto your laptop. Obviously, a hard shell won’t be able to save your Mac from a drop off a building, but for those everyday accidents, it is not only excellent scratch protection but also amazing shock protection.
These hard shells aren’t just great for the aluminum Macbook models, but they also come in versions for the plastic cased Macbooks as well and for about $50 each, they can be a real case saver!
Wear your Mac in a Sleeve
Whichever level of protection you choose from, you can still always do with a sleeve case for keeping your Mac protected while traveling. Although some sleeves can offer a pretty tight fit like the Contour Design sleeves, others like Incase allow extra room so that you can keep your notebook covered by a skin or a hard shell and still fit it into the case. Some sleeve manufacturers actually design cases that act as both a sleeve for traveling but then also open up to allow the user to work on their Mac while it is still incased by the sleeve. Isis Dei and iSkin are two reputable and well priced manufacturers who allow for this flexibility in their case lineup.
Contour Design rE-versible Sleeve
The best part about sleeve cases is that with so many manufacturers, you are certain to find something that fits your needs and your budget, not to mention your personal style!
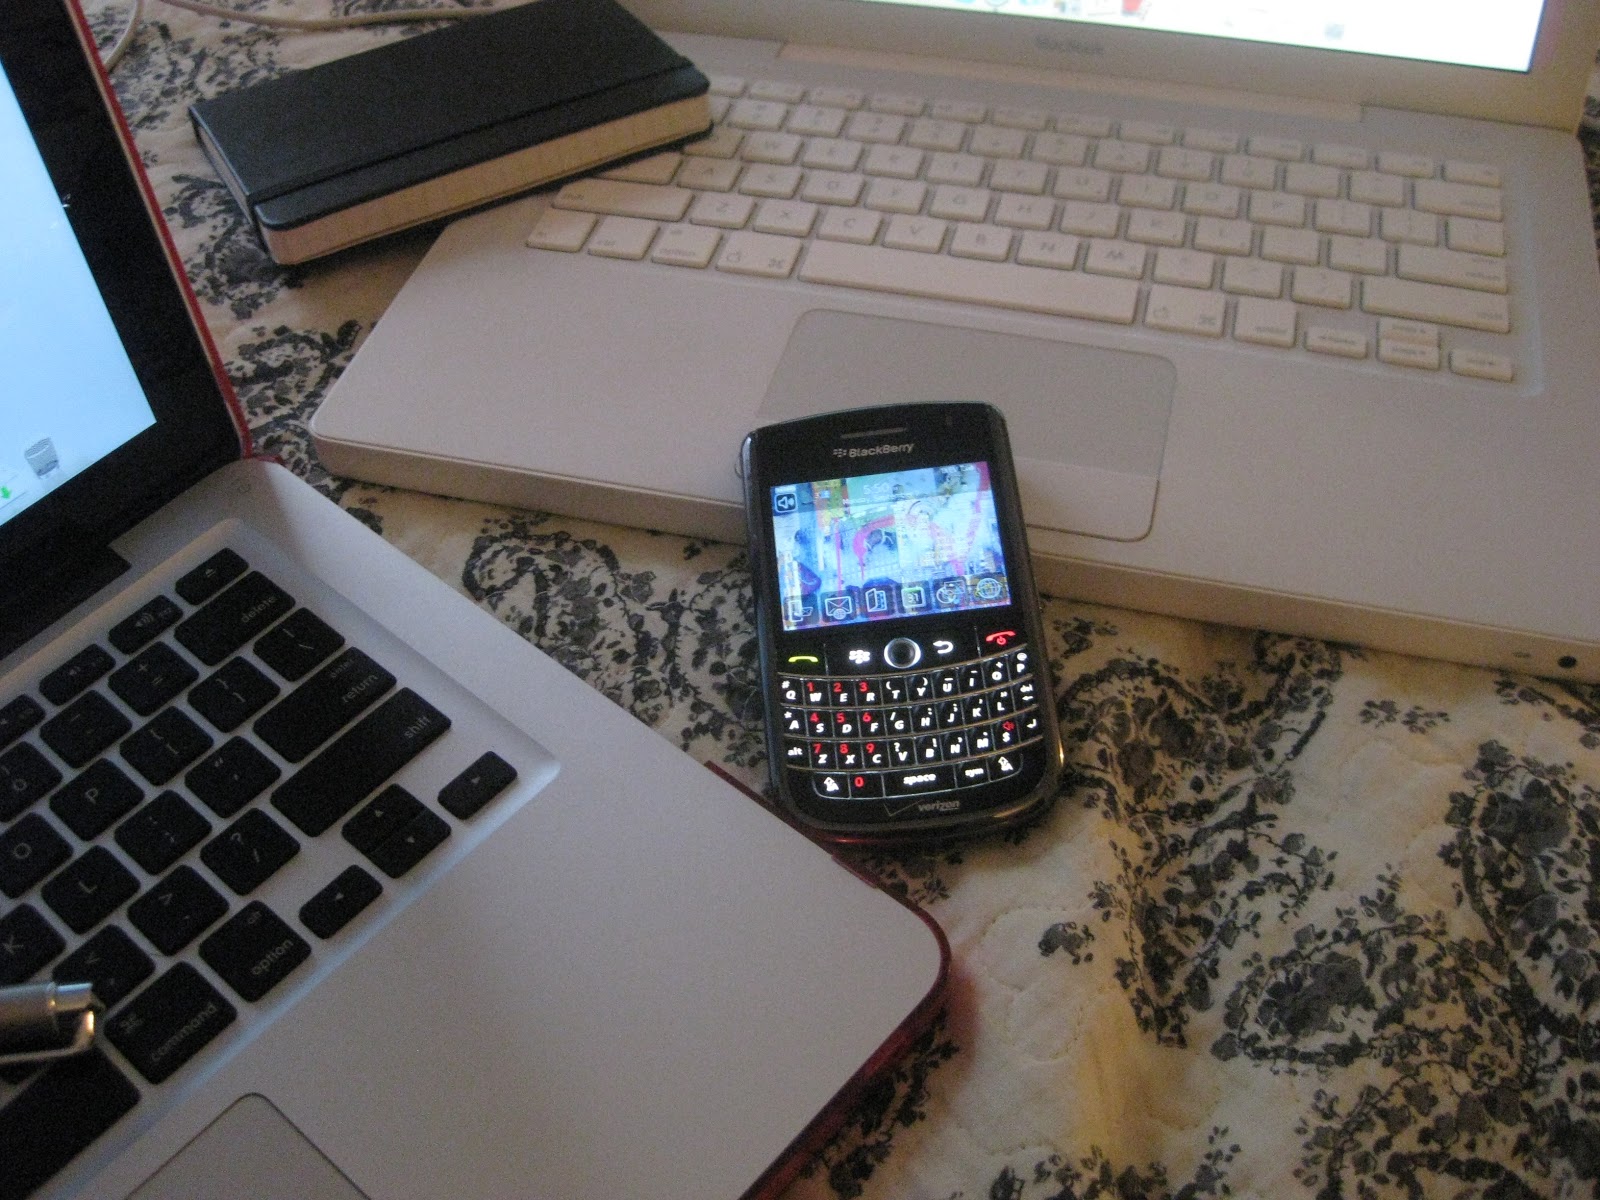
So, I found an application that gives Mac users the ability to tether their Blackberry devices to their Macs. TetherBerry, costs about $50 but so far it is the only solution I have found that lets me utilize my mobile broadband plan.
In case you can’t watch the video and still want to know my tips on getting your Blackberry device to tether to your Mac, I am going to provide written directions below.
1. To begin, you will need to download the Tetherberry application on both your Mac and your Blackberry. Follow the link above, select Free Trial, and then choose the Mac Version of the software. From your Blackberry, open the TetherBerry webpage from your browser, select Free Trial, and then follow the URL provided to download the software onto your Blackberry.
2. Once you have successfully downloaded the software onto both your Mac and your Blackberry, go to Options on your Blackberry, then select Memory, and make sure Mass Storage Mode Support is ON and that Auto Enable Mass Storage Mode When Connected is either PROMPT or YES.
3. Next you must connect your Blackberry to your Mac via the USB cable that is provided to you with your Blackberry. At this point it would also be a good idea to check to make sure you are not connected to the internet by any other means. On your Mac, go to System Preferences and select Network. Check to make sure you are not connected to the internet at all before you continue.
4. The next step is to run the TetherBerry GUI on your computer and then also run the TetherBerry application on your Blackberry. You may need to provide your password in order to allow the connection between the Mac and the Blackberry on your computers end.
5. At this point, if everything has gone correctly, the Status of Tetherberry on your computer should say “TetherBerry Connection Active,” and you should see activity in the numbers of Packets and Data Sent and Received. You can also check that you are connected to TetherBerry by going back to the Network settings we visited earlier, where you should see that TetherBerry has an active connection.
6. Test your internet connection by opening up a browser window on your Mac. If it opens in a reasonable amount of time, you are good to go. However, if your browser does not open a new page or you get an error message from your web browser saying you are not connected to the internet, then Exit the TetherBerry Application (you may need to provide your password on your computer again) and then begin again from step 4 until the tethering is successful.
On a side note, the first time I attempted this method, it took me a few times of connecting and reconnecting to the TetherBerry software before my Mac was successfully receiving an internet connection. On subsequent attempts, it takes me two trials of step 4 onward to successfully get a browser page to load.