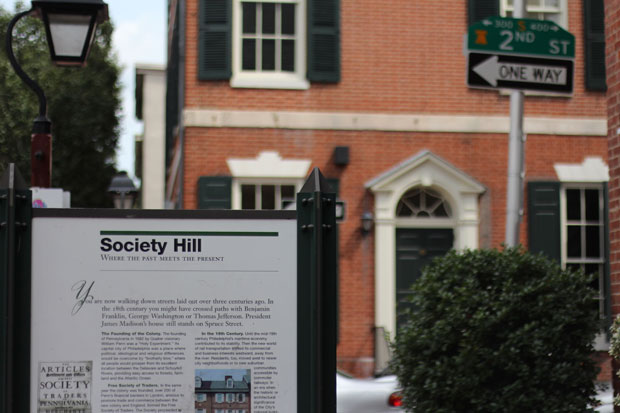
Happy 4th of July Friends! Since most people in the United States have today off, I thought instead of my normal blog post, I would share some beautiful images I captured during a visit to Society Hill in Philadelphia. As some of you may know, I do currently reside in the suburbs of Philadelphia, but a few years ago I lived in a studio apartment in Society Hill Philadelphia, one of the most historic neighborhoods in the city filled with cobblestone streets and beautiful brick architecture dating back from the birth of our nation! I hope you enjoy these images of the city I love!
As I said, the Society Hill Headhouse Square area of Philadelphia was once my home and has a very special place in my heart!
My husband proposed to me under this historic building and gathering place in the middle of a snowstorm!
The architecture in this area of the city is a beautiful mix of classical and colonial.
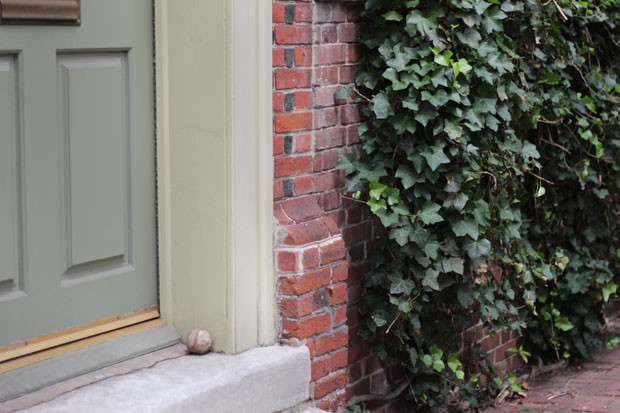
The homes are all beautiful brick, with brick sidewalks on cobblestone tree-lined streets. A haven in this busy city.
On the weekends, horse drawn carriage tours are a regular sight.
As are early American flags!
And our more traditional American Flags are abundant as well!
This breathtaking area of the city is truly Americana at it’s finest.
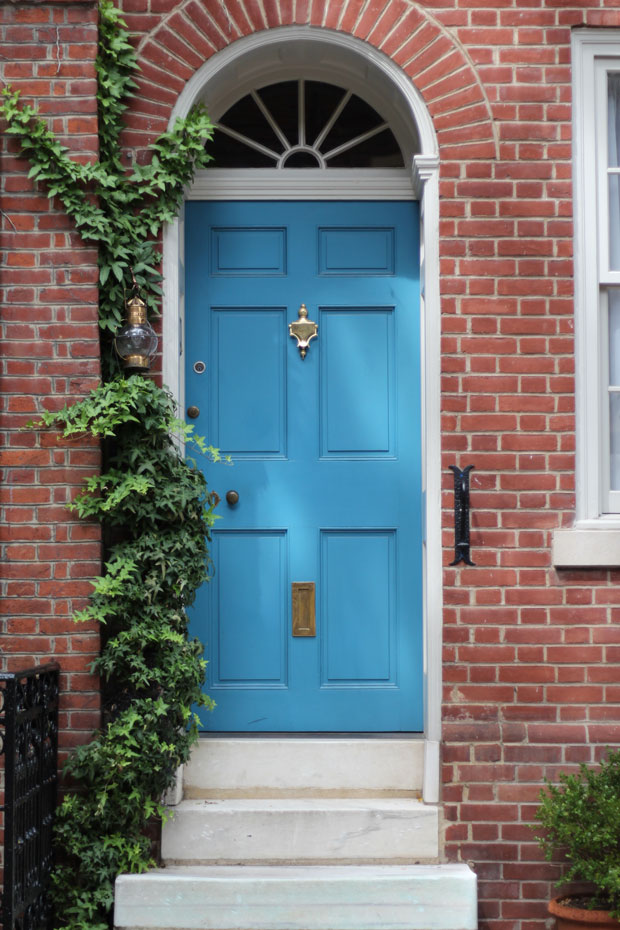
Blue doors and stunning green ivy,
Paired with unexpected whimsy!
There is certainly nothing better than exploring this sleepy neighborhood of the city,
and taking a moment to let your surroundings take you back to the birth of the nation!
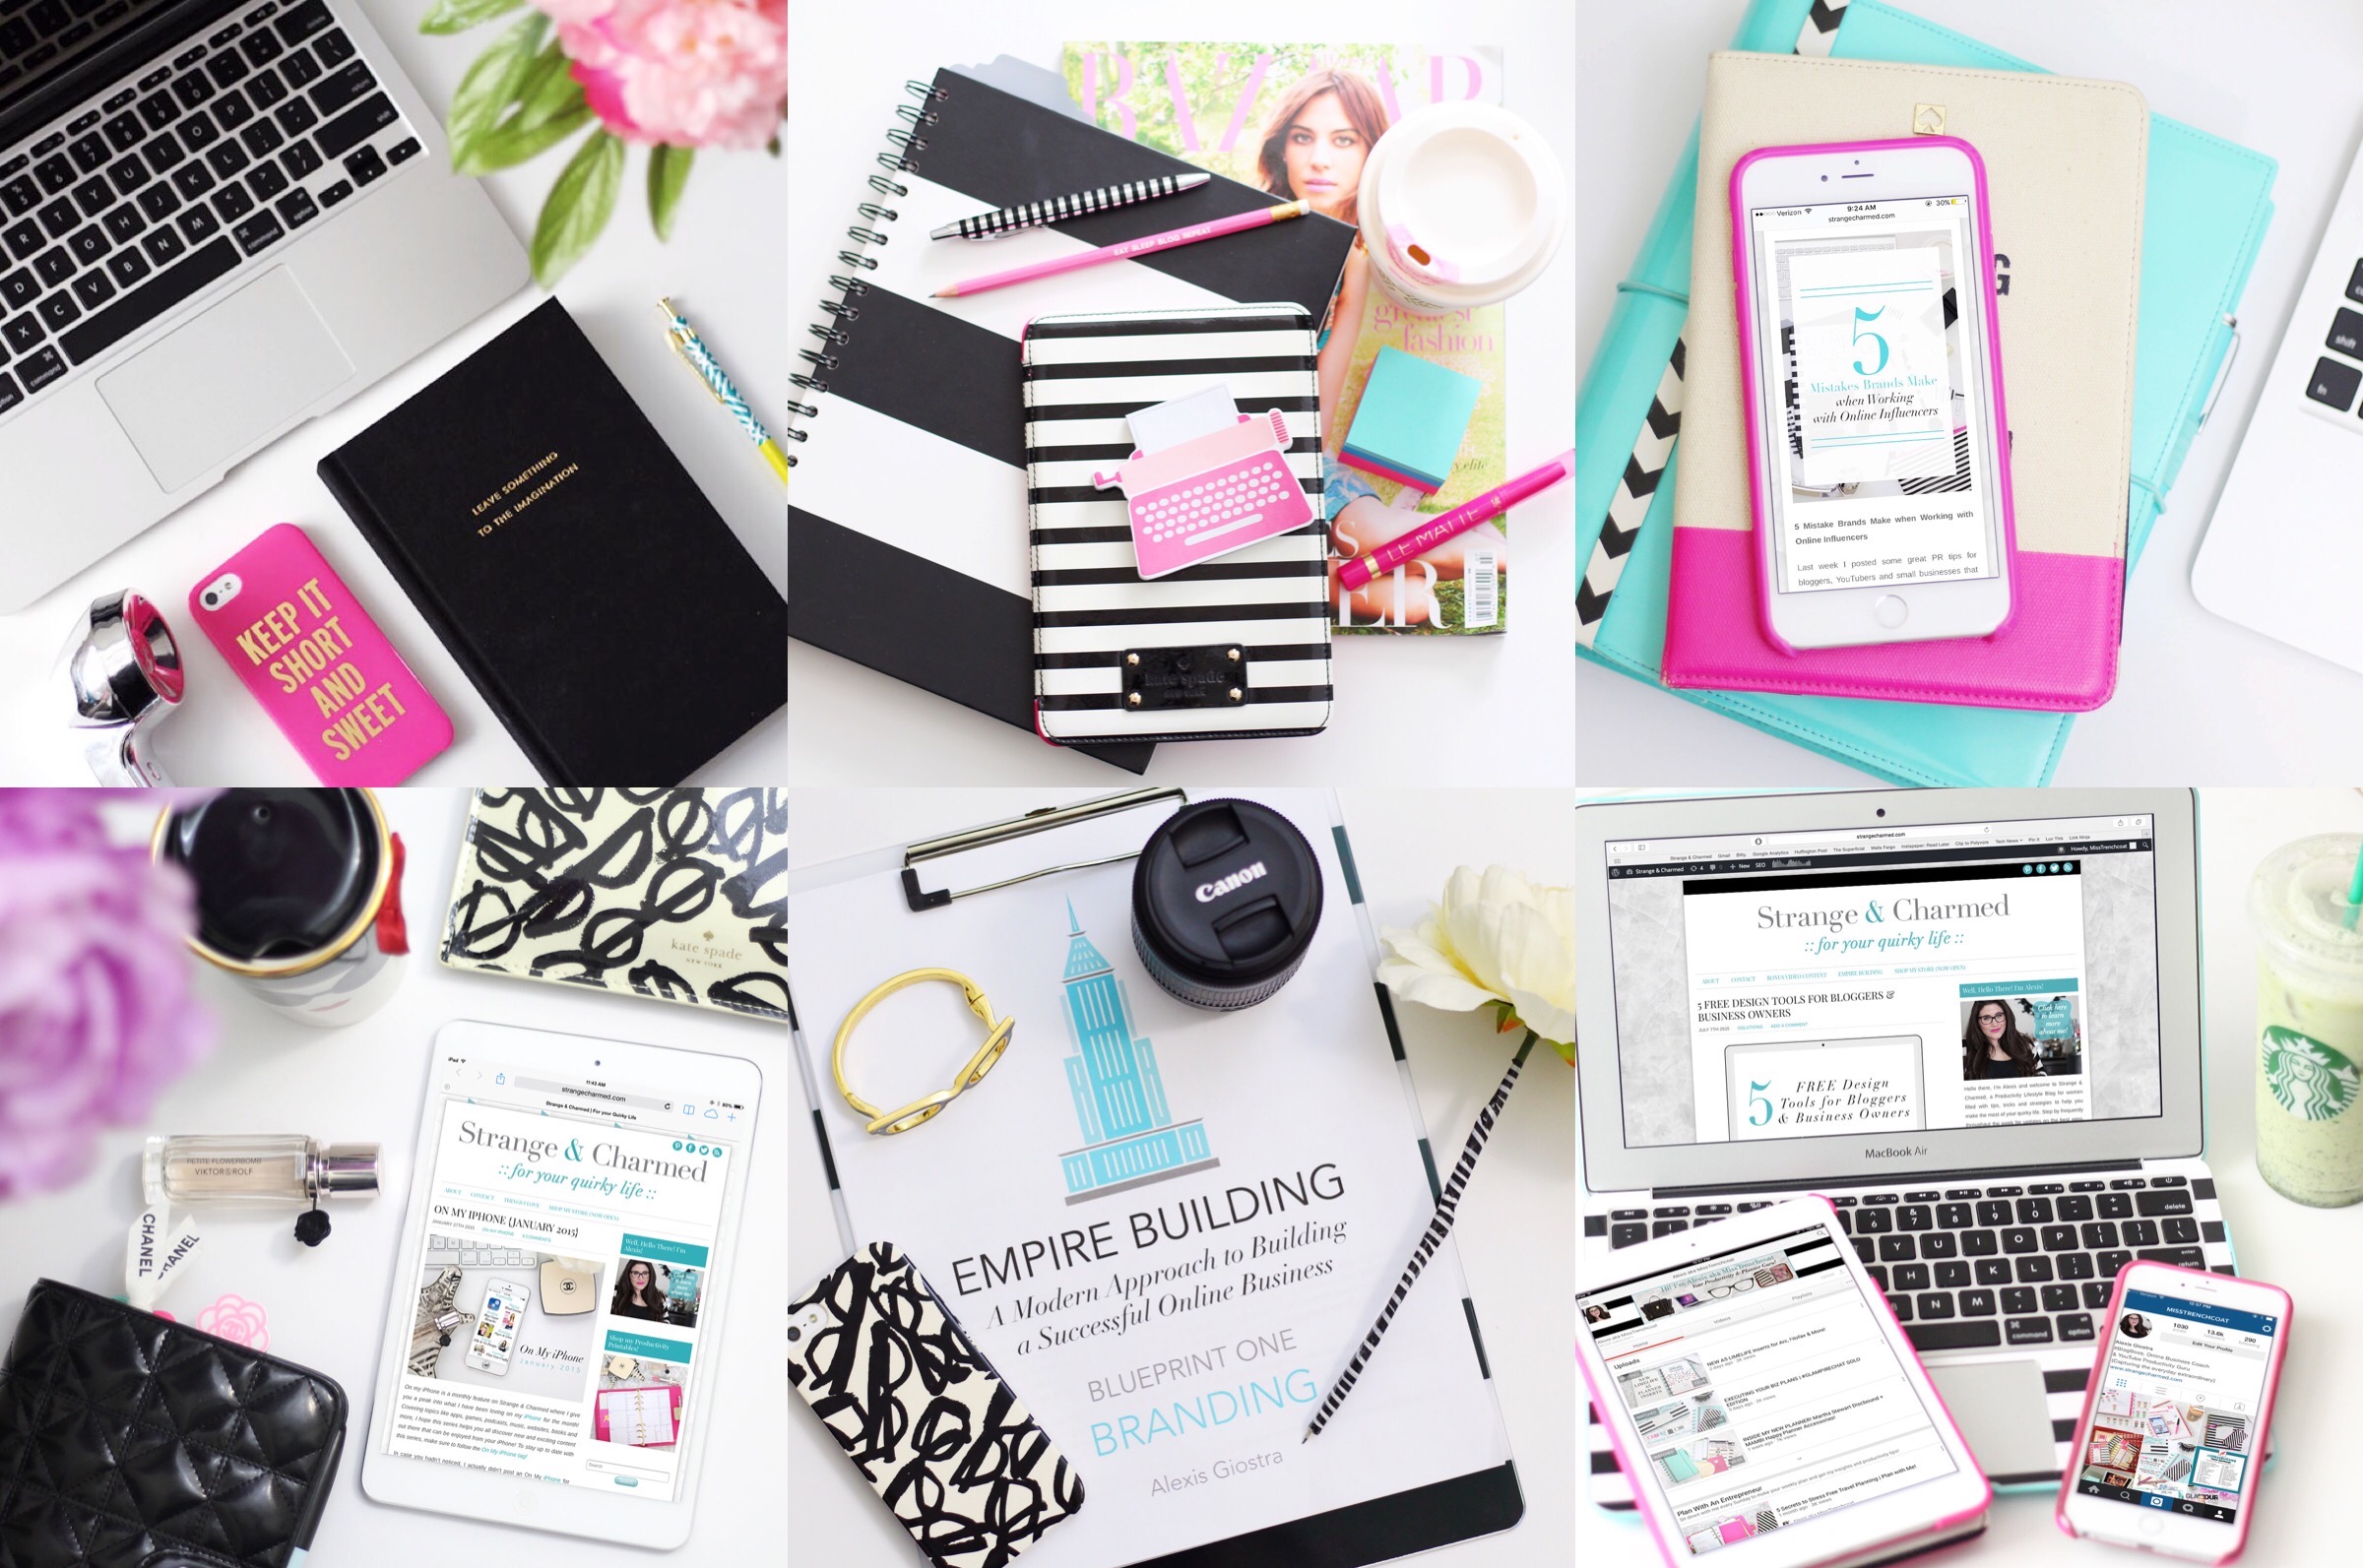
You’ve seen it before, on Instagram, on that blog you love, all over Pinterest! Styled Stock Photography is used by brands and businesses everyday to convey a specific customer experience with their online audience. Essentially, Styled Stock Photography is a form of still-life photography that is used by marketers to help brand build visually online. From immersive visuals on a website to perfectly styled product shots on a ecommerce shop, Styled Stock Photography is the way we sell our brands online visually. The web and social media presents a unique challenge to brands and businesses that Styled Stock Photography solves. On one hand, we can use the power of the internet to connect with more people than ever and share our vision for our brands and products in a matter of moments. But on the other hand, the congestion of the internet and the lack of a real human touch online makes it harder for businesses to stand out and develop a personal connection with their potential customers. This is where Styled Stock Photography comes in. It’s trite, but a picture is worth a thousand words, and the images that you use to convey your brand, business and products to the world is an essential part of developing that personal human connection with your audience.
Maybe… You are a blogger who wants to up level their brand to attract more readers, more sponsors and more opportunities online.
Perhaps… You are a creative business owner that needs to create eye catching and drool worthy images of their products for social media or their ecommerce shop.
Or… You are an online marketer that wants to build a cohesive, and worry-free brand online!
Why can’t I just take styled photography from online? I see people doing it all the time!
Great question! The Digital Styling Lightroom is a course that was designed to help bloggers, online marketers and creative business owners create a cohesive brand online, and unfortunately, using other peoples images online won’t just hurt your brand, it can also put you in legal trouble! Years ago it was the norm for people to turn to the internet to find images to use in their blog posts or sales pages, but now copyright laws are cracking down on internet fair use and more and more you hear about bloggers or businesses that are being sued for thousands of dollars for using an image without permission. Whenever you use an image that isn’t your own, you are taking a major risk, and I don’t know about you, but I personally don’t want to put my business at risk like that!You may also be familiar that there are now many places online you can go to purchase styled photography. Ever since copyright became a major issue for online brands, photographers and businesses have been popping up all over the place to sell styled stock images to bloggers and business owners. However, the plain fact of the matter is that if you can buy an image from one of these sources, so can anyone else, including your competitors! Remember, the Digital Styling Lightroom is all about building a cohesive band, and you can’t build your own brand and expect it to stand out online if you are using images that anyone can buy sold by photographers that are taking generic styled shots that can appeal to businesses across the board. Your Styled Stock Photography needs to be personalized and branded to YOU!
What you will learn in the Digital Styling Lightroom!
The Digital Styling Lightroom (or DSLR for short) teaches you everything you need to know in order to compose, shoot and edit Styled Stock Photography. The aim of the course is to guide you to create your own Styled Stock Photography Library, a collection of branded images that you can use in a variety of places online to help promote and strengthen your brand. Everyday I need new images for social media posts, blog headers, website banners, product shots and more, and your Styled Stock Photography Library is going to be the most valuable resource you have for your business.
Let me walk you through the course and what you will learn!
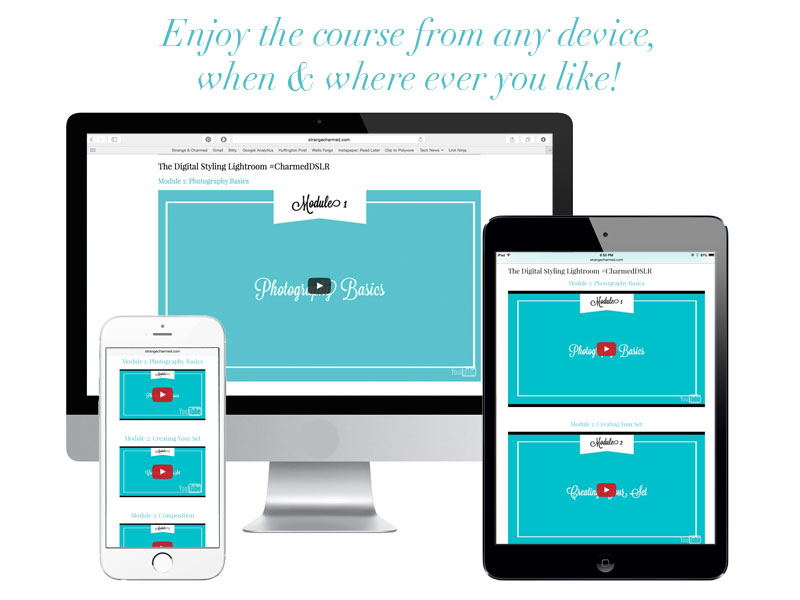
The Digital Styling Lightroom is a 5 Module Video Course. After you purchase DSLR, you will be given a QuickStart Guide to help you access the Course Members Area where you will find the 5 Video Modules ready for you to hit PLAY! The Members Area is completely mobile friendly, so you can enjoy the course from any internet enabled device.
Module #1: The Fundamentals of Digital Photography will teach you…
The Equipment I Recommend
How to Use a DSLR Camera
Where and when to use Styled Stock Photography
Module #2: How to Create a Set for a Styled Photoshoot will teach you…
How to get perfect lighting
The essential elements of a set
How to brand your set to your business
Module #3: Formal Photography Composition will teach you…
Classical and modern composition
Using multiple composition types in an image
Where to place your props
Module #4: My Exact Styled Photography Workflow will teach you…
How I set up and shoot my styled images
The 5 types of styled shots I recommend you have in your Styled Stock Photography Library
My thought process for composing great images.
Module #5: How to Edit Your Photos & Create Effective Advertisements for Your Business in Photoshop will teach you…
How to turn your photos into visual graphics for your website or social media
Common photo editing techniques and adjustments
How to create popular, eye catching advertisements for your website or ecommerce shop
In total you receive over 3.5 hours of video training from this course!
Downloads, Course Materials & BONUS CONTENT!
Don’t forget that the Digital Styling Lightroom also comes with a number of downloads and course materials in PDF format to help you make the most of your learning experience! Inside the Members Area you will also find:
The Course Slides
The Course Notes
A Photography Resource Guide
An Exposure Triangle Cheatsheet
My Lighting Guide
A Branded Prop Brainstorm Worksheet
A Styled Shot Guide
A Styled Shot Checklist
A Photoshop Tipsheet
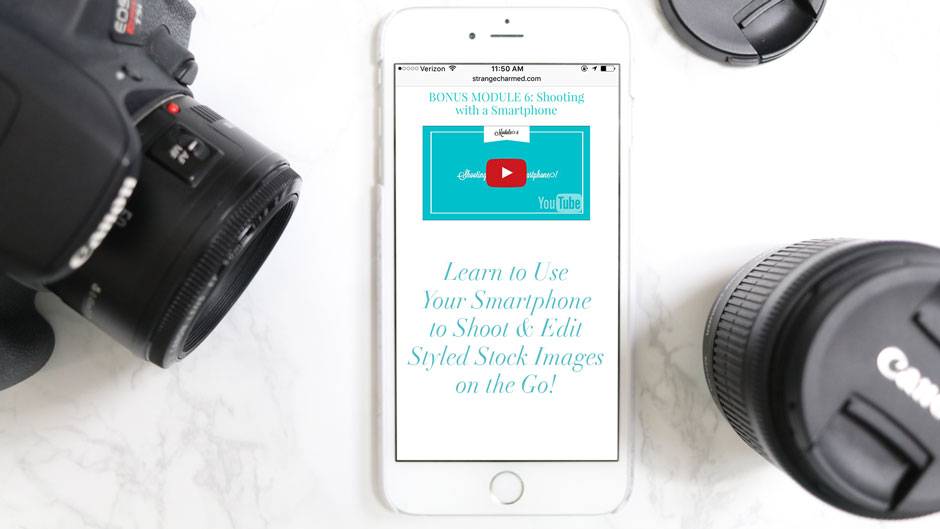
BONUS MODULE #6: Shooting with a Smartphone!
When you purchase the Digital Styling Lightroom today, you will also receive my BONUS Module #6 that is all about how to shoot and edit Styled Stock Photography on a Smartphone!
This was a highly requested module that will give you insight into how I use my smartphone to shoot styled stock photography on the go or when it’s just not convenient for me to get out my dslr camera.
The Digital Styling Lightroom Course is truly a living, breathing course and I am always thinking of ways to improve the course and make it the best it can be! When you purchase the course, future updates are yours automatically inside the Members Area!
Pretty cool, huh?
That’s my commitment to quality and value for you as my student and customer!
Still on the fence? No problem! I’m here to help you decide if this course is right for you, so if you aren’t sure your business will benefit from great styled images, eye catching graphics and perfected product shots, click here to send me an email and we can figure it out together! The best part about my course is that you are never alone- I’m here to help you every step of the way, from deciding to buy to shooting and uploading your glorious images to the web. I’m here to answer your questions and support you through the learning process!
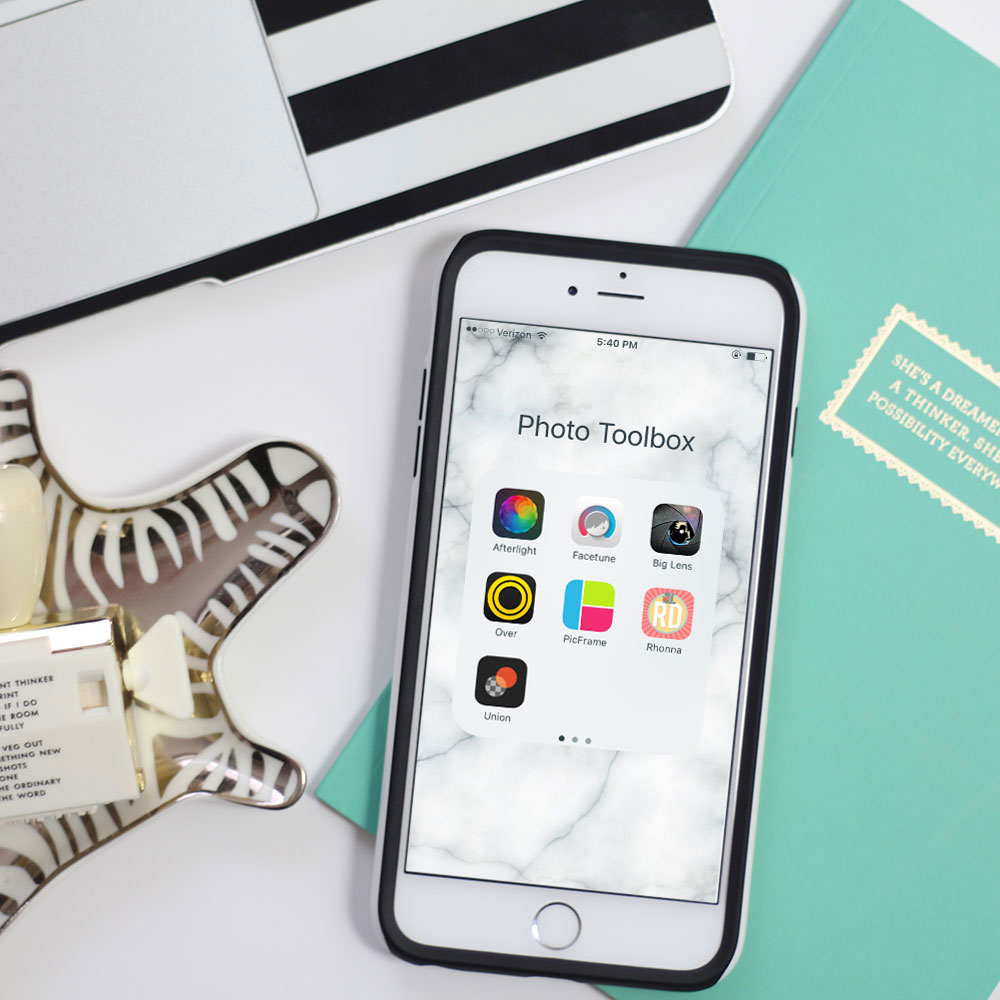
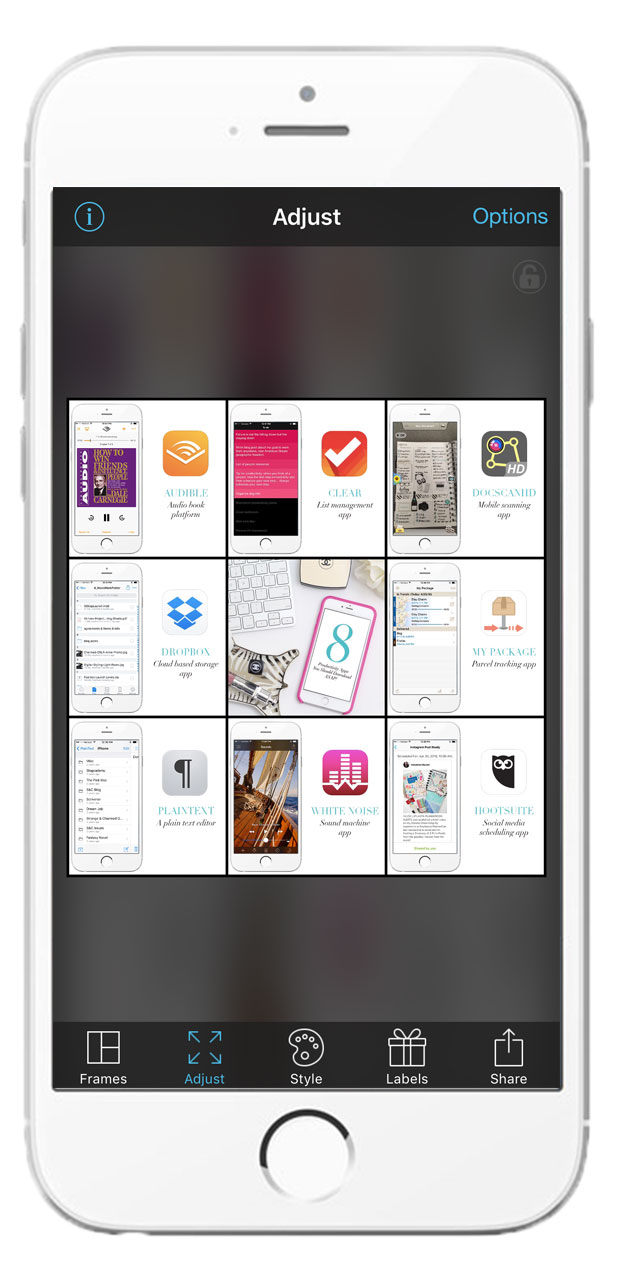
As a blogger and online business owner, I rely on digital photography for much of my online presence. From adding an image to a blog post to sharing a post on Instagram, images and photography are a key way I promote my brand online, so I rely on a whole virtual toolbox of photo editing applications on my smartphone to ensure I can optimize any image I need in a snap and on the go if need be! Here is
For general photo editing: Afterlight
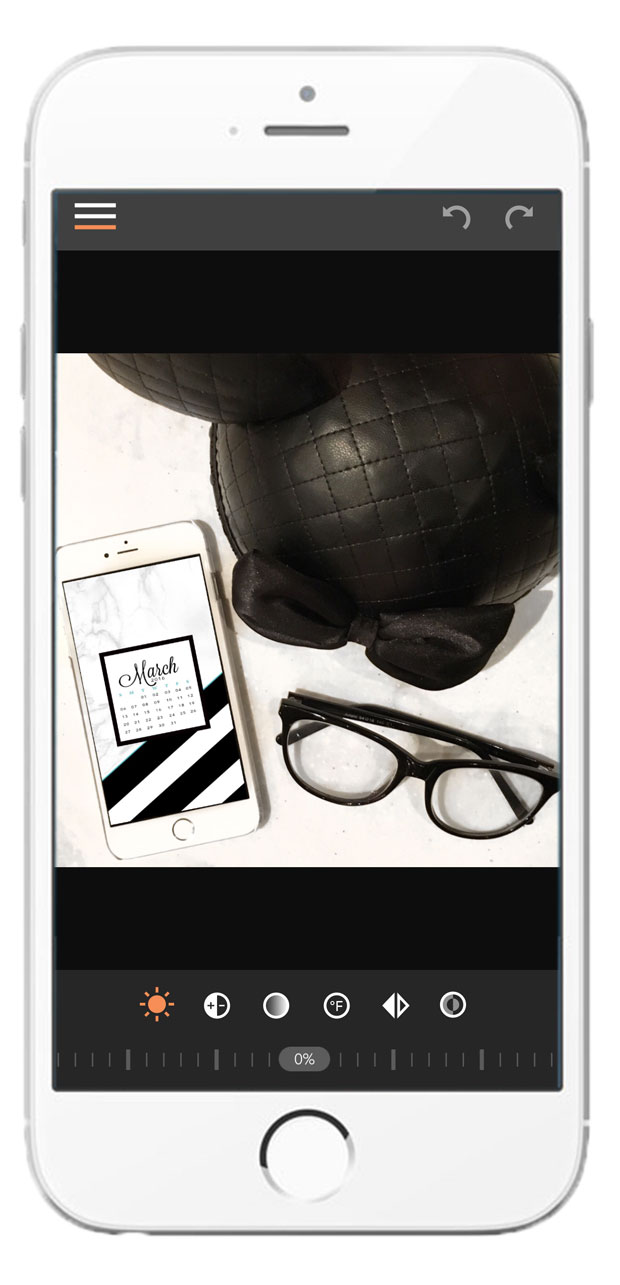
Afterlight is the go to app in my toolbox that I use for general editing like adjusting the brightness, contrast and saturation of the image. I have used many different apps to adjust these basic features, but Afterlight produces the best results by far! I also love the temperature feature inside the app that gives you the ability to remove those casts of colored light on your image that result when you aren’t shooting in full natural light! Definitely worth the download and an all purpose photo saver!
For adding and editing details: FaceTune
FaceTune is a recent addition to my iPhone photo editing toolbox that I like to use to edit the details of my images. Specifically I like to use the whiten, details, patch and tone features of the app to perfect my images. Whiten will help me change any weird color cast to a bright white color, details helps accentuate small details of the image, patch is great to cover up imperfections in a photo and tone helps me change or saturate color for an item in the image. Although this app was clearly created for selfies, it works wonders on my styled photos!
For a DSLR look: BigLens
I’ve been using BigLens for years to add a faux blur to images in order to give them that DSLR shallow depth of field look. This isn’t an app that works for all images, but for those where the subject and background have significant separation but you want your background to blur away to keep the focus on the subject, it works perfectly!
For adding text: Over
Over is a serious oldie but a goodie for adding text to any image. Although I have a few apps that can add text to images, Over is very easy to use and has a lot of simple text features that go a long way to give you precise control over the result of an image!
For making collages: PicFrame
PicFrame is another app I’ve had in my toolbox for a while and this one pretty much serves one specific purpose. PicFrame helps you create collages out of your photos which is very handy for product shots, Instagram and blog posts! Even though I also use Photoshop to edit my blog and shop images, I tend to use PicFrame to create collages so I don’t have to bother with Photoshop. It’s a very easy and straightforward app to use!
For fun promo style graphics: Rhonna Designs
Rhonna Designs is a very fun app that is great for creating fun, promotional style images. It includes a feature for adding text which I do like to use, but it also has a lot of fun “stamps” and effects built into the app to help you create eye catching graphics. Usually, these sorts of images will be shared on Instagram or Facebook because they are more of a one-time use graphic as opposed to a staple styled shot or product graphic that I would want to reuse!
For adding layers to an image: Union
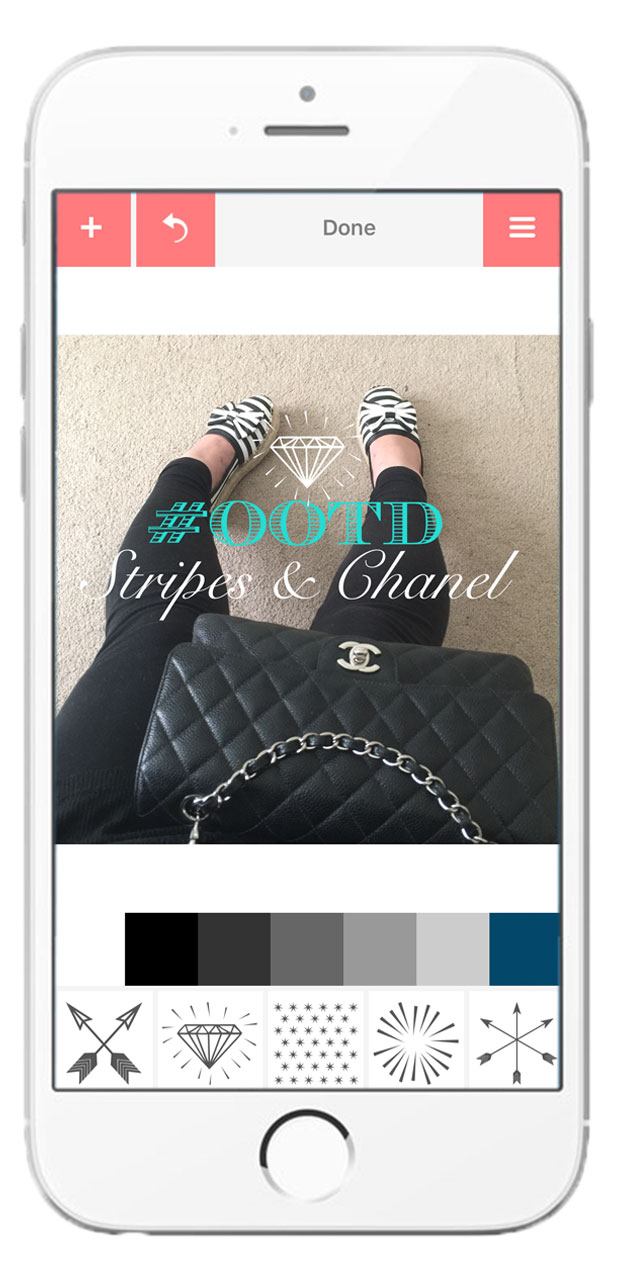
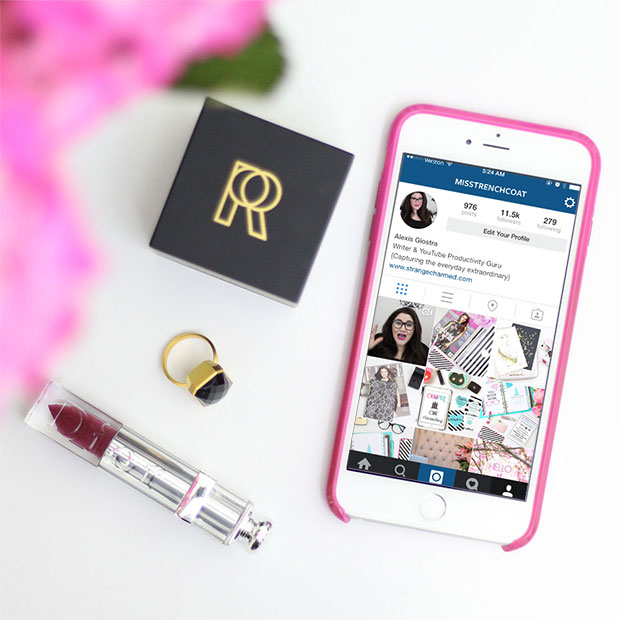
Finally, we have Union, a surprisingly powerful app that I tend to use for one single purpose; overlaying screen shots on gadgets! As the name suggests, Union is a layers based photo editor that has some very powerful masking features that give you the ability to blend different images into one, however, these powerful features tend to be lost on me as I just like to use this app to merge a lay flat image of a gadget with a screen shot so that it appears as though the gadgets screen is bright and vivid in the original image.
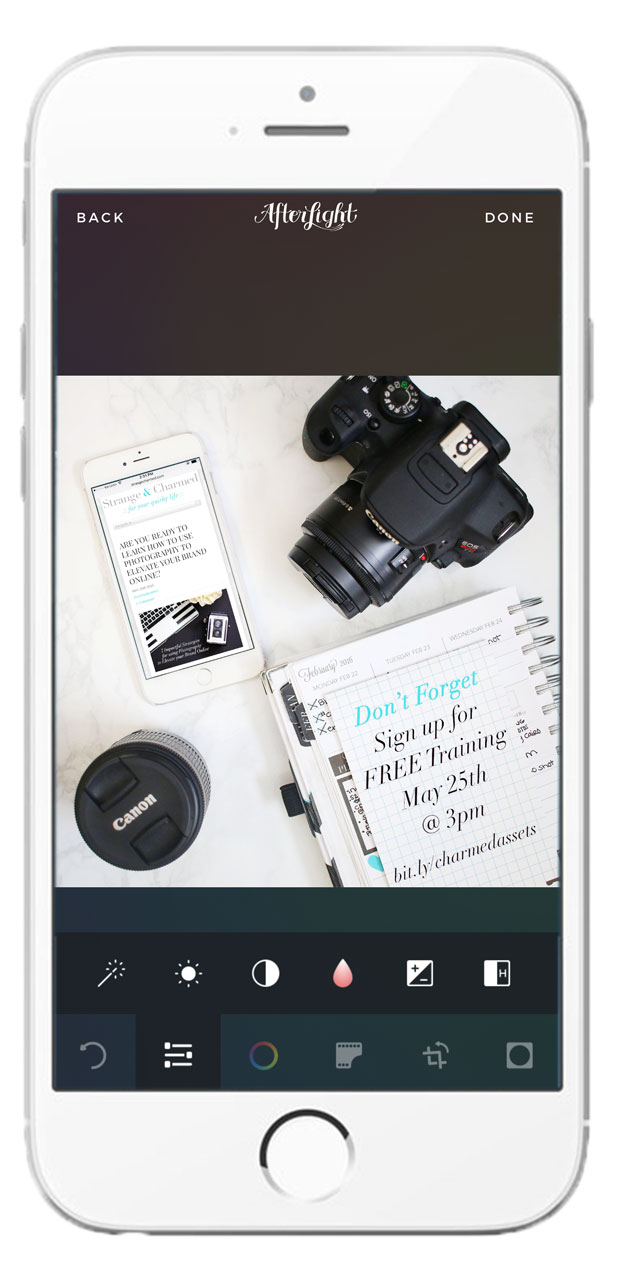
Are you ready to learn how to use photography to elevate your brand online?
If so, you won’t want to miss my Live FREE Webinar Training on Wednesday May 25th at 3pm EST! I’ll be covering the 7 impactful strategies that I use on a regular basis to spread awareness of my brand, connect with my audience and sell to my followers without ever having to make a slimy sales pitch!
I’m not sure how long you have been following me for, but let me give you a little overview of the effect these strategies have had on my brand and business since 2015. Right now I’m going to do something I rarely do, and that’s talk numbers. If you know me, you know I hate discussing numbers because numbers can sometimes be deceiving, but in this situation, I think it’s important to understand the numbers to see how effective these strategies have been for me.
Instagram
At the start of 2015, my Instagram following was roughly 4,500 and it took me a few years to hit that number. My current following is roughly 21,800 followers. Since January 2015 when I instituted these effective strategy changes, I’ve been growing at an average of over 1,000 new followers a month! Imagine if each month, you had 1,000 new potential customers or clients. What would consistent traffic like that do for your business?
Site Traffic
From the end of 2014 to the end of 2015, my site traffic made a dramatic leap! My total page views to my website were about 430,000 in 2014 but they 3X’d to over 1.5 MILLION page views in 2015! Understanding some key strategies for how I used my photography made a tremendous impact on my already thriving website and all this new traffic lead me to one very important thing, higher revenue!
Shop Revenue
Growing my social media following and website traffic has been an awesome side affect of my new photography strategy, however, the most impactful growth for my business has been, hands down, the growth in my shop revenue! From 2014 when I launched my shop to end of 2015, I have 6X’d my revenue! And that’s just the start! Q1 2016 results are showing even more growth for my business and there is no doubt in my mind that some key strategies are responsible for the tremendous success I’ve been having.
Amazing results? Right? You too can pick up hundreds of new followers a month, increase your page views and grow your revenue by using my strategies!
I’m confident that if you too implement these same strategies, you can see similar results for your brand! I’m sure you are eager to learn these strategies, and I am eager to share them with you, so also I’ve gone ahead and put together a study guide for you to use during my webinar to follow along, and identify the action items you need to take for your own business!
To get access to both the Live Webinar Training and the Study Guide for the event, click here to reserve your seat for the event on Wednesday May 25th at 3pm Eastern. You will also want to attend live because I will be sharing some exclusive goodies for live attendees, however, if you cannot make it live, there will be a replay available for a limited time!
So that is all for now! Can’t wait to see you on the webinar training and I’d also like to encourage you to share about the webinar with your friends on social media so they can attend as well! If they are bloggers or business owners, I bet they will thank you for the invite!
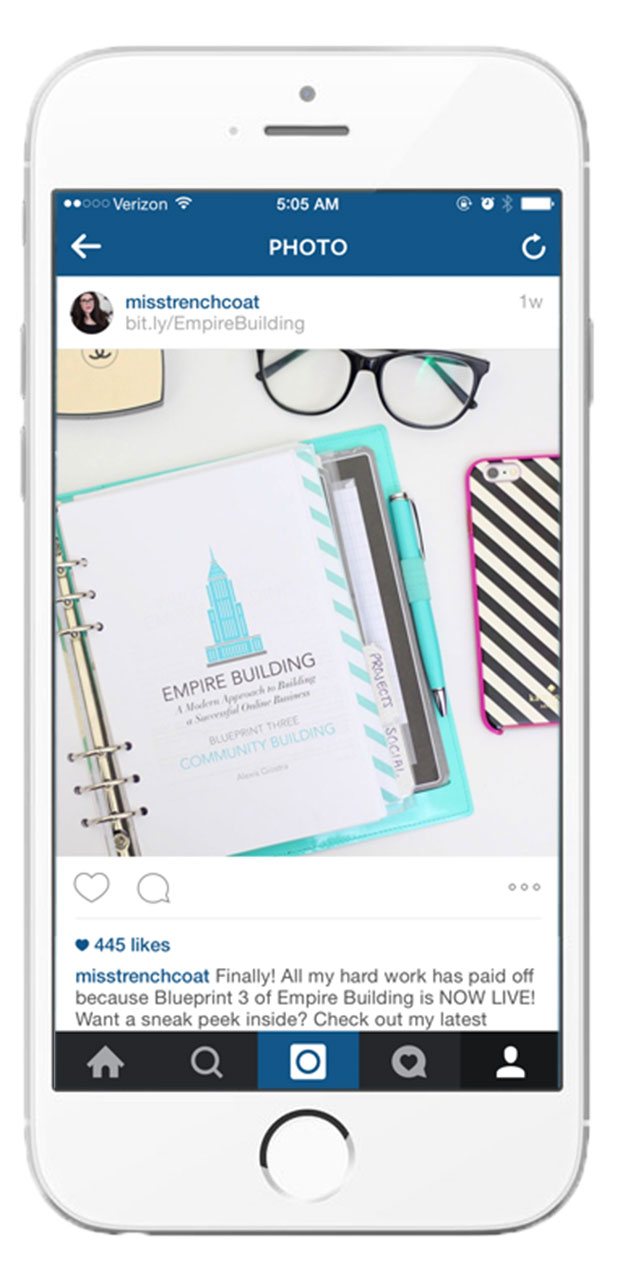
We all know that Instagram is currently the fastest growing social media platform, so now more than ever, business owners— especially online entrepreneurs— should be using the application to the best of their ability in order to drive more traffic to their site and ultimately make more sales via the application. Unfortunately, Instagram doesn’t make it especially easy for businesses to drive leads and make sales, but a savvy business owner knows that there are ways out of this jam! So, today, I wanted to share with you three simple and easy to implement tips that you can use right now on Instagram to help you make the most of the platform and gain new followers and well deserved sales!
1. Take Styled Product Shots
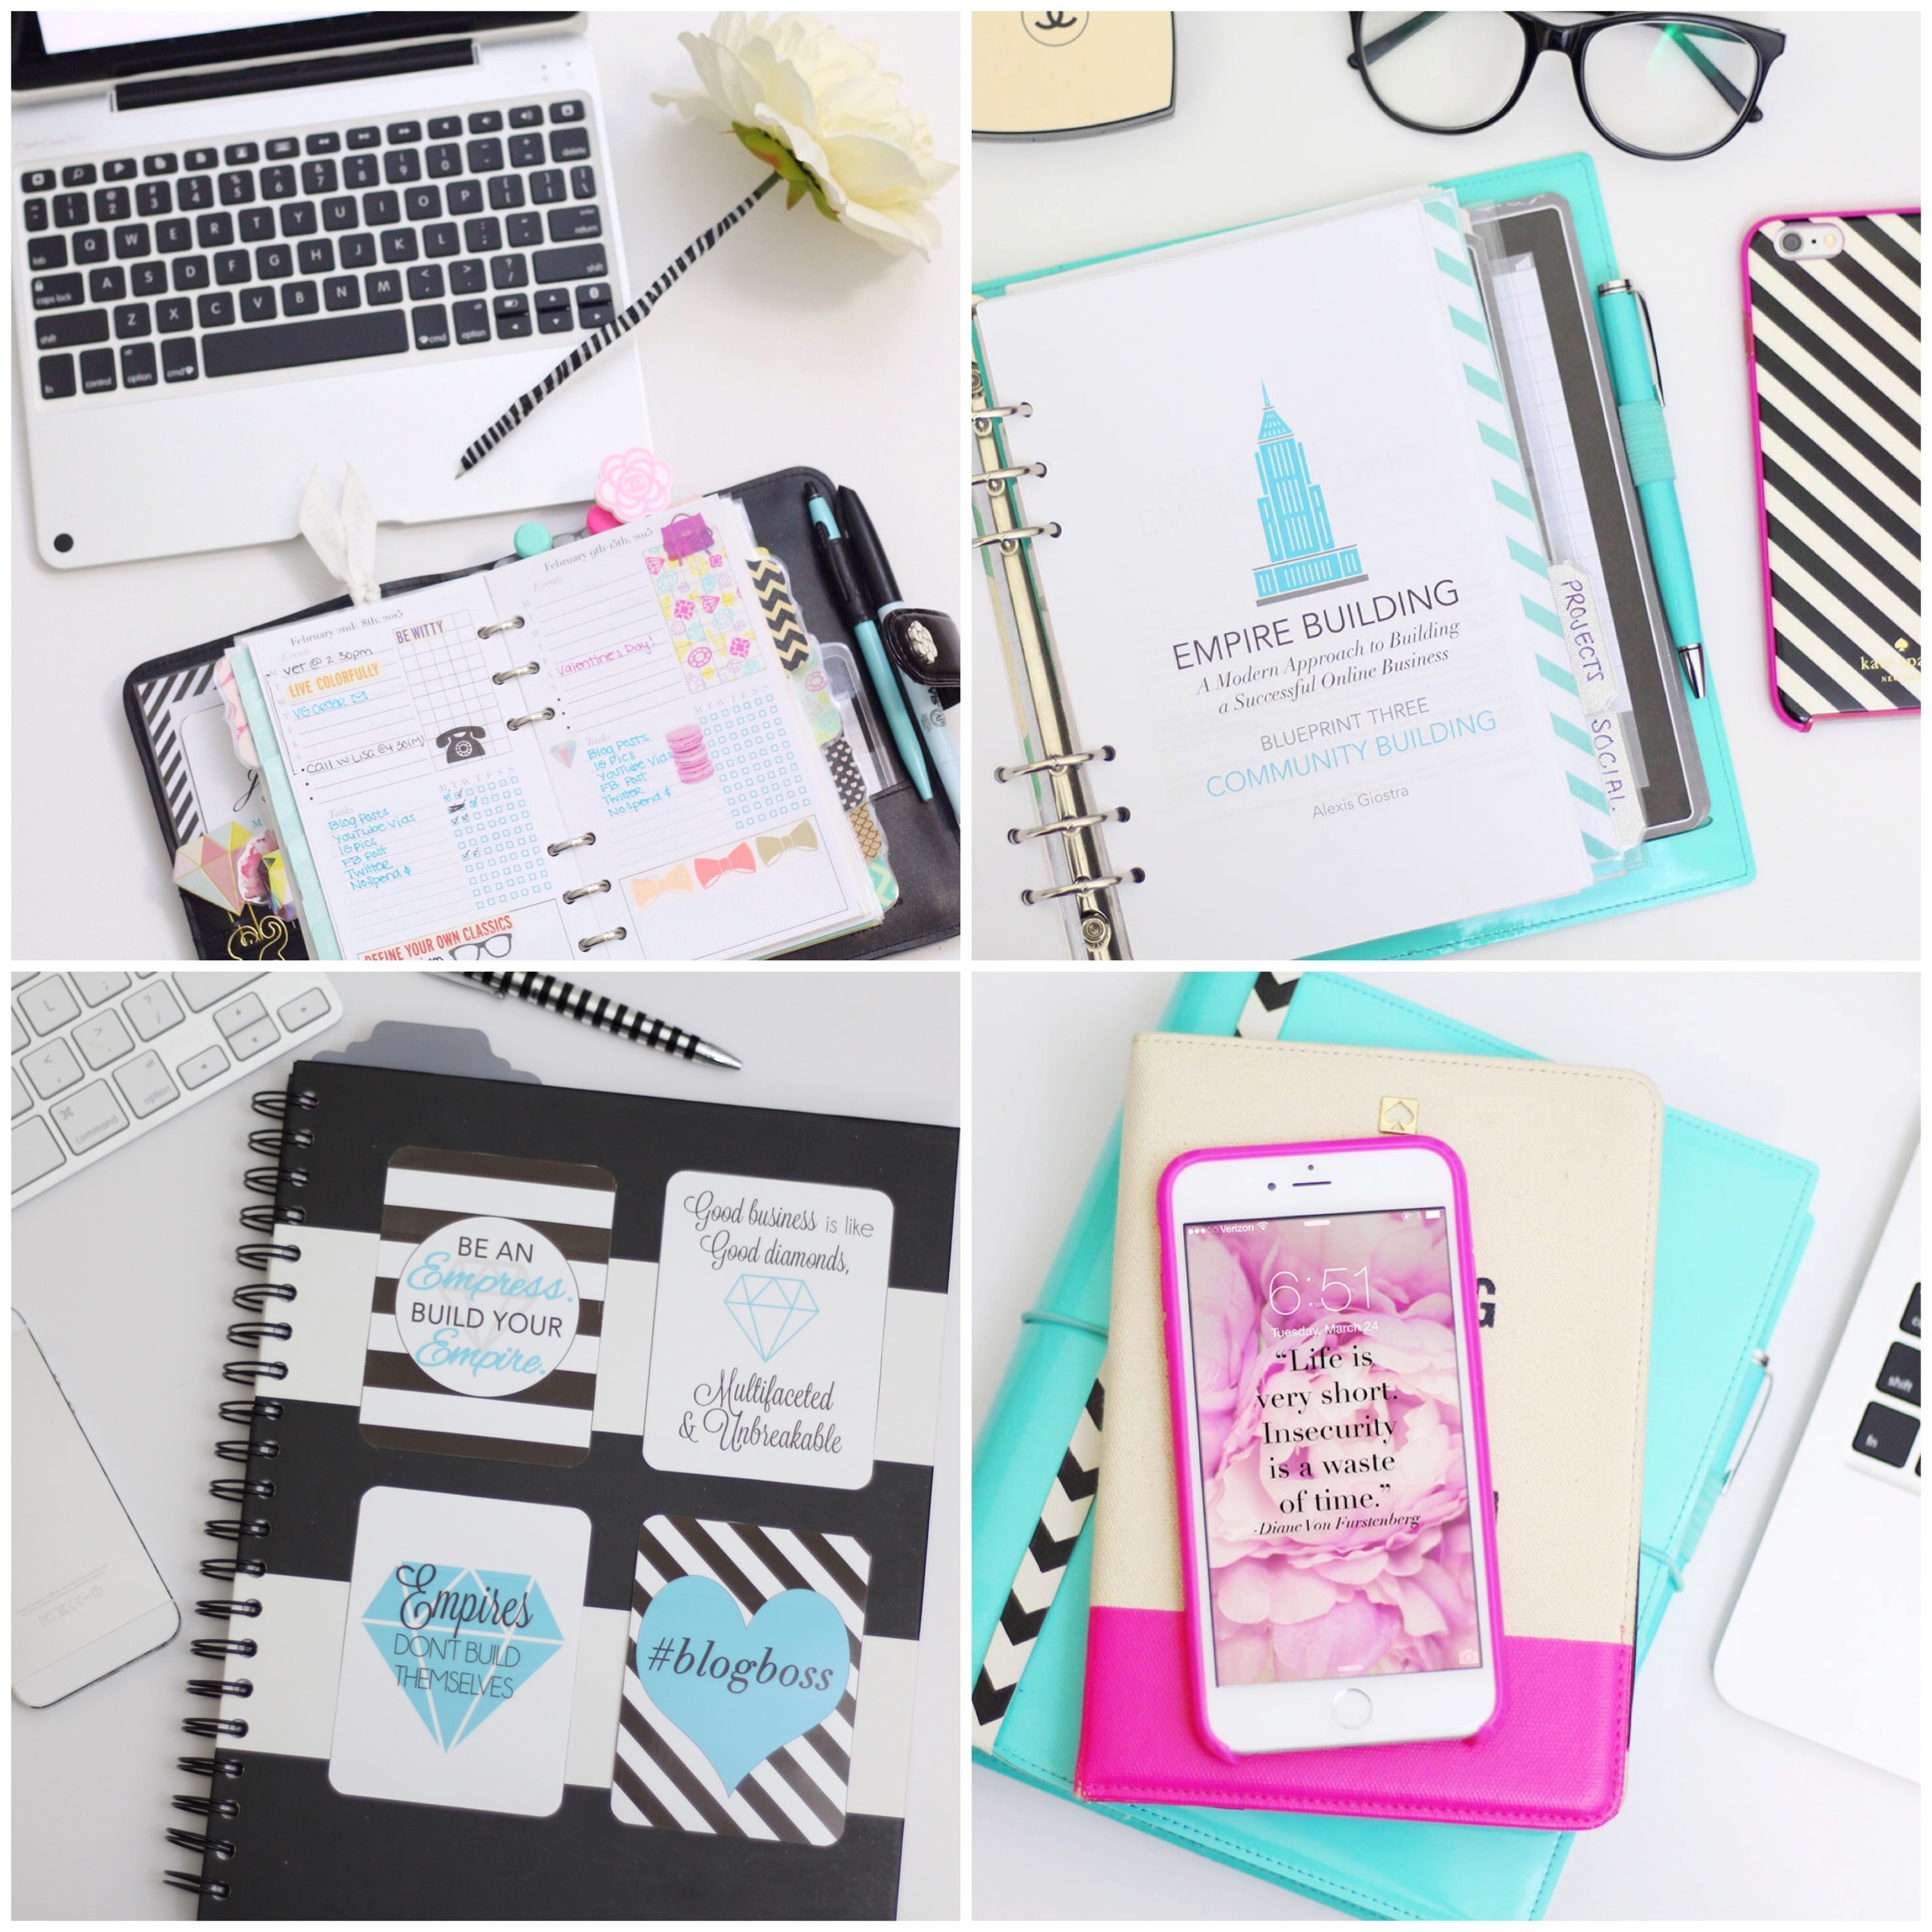
The first thing that every business owner should be doing on Instagram is taking styled product shots. I wrote a whole post about how I take mine so check that out if you want more tips on this specifically, but obviously nothing is going to get you further on Instagram than great photos. If you sell physical or even digital products, you should be styling those items into shots to share. Above are a few examples of styled product shots for my digital/virtual products to give you some ideas. If you sell services, you too need to be styling shoots, but instead of showing a product you need to convey a message that aligns with your service. A home organizer may want to share styled shots of organized pantries and linen closets, a dog walker may want to share pictures of happy pets, whatever your speciality, get creative and start shooting some images that show your work in action!
When I said that Instagram doesn’t make it especially easy for businesses to drive leads and sales, this has to do with the fact that the application only gives you one single location for utilizing clickable links. For an online business, direct links to products, email lists or other online platforms is crucial to gaining more of a following and achieving more sales. To work around this issue, I highly suggest using a free resource called Bit.ly which allows you to take long URLs and turn them into custom short links. I then use these links in my Instagram feed by listing them as my location so that the link is clearly visible. Now, the link still isn’t clickable, but the idea is that a unique short link is easier for people to remember and if they are curious they can quickly type it into their browser and get immediate access to whatever you are promoting! Because I run an online business, I make sure that my location services are turned off on my phone before doing this so that the link doesn’t become a live location link for me, but if you run a brick and mortar or do want to mark your geographic location, feel free to skip this step!
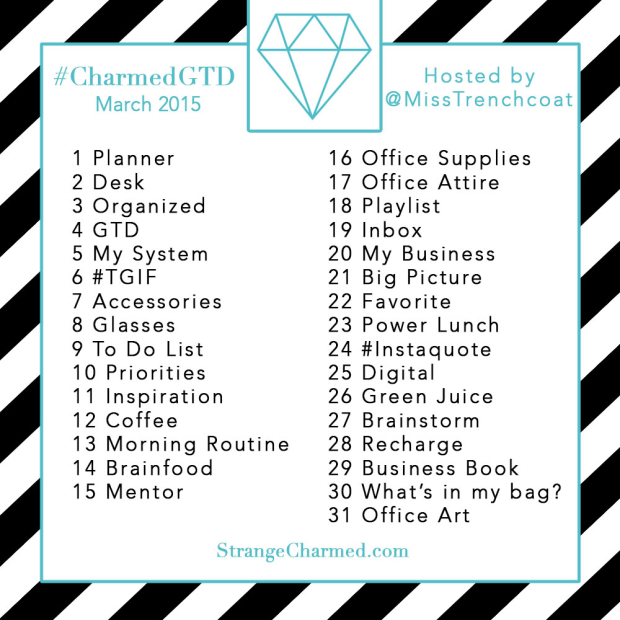
3. Host a Photo Challenge
We’ve all see and perhaps even participated in a photo challenge hosted on Instagram, but have you utilized this great community building activity for your own business yet? If not, it’s a very simple promotion to set up. First, start off with a simple graphic of daily prompts related to your industry or the type of challenge you want to host. Above is an example of a graphic from a recent photo challenge I hosted which brought me thousands of new subscribers in just one month! Next, you will notice I gave my photo challenge a simple yet custom hashtag that is unique to me that people could use to tag their images. This is an important step you want to make sure not to miss because you want people to use that hashtag and that hashtag needs to lead them straight to you, so get clever with the tag but also try to keep it short and simple! Finally, you are going to want to set the time frame for your challenge and promote it through your Instagram and other social media platforms. I’d also suggest getting some friends or loyal customers on board with helping promote and share the image so that it gets around to as many people as possible. Once the challenge begins, feel free to take part in it yourself if you’d like, or simply spend some time each day going through the custom hashtag, liking and commenting on the photos from your participants. The more interaction you provide, the more followers you will garner for yourself!
Those are my three tips for business owners to make the most of Instagram! Like I said, these are all simple enough to achieve and implement immediately, so I highly suggest spending a few minutes today (or scheduling some time coming up on your calendar) brainstorming some styled shots, and working on a photo challenge to promote your brand! Make sure you sign up for a free bit.ly account and start using those custom links asap, you can even go back and edit some old images with relevant links if need be! Let me know if this post helped you and if it did, I would love if you would share it in social media. Leave a link to this post in your Facebook feed or Tweet a link to it out! That’s a quick and easy way to share my content and I sure do appreciate it! Oh, also make sure you are following me on Instagram @MissTrenchcoat and if you want to learn more about how to use photography to help build and promote your business, sign up for my upcoming webinar on Sunday February 21st titled “The 5 Photographic Marketing Assets You NEED to Build a Cohesive Brand Online!” If you are interested in building your brand or business online, this webinar is going to teach you about the images you need to make it happen for yourself and provide some examples and strategy that you will want to implement asap! If you are interested, please sign up for the webinar here!
xoxo,
This post originally appeared on Strange & Charmed on May 14th, 2015 and is being reposted as a Throwback Thursday where I select high value content you might have missed, and share it for any new members of my community! I hope you enjoy this feature!
5 Stress Free Steps to Grow Your Instagram Following!
As you may already know, the other week I hit 20k followers on Instagram, which I was super thrilled about! My growth on Instagram has been a great testament to the fact that you don’t have to do a lot of work or feel overwhelmed hustling to grow your following. Once you find your niche, you can easily integrate slow, steady, sustainable growth for your account, even if you are like me and only want to post about one picture a day. You don’t need to overdo it on Instagram to make an impact, and your Instagram growth definitely shouldn’t be a source of stress for you and your brand. These 5 simple steps will help get you started!
Step 1: Choose the Theme for Your Account
In order to create an Instagram Account that grows consistently, you need to have a clear vision for the theme of your account. What will you be sharing, what types of photos or things you will show on your account, and what will people come to expect to see from you? You need to understand these key items in order to create a consistent theme for your account that is attracting a specific follower that shares your specific interests.
Step 2: Develop a Consistent Posting Schedule
Whether you want to share once a week or multiple times a day, it’s important to define this frequency and stick to it as much as possible. Consistency in your posting will help develop trust between yourself and your followers will ultimately help you gain more followers to your account.
Step 3: Share Great Posts
Remember, your Instagram post consists of two parts, your image and your description. Make sure you are using great photographs first and foremost, but also make sure to take time to craft eloquent descriptions. Although a picture says a thousand words, the message you choose to leave in the description of your post will go a lot further into developing your themes and your relationship with your followers. People love to feel connected to others online, make sure you use your images and descriptions to connect!
Step 4: Use Relevant Hashtags
Hashtags are the search engine of Instagram. If you want to be discovered by new followers and grow your audience, you are going to need to use hashtags to help you get it done! When it comes to hashtags you have a few rules you need to understand. First, you need to use relevant hashtags, meaning, the hashtags people would be using to find your image that make logical sense. If you aren’t sure what these tags would be, just do some research in Instagram and see what existing hashtags have a lot of pictures and if those pictures are similar to yours. Another thing you need to understand about hashtags is that, in my opinion, you should use as many relevant tags as possible. When I was in serious growth mode for my account, I was using around 20-30 hashtags and I think that is reasonable. Instagram does cut you off if you use to many so keep that in mind.
Step 5: Interact with Others!
The final step to growing your Instagram account is to make sure you are interacting with others in the app. Make sure you are replying to comments left on your posts, reach out to other creators on Instagram that are within your market or niche and collaborate, and of course, make sure you support the accounts of your best followers as well by liking and commenting on their posts as well. Remember, Instagram is social media, and the point of it is to be social. You’re not going to grow by posting a picture and walking away from your account, you need to interact in order to gain followers!
I hope these steps have shown you how a few key actions can help you grow your following on Instagram without stress! If you have more questions about taking great photos for your account, make sure to check out this LIMITED TIME OFFER on my Photography Styling Course, The Digital Styling Lightroom which walks you through how to style, compose, shoot and edit great photos!
One of the questions I get asked most frequently is about how I get that perfect styled shot for my blog and Instagram photos. The truth is, there is nothing glamorous or specifically hi-tech about how I achieve these shots, it’s a few low budget items, a nice camera and a whole lot of practice! While their isn’t much that really goes into shots like these, they are hands down my favorite photos to take because I love the challenge of setting up a styled shot that is inspired and lovely. I know it may sound silly, but I take these shots for myself more so than I do for anyone else. You wouldn’t believe how inspiring these shots are for me personally, they are like my personal art form for expressing myself and a lot of thought and curation goes into each shot I take. So, if you would like to know my tips for taking the best styled shots, here you go!
White foam board: One of my biggest tips for taking that perfect styled shot is to use white foam board to shoot on and also as a reflector for the light in your image. When you shoot on a flat white surface such as foam board, the colors and objects in your photos always stand out and look super clear! I like to use one piece of foam board to style my items on and another piece of foam board to bounce the light onto the scene. It helps to get that clean crisp look without any hot spots of light since I don’t let my light source fall directly onto the scene.
Studio lights: I always shoot my styled shots with my studio lights. Usually just one from my set will do the trick. Because I want my shots to look as clean as possible, I find that my studio lights are the best way to achieve the whitest whites and the truest colors for my images. The studio lights I use are seriously nothing fancy, the whole set was relatively inexpensive and easy to store away, here is a link if you’re interested in checking them out for yourself.
A high quality camera: I shoot all of my styled shots with my Canon EOS Rebel T5i and my 50mm 1.8 lens. I find this combo works great and produces the best shots. When taking aerial shots such as the ones pictured above, I tend to set my aperture to 2-2.8 and place the focus on an object in the center of the scene. That way any items that are closer to the foreground, like flowers in a vase, get that lovely blur, but all the objects laid out remain in focus!
BONUS TIP!
Another question I get asked a lot is how I get the screens of my gadgets to look so bright in the photos I take, and the answer to this is simple, I don’t! Whenever you see an image of mine that has a gadget screen visible, I have taken that shot with the gadget turned off, taken a screen shot that I want to use from the gadget in question and superimpose the image onto the photo in post processing via Photoshop! It’s nearly impossible to achieve that sort of look in a real photo because you can either expose the lighting for the overall image or expose for the gadget screen, but you can’t do both, so I find this method is the simplest and creates the best photo over all.
So, now that you know my secrets to great styled photo’s, I can’t wait to see what you all come up with! Make sure to tag me in your Instagram photos @MissTrenchcoat so I can check them out and of course leave you a like and comment! Feel free to leave me your photo questions as well in the comments and I may answer your question in a future post!
xoxo,
This post originally appeared on Strange & Charmed on April 9th, 2015 and is being reposted as a Throwback Thursday where I select high value content you might have missed, and share it for any new members of my community! I hope you enjoy this feature!
Last week, I hit 20,000 followers on Instagram! Thank you all so much for your support and interest in my work. I love that you get as excited as I do about my images because I do truly enjoy photography and there is nothing more fulfilling to me than to help others advance their skills as well, so today I just wanted to take some time to share a video I made last year on the subject of how I style and edit my photo’s for Instagram. If you are looking to replicate my IG success, I suggest checking out this video and keep an eye out on my blog this month because I am going to be sharing some content to help you use photography to advance your brand or business online.
Click here to check out the video in case you missed it, or if you just need a refresher!
There is one other little thing I wanted to let you all in on as well! I will be hosting a special webinar on Sunday February 21st titled “The 5 Photographic Marketing Assets You NEED to Build a Cohesive Brand Online!” If you are interested in building your brand or business online, this webinar is going to teach you about the images you need to make it happen for yourself and provide some examples and strategy that you will want to implement asap! If you are interested, please sign up for the webinar here!
Can’t wait to see you all on the LIVE webinar on the 21st!
Well, it’s the most wonderful time of the year and you know what that means? There will be many, many moments that we will be eager to capture on film, or well, on our phones! So, I thought this would be the perfect time to discuss some very important photography skills to ensure that you are always capturing that perfect moment. You don’t have to be a professional photographer to get great shots, you just need to know these five key tips!
1. Never let your subjects know you are going to photography them: If you do, they will start to pose or shy away and although a nice little pose can be cute, these types of pictures aren’t always the best or most natural. If you want to get some good shots, don’t let your subjects know you are about to photograph them. Make sure your phone or camera’s shutter noise is turned off (there is usually a way to stifle it in your settings) and summon all your ninja skills to keep your subjects unaware of your presence and the presence of the camera. This is one of those times when using a nice fancy DSLR may actually not be to your benefit because that sort of camera is obvious. Using your phone, however, may be a good option to get in all those sneaky photos. Just pretend you’re using an app or checking messages!
2. Wait for your subjects to interact: If you wait for your subjects to interact with something like an object or another person, you will get a much nicer scene to photograph. Great moments to catch are conversations, children (and adults) playing with presents, and special embraces.
3. Look for movement and gesture:Some of the best moments to capture are ones where you subjects are in action. Unwrapping presents, talking with their hands, and cooking all make for really special candid shots!
4. Zoom into the little details:One of the differences between good photography and great photography is attention to the little details. I’m talking hands, feet, accessories, eyes, smiles and much more. I think a lot of amateur photographers are always a little scared to get too close to their subjects (especially if you’re trying to keep the pictures candid) but you can always use your cameras zoom to catch the little details that really show emotion. If your taking pictures and find that you feel like there is “something missing” from your images, try retaking the pictures a little closer or zoomed in to a nice close crop!
5. Tell a story: The best images always tell a story and when it comes to holiday photos, that is exactly what we are trying to capture. If you’re just starting out with photography, this may be the most difficult concept to master because it’s quite a bit more abstract. The best way for a beginner to master this is to ask yourself with every shot “what is this picture saying?” If you are always asking yourself what a certain composition or shot conveys to the audience, you will be well on your way to telling a great story with your pictures.
So, those are my five best tips for capturing that perfect moment with your holiday pictures or any pictures for that matter! I hope this helps you to take awesome pictures of your friends and families that will help to make this season a memorable one!
xoxo,
This article was first published on Strange & Charmed on December 4th, 2014 and is being reposted as part of my Holiday Prep Hiatus! For the months of November & December I will be recycling some vintage S&C content that you may have missed in order to give myself some extra time to finalize projects and spend time with my family during the holiday season. All reposted content will be marked as such. I hope you enjoy this blast from the past blog post!
Today on my FREE Photography webinar, 7 Impactful Strategies for Using Photography to Elevate Your Brand, I dropped a bomb on you guys! For the last few weeks, I have been working on a completely new product that is different than anything else I’ve created, and as far as I can tell, is also a product completely unique to the online digital marketplace. As you may already know, this month, I hosted a 30 Day Photo Challenge & Mini Course, called #CharmedDSLR, which was short for the Strange & Charmed Digital Styling Lightroom. This Mini Course was a primer for a full length Photography Styling Course that just released today!
I’m very pleased to announce my new digital course, The Digital Styling Lightroom, an online photography styling course that teaches bloggers and online business owners how to take their own styled stock photography. The workshop is taught via 5 video modules that include both lecture style instruction and workshop style tutorials. Included with this course are a number of downloadable course materials, cheatsheets, tipsheets, checklists and guides that will ensure you have everything you need to take the lessons learned in this course and apply them to your own styled stock photography!
The 5 Video Modules of the Course & What You Learn
Module 1: Photography Basics- You will learn the fundamentals of digital photography.
Module 2: Creating Your Set- You will learn how to create a set for a styled photoshoot.
Module 3: Composition- You will learn the fundamentals of photographic composition.
Module 4: Shooting Styled Photography- You will learn my exact styled photography workflow.
Module 5: Editing with Photoshop- You will learn how to edit your photos & create effective advertisements for your business.
In total you receive OVER 3.5 hours of video training from this course!
The Course Materials & Special Bonus Items You Get When You Buy!
Course Slides
Course Notes
Photography Resource Guide
Exposure Triangle Cheatsheet
Lighting Guide
Branded Prop Brainstorm Worksheet
Styled Shot Checklist
Photoshop Tipsheet
Is the Digital Styling Lightroom for you?
This course is for a blogger, business owner or social media enthusiast who needs to style products or create images for their websites, ad campaigns, shop listings and social media feeds.
It’s for a Solopreneur or a business owner with a small team that wants to streamline their photography process to get better results in a shorter period of time.
And finally, if you want to learn how to create high quality advertisements that will attract followers and sell your products, this is for you!
Are You Ready To Get Started?
If this sounds like you, I’d like to invite you to join the course today and start learning how to take your own styled stock photography!