franklin covey

How Many Planners Should I Use?

How Many Planners Should I Use to Optimize Productivity?

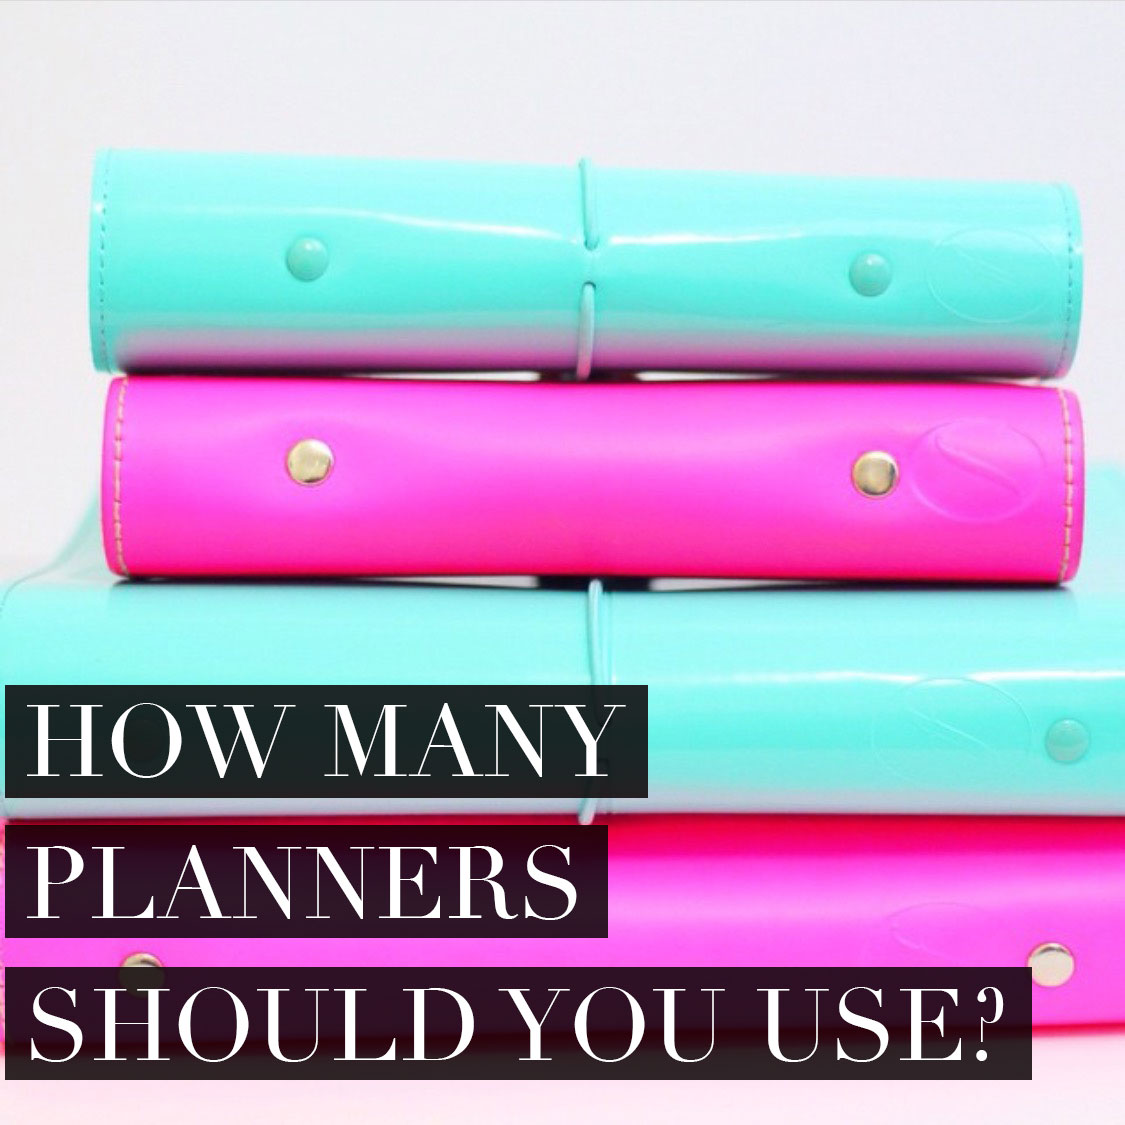
I’m always surprised that one of the most frequently asked questions I receive from my community revolves around how many planners one should use to optimize their productivity. To me, the answer is pretty obvious, but I think within the planner community there are so many options for planners and different uses for planners that many of us begin to suffer from shiny object syndrome and want to use all the planners and have a dedicated planner for different aspects of our lives. The thing is though, we all have the same 24 hours in a day and we all have just this one life right now to plan for, so separating aspects of our lives into multiple different planners seems counterintuitive to me.

Check out my recent video on the topic linked above and make sure to subscribe on YouTube for more!

The rule I like to use is one planner, one life! That’s right! I think each of us only needs ONE planner to get the job done, organize our schedule and keep on top of our tasks. Why? Well, I think it’s important to keep all of our information for what we need to do and where we are expected to be in one place. When we separate out our calendar or our tasks into different planners we end up only seeing one portion of our life and obligations at a time, thus missing the big picture. This can cause us to overload our schedule with too many tasks or appointments, since we don’t see a full picture of our days, weeks and months. I think many of us already struggle with putting too much on our to do lists, so streamlining into a single planner system, if you are using multiple planners, should help you get more realistic with the expectations you set for your day.

Now, I do believe their are circumstances where using more than one planner is reasonable. If you are someone who works outside the home and your work stays at work, clearly separate from your personal life, then it makes sense to me to have a second planner for your job that you leave at work! This also stands in the event that you have a job where you keep sensitive information or appointments regularly and may need to keep a separate work planner for legal or privacy reasons. I also believe you can use more than one planner IF you get clear on the difference between a binder and a planner. Now, for example, I use a Filofax binder to house my planning system, but you could use a Filofax binder as a journal or to store reference information- it doesn’t just work as a planner cover! So, if you are using more than one binder and one is dedicated to your schedule and tasks, and the others are being used to house specific information or for other purposes, than using more than one is fine. The point is just that you don’t want to separate out information that pertain to your schedule and tasks because it will ultimately overwhelm you to have that information in more than one place.

I know many people bring up the fact that they use more than one planner because they like to use a smaller, more compact planner to travel with outside the home or work, and they might use a larger desk style planner to stay at home. To me, this scenario is baffling because ultimately you are duplicating information which isn’t optimizing your work, just causing you to do more! If you are someone who needs a smaller planner to travel out and about with, my recommendation would be to then keep your schedule and tasks in the smaller planner, and then use the larger binder for extraneous information that you don’t need away from the home or office. Yes, using a smaller planner may mean you can’t store a full year of inserts at one time, BUT ultimately, I believe it will help you to see the bigger picture on your short term items so that you are keeping on top of your schedule and tasks.

If you are using a single planner system and still struggling to get your schedule and tasks organized, I have a great FREE resource you won’t want to miss. I have created a Functional Planning eCourse that will teach you the ins and outs of my Functional Planning process and how to make the most of the 24 hours in your day with just one single planner! Click here to sign up for the FREE eCourse which will be delivered by email on a weekly basis!

So I hope this gives you some food for thought if you are wondering how many planners to use. Of course, I am not the be all and end all on this matter, so if you are using more than one planner successfully outside of the scenarios I discussed, let me know how you manage it and what systems you are using.

xoxo,

Spring Cleaning Your Planner: Clean or Replace Your Binder

Spring Cleaning Your Planner: How to Safely Clean Your Binder or Replace It!

Spring Cleaning Your Planner

Happy April Planner Friends! Well- I am officially back from my Entrepreneurial Spring Break and now that it’s over all I want to do is fill my planner with new ideas and inspiration to carry me through the summer. While I was on spring break, I did some decluttering around my home, sent a bunch of clothes to goodwill, and gave away some of my unused accessories to family members. I really wanted to do what I could to make room and pass on what I could from my life, primarily to show gratitude for many wonderful blessings that have come into my life recently, but also to keep myself in balance. Balance for me is one part streamlining of what I already have, and another part planning for what’s to come. So, in that spirit, the time has come to Spring Clean my planner as well! While I am going through this process, I thought that I would share some ideas to help you spring clean your planner as well! So, this topic is going to be a 10-part series during the month of April, BUT you can come back to this series or use these ideas year round to help you reset your planner when you need it. I hope you enjoy the series and that you will come back to my site often this month to see it unfold! Feel free to share and posts you particularly enjoy as well- that would be lovely!

Part 1: Clean or Replace Your Binder

Depending on the age and wear of your planner, one of the quickest ways to spring clean it is to literally give it a good scrub or replace it altogether. Many of us in the planner community see our planners as an accessory, not just a productivity tool, so keeping our binders in good condition or swapping them out for the season is reasonable. Here are some helpful tips to get you started.

How to Safely Clean Your Planner

Correctly identify the fabric of your planner: Depending on the type of fabric or material used for the interior and exterior of your planner, you will use different cleaning products. Make sure to identify each material by checking and labels or paperwork that came with your planner, or by contacting the retailer directly. If you aren’t 100% sure of the material, I wouldn’t risk damaging it by using a product made for a specific material, however, a mixture of warm water and mild soap are a safe bet if you just can’t find the information. For any product you use, make sure to spot check the formula in a small, hidden area of your binder to ensure it does not do any damage or cause the color to run or fade.

Find the trouble spots: Before you begin cleaning your binder, I recommend assessing the damage and determining if there are any trouble spots. Cleaning up your binder is one thing, but dealing with specific stains is another. Don’t proceed with cleaning your binder until you have given it a once over and checked or any trouble spots like pen marks, stains or areas of rust/oxidation on any metal pieces. You will want to address these issues first with spot treatments specifically tailored to your binder material and the trouble spot. There are many different stain specific products available to help you spot treat your binder, like these.

Empty your planner: This may seem obvious to some, but remember to empty out your planner before you begin cleaning it. Check through and pockets and zippered areas and ensure everything is removed so you can get down to work!

Use a light touch: Whenever I’m cleaning any of my accessories, even my planners, I like to use a light touch so I don’t damage the item. You can always go back over areas with heavy build up if you are too gentle on a first pass, but if you are too rough you can do irreversible damage. Just be smart, work gently in small sections and don’t rush!

Let it dry: Once you’re done cleaning your binder, make sure to give it time to dry. Leather and faux leather binders tend to dry in a few hours, but if you have a cloth planner that required more product to clean, let it dry overnight before returning paper to it just in case! We wouldn’t want to ruin our inserts now would we?

If you’d like to watch my cleaning process, check out my 2017 Planner Setup Video where I give my leather binder a thorough clean at the start!

Replacing Your Binder

Of course, if you don’t simply want to clean your planner and want to replace it altogether- that’s a legitimate option. If you’re looking for something new, think about whether you want to swap your style or your entire system! It’s easy enough to swap one 6 ring planner for another in a coordinating size, but its a little more involved if you want to change from a ring bound to a travelers notebook style, for example. To get some great inspiration for your next planner purchase, check out my Planner Resource Guide Post on Picking a Planner! It covers some great basics for what’s available planner-wise to get you thinking about your needs.

I’d love to hear about your experience with cleaning your planner or picking out a new one for the season! Feel free to share your favorite products or planners down in the comments and be sure to share this post if you found it helpful!

xoxo,

February FREEBIES: Dashboard, Monthly To Do List & Wallpapers

NEW January Planner Printables You Won’t want to Miss

February FREEBIES: Dashboard, Monthly To Do List & Wallpapers

Let’s get our February planning started with some free printable planner inserts and new calendar tech wallpapers, shall we?

Of course, I love to see pictures of your planner inserts and wallpapers at home on your planners and tech gadgets! If you share a picture, please use #CharmedGTD so the whole community can see your setups and of course tag me @MissTrenchcoat as well in your pictures on Twitter & Instagram!

Happy February Planning!

xoxo,

The Charmed Shop Holiday Sale Preview {PLUS Free Printable BONUS}

The CHARMED SHOP Annual Holiday Sale PREVIEW!

The week is here! Thanksgiving Day is just 3 SLEEPS AWAY and the Charmed Shop’s BIGGEST ANNUAL SALE is about to begin.

NOW IS THE TIME to start making your holiday shopping list for the special friends and family in your life that you will be gifting to this year AND don’t forget #1, YOURSELF! While you are out shopping this weekend and over the next few weeks generously thinking of others, you don’t want to forget about picking up a few essentials for yourself. The end of the year is always a stress-filled, action-packed season, and it’s so easy to loose track of time and your own priorities when you are feeling the weight of a never ending to-do list on your back. Commit to Working Smarter, Not Harder this season and give yourself the GIFT OF PRODUCTIVITY with some of these planning essentials!

Here is a Special Preview of what you can expect from The Charmed Shop’s Annual Holiday Sale that starts Thursday November 25th and ends Monday November 28th!

PLANNER & OFFICE ESSENTIALS

Printable Meal Planning Bundle Now On Sale!

Meal Planning Bundle: Available in both A5 and Personal Size, this bundle of printable inserts for your planner is everything you need to streamline your meal planning process for JUST $10!*

Printable Planner Holiday Decor Bundle on Sale!

Holiday Deco Artwork & Printable Stickers: Personalize your planner for the Holidays with a Printable Holiday Sticker Design AND the Most Wonderful Time of the Year Printable Artwork that makes a perfect cover, divider set or dashboard for your planner. Just $10!

Printable Office Wall Art Now On Sale!

Printable Inspirational Wall Art: During the Holiday Sale, ALL WALL  ART IS 50% OFF, No coupon code required.

Best Sellers 

2017 Functional Planning Bundle

The Charmed Life Planners & Functional Planning Bundles are BY FAR some of the best selling planner supplies in The Charmed Shop! Get your complete Printable Charmed Life Planner or Bundle Now Available in Full US Letter/A4, A5/Half Letter & Personal Size Filofax Equivalents, just $25 for the Charmed Life Planner or $35 for the Whole Functional Planning Bundle with your Choice of Planner and Project and Task Tracking Inserts as well!*

PRODUCTIVITY MUST HAVES

The Work Smarter, Not Harder Bundle, 2 Info Packed Productivity Master Classes for 1 Affordable Price!

The Work Smarter, Not Harder Bundle: My Two Popular Video Master Classes bundled together for one great price JUST GOT EVEN BETTER! Get yours for just $50 and get your productivity and goals in order for 2017!

The Charmed Life Personal Development Master Class is On Sale!

The Charmed Life Master Class: My signature self-guided personal development master class that will teach you my 10 Charmed Life Secrets and how to apply them to your own life, is just $49 during the sale!

Best Sellers 

YOU GOT THIS Strategic Goal Setting Workbook is on Sale!

• The YOU GOT THIS Strategic Goal Setting Workbook: If you DO NOT have this printable, action-oriented goal setting tool, you are seriously missing one of the ALL TIME BEST SELLING resources in The Charmed Shop. Get yours for just $19 before the New Year so you can map out your goals and FINALLY have a clear path to achieving them!

BUSINESS BOOSTERS

empire-building-charmeddslr-bundle-400x400 architect-path-bundle

Online Business Course Bundle: Looking to start an online business in 2017? Have a current online platform you would like to turn into a business? The Online Business Course Bundle includes EVERYTHING you need to build your brand, following and income streams online! Get the Bundle for just $277 or choose the upgraded Bundle that includes one-to-one consulting calls with me for just $547!

EXTRA DISCOUNT CODES

As I mentioned in my post last week, the Holiday Sale includes two options. A public sale option, that I’ve outlined above where anyone can go to the shop and purchase the special discounted products, and a private option for those on my email list. If you are subscribed to my list, as an insider you will ALSO get access to special COUPON CODES for up to 33% off your total purchase in The Charmed Shop! So, if you want ADDITIONAL SAVINGS on EVERYTHING you purchase during the Holiday Sale, get on my list ASAP by filling out the form before and don’t forget to confirm your subscription to my email list or you will miss the codes!

Subscribe to My List!

* indicates required


TO DO & FREE PRINTABLE BONUS

The Sale is still a few days away, but I don’t want you to miss out on these great discounts because they are seriously a once a year occurrence. So, to help you prepare for your busy week ahead, I have some helpful tips for getting yourself prepared, plus a FREE Printable Bonus for you.

  1. Get on my email list (form above)
  2. Check out this video playlist that covers some of the different options and items on sale 
  3. Print out this FREE Holiday Shopping Check List to keep track of everything you need to purchase for yourself and others this holiday season!

I hope you have enjoyed this Holiday Sale Preview and that you have some ideas for what you don’t want to miss out on in The Charmed Shop this week! Remember, if you want to save even more this week, you need to be on my list, so don’t forget to sign up! 

xoxo,

Alexis-Signature

*Sale price is already running.

How to Turn a Filofax Binder into a Desktop Filing System

How to turn a filofax into a desktop filing system

How to Turn a Filofax Binder into a Desktop Filing System

Let’s be honest, how many of us have an extra Filofax planner sitting around that we’d love to put to productive use? I know I do, and that’s why I am always thinking of new ways to use them. The great thing about Filofax planners is that they are more than just planners. They are high quality ring binders that can be used to store anything from your calendar and to do list, to your paperwork and mail. One of my favorite ways to use a spare binder, specifically a spare A5 (although you can also manage this with a personal size) is to create a desktop filing system. That’s right, a simple, easy to use file system that sits on your desk and is portable enough to keep your essential documents and reference information safe while on the go. Since I am a productivity junkie, I like to use the 43 Folders System to file papers, mail and information I know I need for later, but don’t want to go through the hassle of filing away in “deep storage”. We all have documents that relate to in-process projects, or emails we have printed out and stuffed into our calendars to keep for a project or event months down the road, and the rotating ticker file or 43 Folders System is a great way to manage those types of physical documents. So, let me walk you through what you will need to undertake this project and give you some simple steps to building your own 43 Folders Tickler File in a spare Filofax A5 Binder.

What You Will Need

What To Do

How to Turn a Filofax Binder into a Desktop Filing System

Step 1: Remove any old inserts or papers from your Filofax.

Step 2: Using a piece of 5 paper as a guide, take a file folder and using a piece of A5 paper as a guide, line up your paper with the top corner of your file folder where the edge and the fold meet and mark the dimensions of the paper onto the folder. Repeat this for all file folders.

Step 3: Using a paper trimmer or scissors, cut the excess file folder where you have marked the A5 dimensions so that you have an A5 sized folder. Repeat this for all file folders.

How to turn a Filofax Binder into a Desktop Filing System

Step 4: On the front side of the file folder, make a diagonal cut from the top corner of the folder (where the edge and fold meet) down to about 2/3rd of the page. Also, remove any tab on the folder if applicable. Make sure to only cut through one side of the folder and leave the other side intact. Repeat this for all file folders.

Step 5: Using clear tape, tape the bottom opening and 1/3rd side opening of the folder shut, making a pocket that can hold papers. Repeat this for all file folders.

Step 6: Punch holes down the long edge of the file folder on the side of the original fold with the A5 punch. Repeat this for all file folders.

Step 7: Name 12 of your file tabs January-December, creating one tab for each month of the year.

How to turn a Filofax Binder into a Desktop Filing System

Step 8: Add one monthly tab to each of the 12 folders. Distribute tabs as evenly as you can.

Step 9: Using your A5 paper guide, mark the dimensions onto your paper or card stock. Repeat this for all 31 pieces of paper or card stock.

Step 10: Using a paper trimmer or scissors, cut the paper or card stock along the A5 guide. Repeat this for all 31 pieces of paper or card stock.

Step 11: Punch each A5 piece of paper or card stock with your A5 punch.

Step 12: Number the remaining 31 file tabs 1-31 and apply one to each of the 31 pieces of paper or card stock cut into A5 dimensions. Distribute tabs as evenly as you can.

Step 13: Open the rings of your Filofax binder and put in the folder labeled with your current month.

How to turn a Filofax Binder into a Desktop Filing System

Step 14: Behind your current month folder, put in the paper or card stock numbered 1-31 in numerical order.

Step 15: Behind the 31st page, put the remainder of the monthly folders, in calendar order.

How to Use Your Filofax 43 Folder Binder

How to turn a Filofax Binder into a Desktop Filing System

Your Filofax tickler file has 12 folders, one for each month of the year and 31 individual pages, 1 for each of the maximum 31 days in a month. To use your binder, place notes, to do’s, documents or papers (fold A4 or US letter pages in half first) into the folder for the month they belong to. For your current month, place papers in front of the numbered of the specific day of the month you want to be reminded or will need a specific document. I like to use sticky notes with reminders on them as a placeholder for any large multipage documents that don’t fit comfortably inside the system, and I leave documents/lists in the current monthly file if they don’t pertain to a specific day but I want to work on them that month. This file is great for storing all those straggling papers sitting in piles on your desk and perfect for forward planning, even if you don’t have any documents related to a specific idea or event. Using list pads or sticky notes with a concept or idea and sticking it to a specific daily page or inside a specific month’s folder is a great way to job your memory for a project or idea you have now that you don’t want to act on until later. As the months progress, make sure that the current monthly folder is on top, followed by the 31 daily pages and then the rest of the monthly folders in order behind those. This keeps the folder up to date and because nothing is specifically dated you can use the system over a span a years without needing to change a thing!

If you would like to replicate this DIY for yourself, here is a video I made outlining the process and providing additional details that may interest you. If you do use this method, I would love to see it, so please make sure to take a picture, share it on Twitter or Instagram and tag me @MissTrenchcoat. Don’t forget to pick up my latest free planner printables over at http://www.TheCharmedShop.com!

xoxo,

Alexis-Signature

Thanks to Filofax for sending me this Binder to use in the tutorial!

2016 Holiday Gift Guide for the Planner Addict!

2016 HOLIDAY GIFT GUIDE FOR PLANNER ADDICTS

Hello My Charmed Ones! Welcome to The Strange & Charmed 2016 Holiday Gift Guide!

The Most Wonderful Time of Year is Almost Upon Us! So, I thought this would be the perfect time to do a short series of gift guides before Black Friday and the holiday rush begins. Of course, since this is a Strange & Charmed Gift Guide, my choices for 2016 will be themed into categories that pertain to my readers. The first Gift Guide is themed for the Planner Addict in your life. Whether that be you or a friend! The second Gift Guide is themed for your Business Bestie. This may be a fellow #LadyBoss or co-worker that you want to spoil this year! The third and final Gift Guide is themed for the Homebody. This could be someone who loves home decor and entertaining, or a book lover who prefers to stay in on a cold winter’s night to relax and enjoy the comforts of home. Of course, with all three of these gift guides for 2016, I will include links at the bottom of the post where you can check out these items, start making your 2016 holiday gift list and get to shopping. So, I hope you’re excited for this series!

Today’s Gift Guide is for the PLANNER ADDICT!

Let’s see what gifts we have in store for her!

2016 Planner Addict Holiday Gift Guide

What’s On the List!

  1. Kate Spade 6-Ring Zip Around Personal Organizer
  2. Acrylic Stationery Organization Box
  3. Gigi New York Mini Notebook
  4. Marble Sticky Notes
  5. Gem Topped Pen
  6. Black & White Stripped Pen Pouch

I hope this Holiday Gift Guide gives you some great inspiration for the Planner Addict in your life! Feel free to leave your gift suggestions for planner lovers down below to add to the holiday gift giving goodness!

xoxo,

Alexis-Signature

Do You Need a Planner Intervention?

Do you need a planner intervention?

If you don’t subscribe to me on YouTube, you have been missing out on a great planning series I am in the middle of called Functional Planning! It’s all about setting up and using your planner to not only achieve planner peace, but to also maximize productivity and organization in your life. I have the pleasure of hearing from my followers on a daily basis, and when it comes to planners and organization, many of them recount the same old tale of planner peace won and lost. No matter which planner system they are using and no matter what planners they have tried in the past, my advice is always the same… It’s not your planner that is the problem, it’s the way you are using it! So, if you are struggling to find a planner or a system for planning that works for you and your life, if you have too many planners and are going crazy deciding which to use and if you NEED a PLANNER INTERVENTION (or know someone who does), my functional planning series will help you find clarity!

Functional Planning #1: Intro to Functional Planning | 5 Reasons You’re NOT Finding Planner Peace

In this video I cover the 5 most common reasons that people do not find or even loose planner peace. For many of us, it’s not just a single cut and dry reason, and for many of the members of my community that I have counseled through this issue, it’s actually a number of reasons which is why it’s important to know what problems are afflicting you so that you can address them!

Functional Planning #2: The Essentials of Functional Planning | 3 Roles of a Complete Planner System

In this second installment of my functional planning series, I discuss the three roles of a complete planner system. When it comes to choosing the right planner for you, it’s essential that your planner be able to do these three things so that you have confidence in your system. One of the problems I find with some planners is that they lack true functionality for users and although you may be drawn to one or another planner because of a specific size or layout, once you start planning and you find that your choice lacks certain functions, it becomes obsolete and you stop using it.

Functional Planning #3: Plan with Me May | My Monthly Functional Planning Process

In this installment of my functional planning series, you watch as I perform my monthly review process. Although this video takes place before May, it’s not the month that matters, but the process of what I do and how I use my planner to prepare for the upcoming month that will provide insight to you in how I functionally plan!

Functional Planning #4: Plan with Me | My Weekly Functional Planning Process

Finally, in this fourth (but not yet final) installment of my functional planning series, I walk you through how I plan on a weekly basis. My weekly review process is another major part of my functional planning process and in this video I share specific tips and strategies that you can implement in your own planner, plus you get a peek into how I use my functional planning stickers to keep my planner looking inspirational as well as functional!

So, I hope you enjoyed this recap of my still in progress functional planning series. If you have no yet enjoyed these videos, I highly recommend bookmarking this post and coming back to it the next time you are sitting down and working in your planner because you will want to take notes and start evaluating your current planner against my functional planning criteria. Even if you believe you have found planner peace, I think it’s always helpful to see how another person plans, so check out the videos and let me know what you thought in the comments below. Which video was most helpful to you and what tips did you walk away with? I’d love to hear about your functional planning experience!

xoxo,

Alexis-Signature

30 Ways to Enjoy June, New Dashboard and Wallpapers {Freebies!}

30 Ways to Enjoy June {Free Filofax Printable}

So, yea, it’s June! How about that?!? I literally can’t believe that nearly half the year is over already! It’s also that time of the month for me to share with you my latest freebies. This month I have a lovely little list of 30 Ways to Enjoy June to go along with your June Dashboard. Now, I know that June may mark the start of summer in the US, but that isn’t how it is across the globe, so I made sure to incorporate activities and simple tasks for this list that aren’t region specific! Since June is the start of my summer, however, I really wanted to focus on little things that I could do each and everyday to put me in a good mood and help me to enjoy the summer, instead of stressing over plans and tasks and whatever other nonsense usually plagues my mind during this time of year. I don’t know about you, but I always feel a great deal of pressure at the start of summer around making plans and enjoying the warmer weather since summer is stereotypically the time of year that everyone waits for. This printable is an attempt to be more mindful and take summer slowly and with purpose. I sincerely hope you enjoy it!

30-ways-to-enjoy-june-free-printable

If you would like to download your own FREE copy of this insert in both A5 and personal sized Filofax equivalents, click here to be redirected to my shop to access the files! 

june-2016-wallpaper-image

Along with your planner freebies, I also have your new tech wallpapers! This month I went with a gradient turquoise chevron that reminds me of ocean waves! Make sure to download your new wallpapers here and enjoy the spirit of the summer wherever you may be in the world!

If you do download these free inserts and wallpapers, please let me know about it by taking a picture and tagging me on Instagram with the hashtag #CharmedGTD so I can see how you are making use of these inserts in your own planners. I love seeing your pictures, and I can’t wait to like them and interact with you on IG! Make sure you’re following me @MissTrenchcoat!!

xoxo,

Alexis-Signature

How I Use My Planner to Automate My Life

How I Use My Planner to Automate My Life

How I Use My Planner to Automate My Life

If you’re reading the title of this post and thinking to yourself, “a paper planner, automated? I don’t think so!” just hang in there for a minute! I get it, when we think automation, we think machines, but at the root of the word automatic is the concept of something happening on its own without conscious thought or effort. I don’t know about you but I am always intrigued by the idea of not having to think about things in order for them to happen, so creating an automated system for my planning means, yes, I need to input data and do the work, but it means not having to put effort into planning. It’s about knowing what I am going to do or how I will be spending my time without having to exert the time and effort of deciding it for myself. The process of automating your planner is akin to laying out your clothing the night before or meal planning for the week. You still need to do things but by systematizing the process you save yourself time and brain power. The human brain really only has a finite amount of processing power for the day and we humans tend to use much of it up on silly little choices and thoughts. Spending 30 minutes agonizing over what to wear means you have less patience at 3pm to deal with a difficult email or customer. Staring aimlessly into the fridge for 10 minutes only increases the chance that you will make the poor decision to swing by the drive thru on your way to work. Time and time again, we prove to ourselves that when we have to make too many choices, we end up making poor choices, when we spend too much time thinking, we loose the ability to focus. So, back to the whole automating your planner concept- not such a crazy concept now, eh? Okay, well, if you are curious to know how I use my planner to automate my life, get ready to take some notes!

Bulk process routine tasks

The tasks we do on a regular frequency should always be handled together to automate our lives. For example, meal planning. Why decide your meals one day at a time when you can use your planner to map out all your meals for a week or more! This saves you time, because you can focus on one topic in a sitting which helps conserve brain power, you can create a single grocery list with everything you need to make your meals, and then when it comes time to prepare your meals you know exactly what you have to make, and again, save on processing power. I tend to meal plan in my planner by keeping a sticker with all my dinner options laid out for the week. Because I like to choose what I’m eating on a daily basis, I keep my options laid out in my planner and check them off as I make them. Although this may not be the most ideal meal planning scenario, I find it’s easier for me to pick from the 7 dinner options in my planner when I have them outlined!

Schedule the essentials

Anything that must be done should always be scheduled, specifically essential life activities like doctors appointments and scheduled maintenance, but you can also use this life hack to apply to any activity in your life from personal projects to office work. When we schedule time to do something, we take the pressure off deciding what to do and when, and we have a ready made period of time available that prevents us from using the excuse of having no time (probably the worlds most overused excuse!). I schedule events and tasks in my planner by writing them on a functional sticker so the event stands out to me. This way, I can literally see how I will be spending my day!

Utilize a next action list

When we don’t have to think about what we have to do “next” we save both our time and our mental energy. That’s why I keep my project plans as part of my daily planner so that I can see all the next actions I need to accomplish in order to complete a project or goal. I transfer my next actions from their project planning pages to my master monthly task list. Some items get scheduled as explained above, but others stay on the list and are moved to my daily to do list based on my workload. That way, when I am planning my days or week, I can look at the list and see what’s next, and if I have extra time in a day, all I need to do is check the list and work on the next item I see!

Theme your days

One of the sneakiest wasters of time in our days is when we switch our focus from topic to topic. Topic switching forces us to stop the flow of ideas and thoughts, refocus to a new topic and then wait for the ideas and thoughts to start flowing again. Because this can be such a waste of time and mental energy, I find that I am most productive and mentally engaged in my work when I deliberately stay on a single topic of focus by theme-ing my work for a day. So, for example, I will decide before the week begins what topic will hold my focus for that day and I will add items to my to do list for that day that pertain to that topic. So I will do all my blog posts on one day, film all my videos one day, do all editing one day, and schedule my customer calls for one day. This keeps my week automated and my mind sharp because I am truly able to sustain my focus.

Keep your routine consistent

Consider your daily routines your automated systems for living. Keeping your daily routines consistent in terms of when you wake up, how much time you spend working or performing certain tasks and the order in which you take care of your day to day minutiae should stay consistent so that your brain is working on auto pilot. If you are’t sure what your daily routine is, keep an eye on it for a week or so and then write it out formally in your planner so you stick to it. If you need to, optimize the routine so that you fit important tasks into your day seamlessly and it will help you plan less because you have automated more!

Do you like this concept of automating your life? If this is something you strive for with your own planning or want to learn more about, let me know in the comments and I will be happy to share more on the subject!

xoxo,

Alexis-Signature

DIY Bow Clips for your Planner & More!

DIY Planner Bow Clip

Ever since I showed you guys those cute little bow paper clips I made for my Filofaxes, you have been asking me to do a DIY tutorial on how to make them! Well, ask and you shall receive, right? I Actually put together a video with not one, not two, but three DIYs for making paper clip accessories for your planner so that everyone is able to create exactly what they want for their planner.

DIY Bow Making Pattern
This is a low res image, download the full file via the link below!

To go along with this DIY video, I created a special Bow Maker Pattern Printable to act as a template for creating your own bows. I show you how to use this template in the video, but the file itself also has directions as well. Feel free to download this file and make yourself bows to your heart’s content! But remember, this printable is free for personal use only. Commercial use of this file is prohibited, and please, if you want to share the file with friends and family, link them to this post or my YouTube video instead of directly sharing the file!

Three DIYs, you read that right! So, other than the bows, I also show you how to make page clips with chipboard elements as well as how to make clips from printables and any other images or icons you may find! If you can print it or if it’s made from paper, you can turn it into a decorative page clip for your planner!

In the video I use my new 2014 Favorite Things Sticker Set as a template for some clips I made by printing the PDF on heavy printer paper instead of on sticker paper! I love this new Sticker Set of course because it’s filled with some one my favorite images and icons from the year! Think pink peonies, coffee cups, perfume bottles and of course, stripes! You can purchase this set from my shop and use it as stickers or to make your own page clips as well!

So here is the video linked above! This is definitely one of those tutorials that is better explained visually, so if you would like to see the three methods I used to make some lovely embellished paper clips for my planner, check it out! Of course, if this video helped you in any way or gave you some new planner inspiration, please make sure to share it in your social media and tag me @MissTrenchcoat! It would mean the world to me!

xoxo,

Alexis-Signature

This article was first published on Strange & Charmed on December 18th, 2014 and is being reposted as part of my Holiday Prep Hiatus! For the months of November & December I will be recycling some vintage S&C content that you may have missed in order to give myself some extra time to finalize projects and spend time with my family during the holiday season. All reposted content will be marked as such. I hope you enjoy this blast from the past blog post!