Photography

{Picture Perfect} How to Take Better Instagram Photos

How-to-extend-your-iPhone's-battery-life

Instagram is definitely one of my favorite social media apps, probably of all time. I love nothing more than to take a break from my workday and pop on over to Instagram and scroll through my feed to get inspiration, relax and just enjoy the beauty and simplicity of photography! Not to toot my own horn too much, but I am actually very proud of my Instagram account as it is nearing in on 5,000 followers! I think the reason my account has been doing so well lately has to do with the extra effort I put into it and of course, a few helpful tips I have picked up since first starting out!

Canon-EOS-Rebel-T5i-DSLR-Review

1. Don’t be afraid to use a DSLR or Compact Camera!

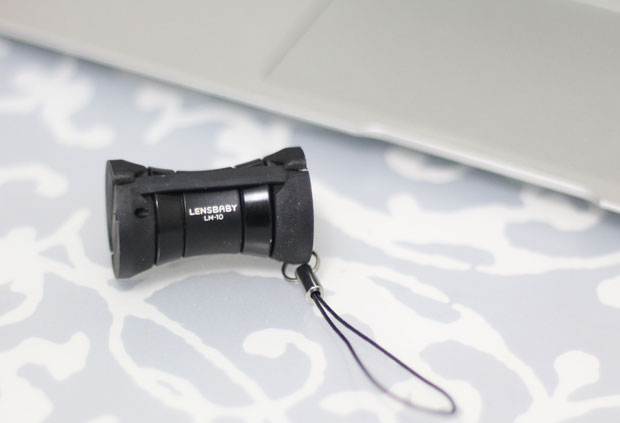
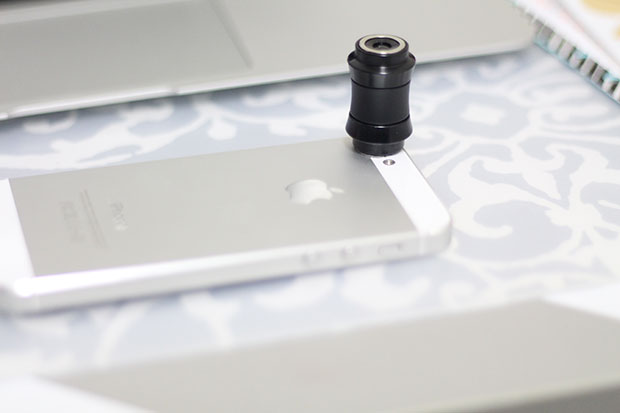
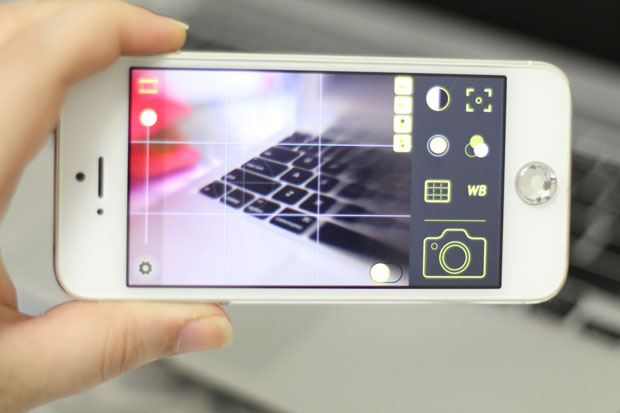
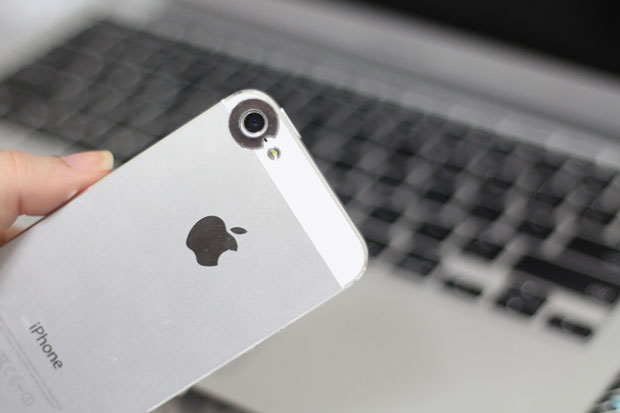
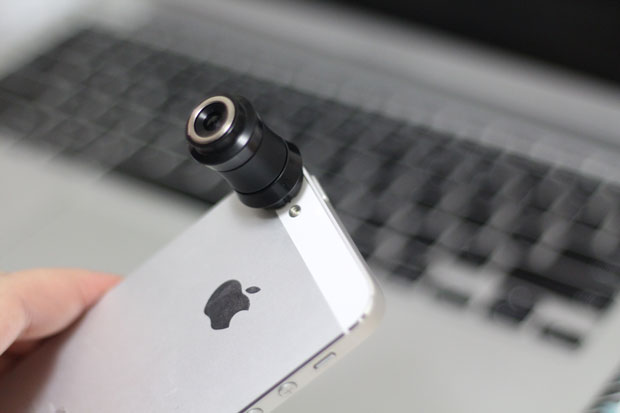
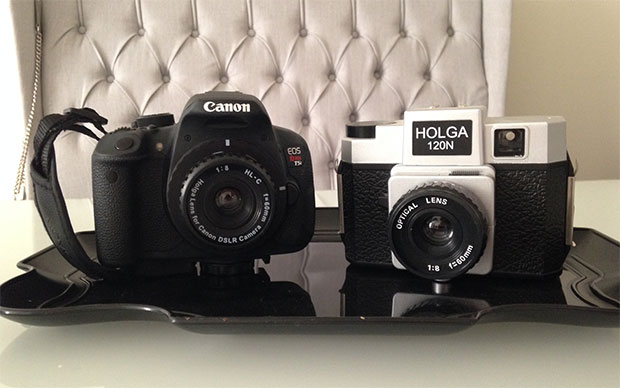
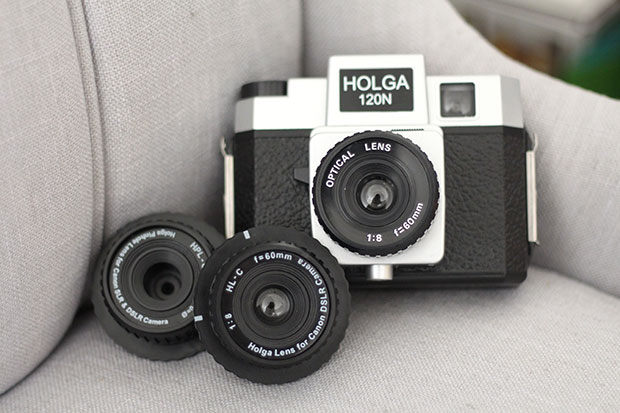
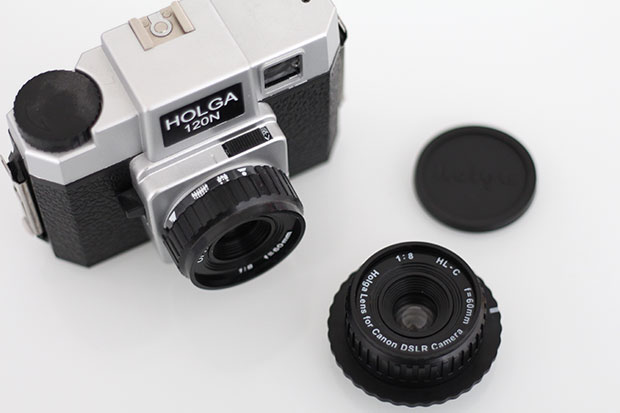
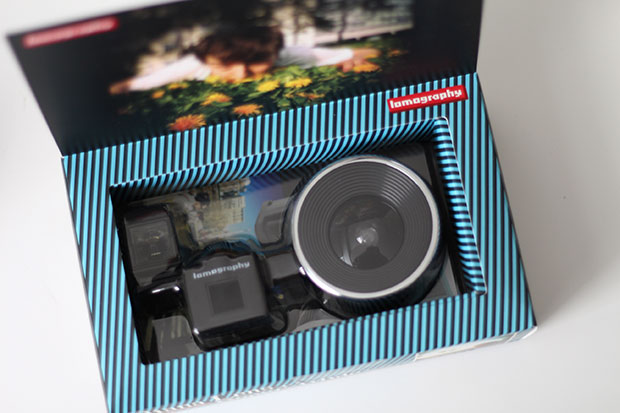
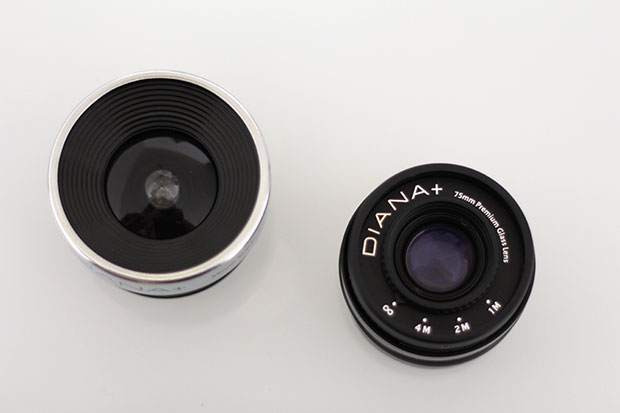
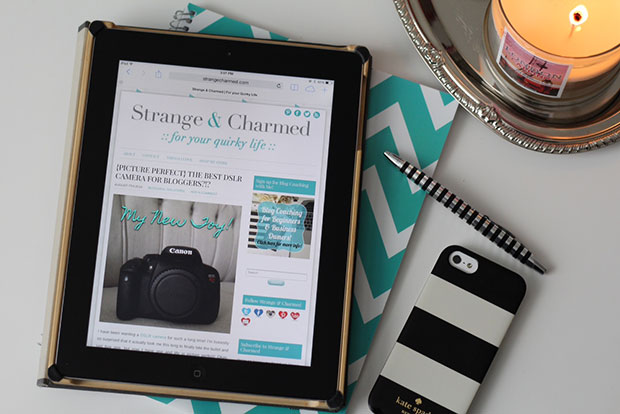
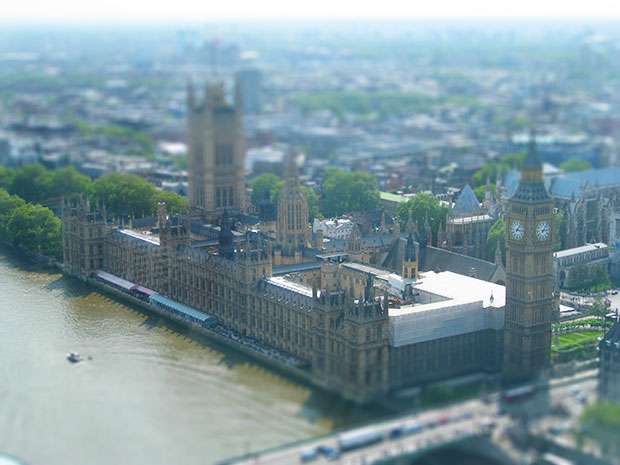
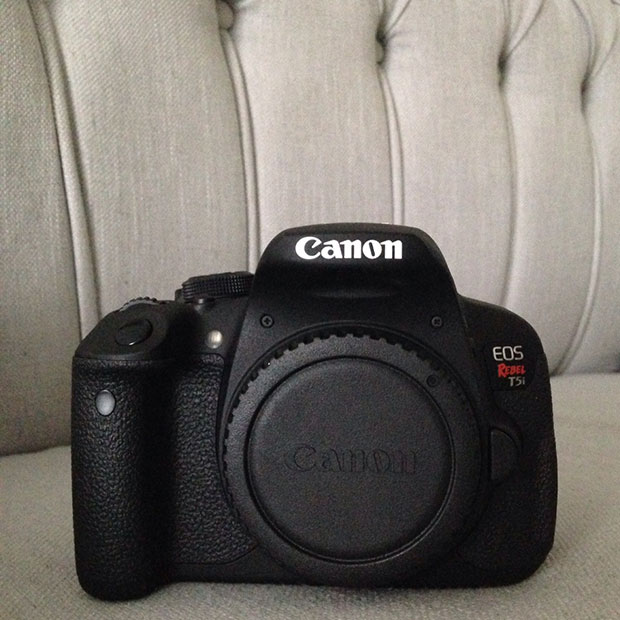
When Instagram first launched, the novelty of the app was wrapped up in the fact that you could capture images on your iPhone and then add these cool filters to your images to give them a cool vintage or film camera vibe! I think the novelty of that soon wore off when people began to see that the best way to get a lot of likes on your photos was to use a DSLR or compact camera to shoot, edit your photos in Photoshop and then post them to Instagram! Now, iPhone purists would say Instagram is meant for iPhone/Smartphone photos, but the truth is, you can take any image and post it, and it is becoming increasingly popular for people to use a higher end camera to take their pictures. If you are trying to grow your account or have a business you want to promote through Instagram, using a higher end camera is really a must! Not 100% of the time, but definitely using a better camera to shoot most of your images is a good idea for marketing sake! Now, I know it can seem like a pain to pull out another camera and then have to upload your images to a computer to edit before uploading to Instagram, but don’t worry, I have a solution for that! At the end of 2014, I actually purchased a wifi SD card, the Toshiba Flash Air, that goes into my camera and pairs with my iPhone so that I can quickly and easily upload my photos from my DSLR to my iPhone, no computer needed! Then I use some of my favorite iPhone editing apps to tweak the photo before I post to IG, it’s super simple and the SD card was very reasonably priced and a great quality- I would highly recommend it!

myface

2. Lighting is VERY important.

Few things can ruin a great photo like bad lighting! I think that is probably the biggest issue I ever see on Instagram is an image that is underlit and/or has the wrong color balance, usually because the photographer has tried to up the brightness artificially within an app! Although I do tend to up my brightness a tad with applications, I always try my hardest to start with an image that is properly lit. Make sure you are using the best natural lighting you can find, or go ahead and use a lamp or studio lights to make sure your image is bright straight from the SD card! If you are in a bind and out and about, try using your iPhone’s built in flashlight feature (or a real flashlight) to help add lighting to a scene by bouncing the light off a reflective or light-colored surface onto your subject. If that isn’t a possibility, or you’re shooting a dark scene on purpose, try to use settings on your camera (like ISO or pre-programmed night scenes) to help properly balance the lighting and color in the image!

Week On Two Pages Filofax Insert

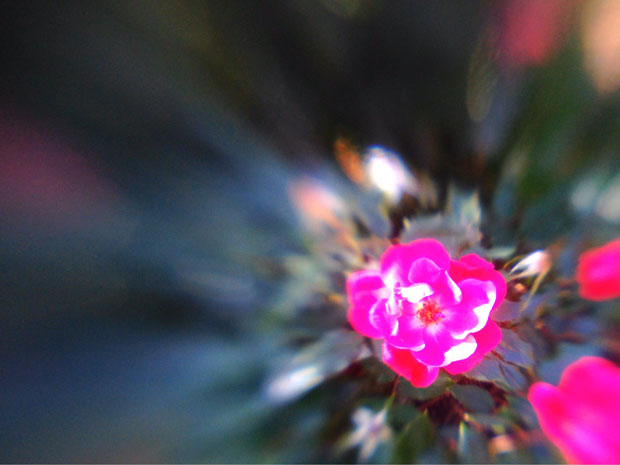
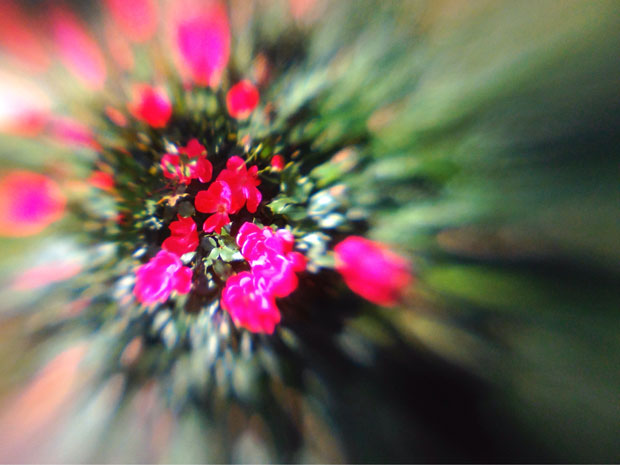
3. Use color saturation to help your image pop.

Now, let me preface this by saying that I try to be as conservative as possible when it comes to adding any effects to an image, but I find that something simple like bumping up the saturation a little bit can really help an image pop. In terms of built-in Instagram filters that help boost saturation, Lo-Fi, Hefe and X-Pro II are probably my favorite for this within the app, or else I use Afterlight which is one of my favorite photo editing apps!

Apple Macbook Air 11

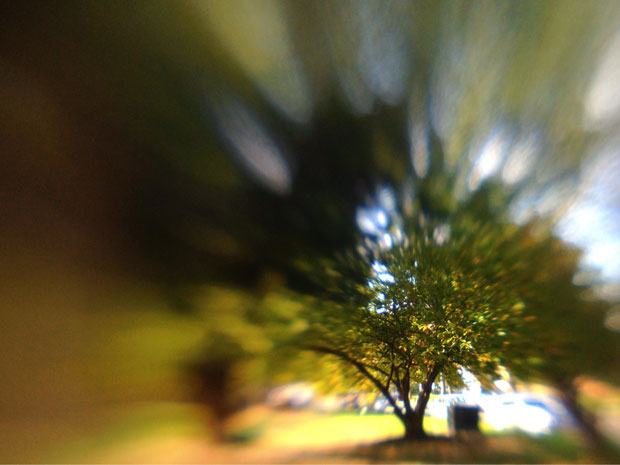
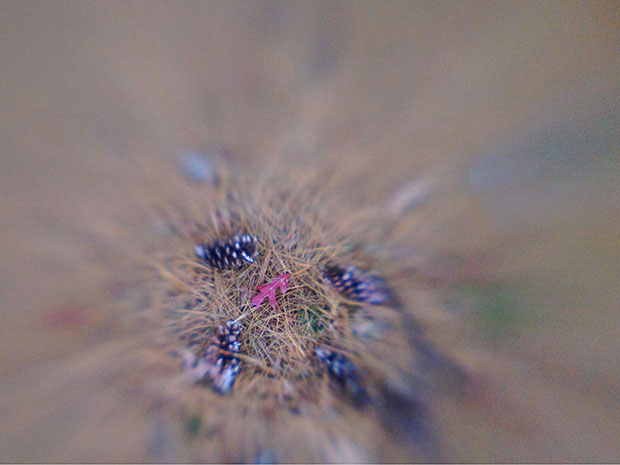
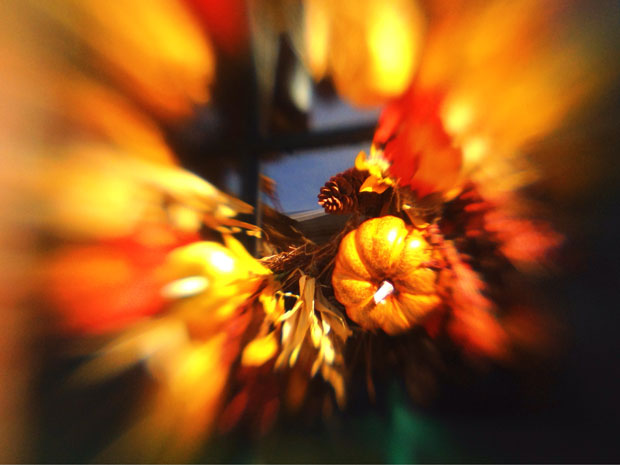
4. Go easy on the filters.

Like I mentioned in the previous point, I try to be as conservative as possible when it comes to filters and added effects. Although that “authentic film camera” look was a popular feature for Instagram that lead to it’s rise, I think now, for the most part, people are over the lomography look. Don’t feel compelled to always use a filter if your image doesn’t require it and only use a filter if you think it enhances an image, as opposed to using a filter to mask the fact that your image wasn’t the great to begin with. This is especially true of HDR filters. HDR was hot in like the early 2000s, but now it just looks incredibly dated. If you aren’t familiar with HDR images, here are a few cringe-worthy examples to help bring you up to speed. I’m sure once you see the examples, you will know what I’m talking about!

Lip-Paint-Desktop-8.10.14

5. Consider composition before shooting.

The final tip I have for making the most of your Instagram photos is to consider the composition of the image you are trying to capture. Instagram provides a “rule of thirds” on-screen guide to help you manage your composition, and I think not enough people pay attention to that feature! Unless absolutely necessary, try not to center your subject in the middle of your image, play around with it’s location in the shot and work with different and exciting angles that may add interest to the photo! I won’t go into how to do this too much in this post, but I will refer you to my Photography Tips post where I discuss this more in-depth and give examples to illustrate how to properly compose an image!

Okay, that is it! Just a few simple tips to help you make the most of your Instagram photos! Make sure to go ahead and leave your Instagram handle down in the comments so I can check our your accounts, and also be sure to follow me on Instagram @MissTrenchcoat if you aren’t already and help me get to 5,000!

xoxo,

Alexis-Signature

{Picture Perfect} Selective Focus on your Smartphone

Lensbaby LM-10 Sweet Spot Lens for Mobile

With holidays quickly approaching, I know that a top priority for many of us is creating memories with our friends and families. Whether it is over a delicious meal, a fun outing or some extra special gift exchanging, there are plenty of special moments ahead for us in the next few weeks, and many of us are going to want to capture as many of them as possible. I know not all of you own DSLR cameras, and that’s certainly okay! I have been making a point with this series to also include options for those of us who may be using compact cameras or even smartphones as our primary means to capture images. Well, todays topic is all about smartphones, specifically the Lensbaby LM-10 Sweet Spot Lens for Mobile! I’ve shown you DSLR lenses in the past, and now I thought it was time to talk about mobile lenses!

Lensbaby LM-10 Sweet Spot Lens

Now, in all fairness, I don’t necessarily believe that you need lenses for your smartphone in order to take nice pictures, but I think they are one of those things that you can use to really achieve interesting effects that aren’t really possible or at least, aren’t really authentic looking when you use an app! The Lensbaby Sweet Spot Lens for Mobile devices is a “selective focus” lens that works in conjunction with their app that is available for iOS & Android devices, and in my opinion, helps to give smartphone photos that interesting blur and depth of field that we normally see on DSLRs (see my guide to Bokeh for more info on blur and depth of field).

Lensbaby LM-10 Sweet Spot Lens for Mobile

So, what exactly is “Selective Focus”? It is basically when a lens allows a camera to choose an area of the image to stay in focus, while the rest of the image is dramatically blurred out! As you can see from the image above, one area of the photo, the area around the flower, is in focus, and then the rest of the picture fades into a lovely blur. The effect is very strong and really helps you to assign priority in your image for where the action is, or where the important element is, and then everything else is just a haze of colors.

Lensbaby LM-10 Sweet Spot Lens for Mobile

Now, here is more of that same flower bush, now with the focus shifted to the upper left on a cluster of flowers, as opposed to the lower right in the previous photo. How did I achieve this? Well, the Lensbaby LM-10 works in conjunction with the Lensbaby for Mobile app, and within that app, you can actually move around the “sweet spot” or the center of focus, across the plain of your image. So you have control over what is in focus and where in the image that focus lies.

Lensbaby LM-10 Sweet Spot Lens for Mobile

Here you can see what the app looks like in action. You may be able to see the faint circle with cross hairs towards the center of the app that you can move and control with the touch screen. The app is actually a pretty crucial part of using the lens, because without it, the lens actually ends up flipping your image upside down, so the app actually reorients the images properly and also adds extra functionality with the focusing options. You can also see, the app includes a few different features for controlling color balance and such- all are pretty standard, but good to have in-app while you’re shooting!

Lensbaby LM-10 Sweet Spot Lens for Mobile

Lensbaby LM-10 Sweet Spot Lens for Mobile

Lensbaby LM-10 Sweet Spot Lens for Mobile

Lensbaby LM-10 Sweet Spot Lens for Mobile

Here are some more shots I took while taking a walk recently. I really love the way you can change the focus and really allow objects to pop. Literally, pop, because I feel like the lens gives this sort of starburst shaped blur, which I really like!

Lensbaby LM-10 Sweet Spot Lens for Mobile

Okay, so lets talk about the lens itself, pro’s and cons style! The LM-10 isn’t your average smartphone lens. It’s actually quite unique in my opinion which is its major pro! First of all, it connects to your smartphone via a secure connection made with a magnetic anchor that you actually have to attach to your phone. It’s just a magnetic metal ring that goes around the lens of your smartphone upon which your lens will sit and attach firmly! The ring itself is quite slim and does remove easily. Lensbaby even includes duplicates of the rings in case you have multiple devices or if you find that you need another (I was quite glad to see that because you do need the ring to really make this function and having spares is important)!

Lensbaby LM-10 Sweet Spot Lens for Mobile

Obviously you can tell from these images that the LM-10 is a large lens! I will say it’s very heavy-duty and well-built, but still relatively light. It comes with a nice lens cover connected to a mini lanyard so you can attach it to a keychain or whatnot and easily take it with you. My only drawback with this lens is that in order to use it, I had to remove my iPhone from its case. For some people this won’t be an issue, and for me it was only a slight issue, but it was a con in my mind! Now, this lens is actually pretty pricey for a smartphone lens, coming in at $69.95. You have to keep in mind that this lens is a very well-built little tool, but I know for some of you, that price is going to be a deal breaker, but I do believe there are some of you that will actually find this lens to be a pretty good value, especially if you are someone who does not own a DSLR and has no intentions of purchasing one anytime soon. For those of you who do really use your smartphone as a primary means to take photos, either of your family and friends to document life for project life, or as a means of artistic expression to share on your social media, this is something I would put on my wish list this holiday season because it really is so unlike anything else and creates images that are pretty breathtaking in my opinion!

Thank you so much to Lensbaby for providing this lens for me to review! Please help to support the brands that help make content like this possible by checking out their site for more photo examples and their blog for more awesome photography tips! You can also purchase this lens directly from their online store as well!

So, what do you guys think? Would you ever use a dedicated iPhone lens to take pictures? Did you like the pictures I took with the LM-10 Lens? Let me know what you think the in comments below and if you have any other products you would like me to review for this series!

xoxo,

Alexis-Signature

{Picture Perfect} Digital Lomography Toy Lenses

Digital-Lomography

Digital-Lomography-Toy-Lenses

If you saw my September Favorites, you know that I recently purchased a bunch of new “toy” lomography lenses for my DSLR. Go ahead, call me a Hipster, but I actually really enjoy lo-fi photography and that whole lomography movement in artistic photography isn’t going away, in fact I think it’s  only getting stronger. In case you’re reading this and asking yourself what lomography is, let me sum it up for you. Lomography is basically an artistic photographic style that values the aesthetic of analog cameras. It’s been something of a movement since the advent of digital photography, preserving the artistic experience of film photography. You may be familiar with the plastic “toy” cameras sold at Urban Outfitters, such as the Diana and the Holga, throwbacks to a dying age dominated by film, or at least you are familiar with the many Instagram filters that can give you that analog film camera look with just a tap of a finger! Well, good news, you can actually buy lenses for your DSLR that have been made by Diana and Holga to give you that great vintage quality in your digital images, and I am going to talk about four of those that I purchased and have been testing and give you my feedback in case you also want to give these lenses a try. I recently took all four of my new toys out with me while I went apple picking and shopping in a quaint little country town near my home. This little experiment on a bright sunny day, gave me the ability to test the lenses in optimal lighting conditions.

Digital-Lomography-Toy-Lenses-Diana-Holga-Canon-DSLR

Now, keep in mind, these lenses are called “toy” lenses for a reason. They are plastic (for the most part) and not made to be high quality optics. They also only cost me an average of $25-30 each, so they are definitely not pro lenses, but for DSLR owners who also enjoy the lomo look or would like inexpensive lenses to play around with, they are an option out there, and options are good! Another thing to keep in mind is that because these are cheap plastic lenses, they don’t have any sorts of electrical mechanisms that speak to your DSLR body, so you will need to shoot in manual when using these lenses. Your camera will act like there is no lens connected to the body, so depending on the camera you have, you will lose certain features as well, but if you are comfortable or knowledgable in shooting  manual, you shouldn’t have any problems. I kept my DSLR in manual with my ISO set to auto (because these lenses don’t have large apertures to let in much light). I also kept my shutter speed as slow as I could without causing blur, again, in order to help increase the amount of light getting in through the lens. Finally, I also used the Live View mode on my display as opposed to shooting through the view finder. In certain situations, you just can’t be sure of the lighting and live view (as least until your comfortable shooting in the lighting/environment you have) will help!

Holga

Canon-Holga-Lens-with-120N

Holga-Canon-60mm-f8

I purchased two lenses made by Holga. The first is their 60mm f/8 Lens, which is the same lens that you would find on a standard Holga camera, but made with a special mount to fit a DSLR. Because these are lo-fi, basically analog lenses, they can’t do things like autofocus, so you have manual control of that by twisting a ring on the outside of the lens that has some convenient little non-specific images that denote portrait, family, group, and infinity! It’s not precise, but it’s also not rocket science! The lens definitely skews on the dark side, and has a good amount of vignetting, but overall, I thought it gave me some of the best “vintage inspired” results out of all four of the lenses. To me, it produced the sorts of images that I might see while flipping through the pages of my grandmothers scrapbook and it’s actually given me a few awesome family photo ideas to work on for the holidays.

Holga-Canon-DSLR-60mm-f8

Canon-Holga-60mm-f8-test

TL;DR: Authentically vintage, albeit tricky to use. Will continue to play with it for fun effects!

 The second of the two Holga lenses I tested was the Pinhole.  This lens is says its 25mm, but since it is just a tiny pin sized hole, there isn’t anything you need to adjust and no way to focus. If you have ever used a pinhole camera before, you know that it’s all about controlling the light with these because their aperture is nothing more than a teeny tiny hole that lets in next to no light. This one was probably my least favorite out of all the lenses I tested, and for good reason. Even on a super bright and sunny day, this lens was still overly dark, and I believe the ISO for this picture was at least 400-600, while the shutter was 1/60. In the typical pinhole fashion, you can certainly make out the heavy vignette circle around the image created by the tiny hole, which I do think adds a really interesting vintage feel, but this is the sort of lens that has a time and a place to use and for me, I don’t find I have many reasons to use it!

Holga-Pinhole-25mm-Canon-DSLR

TL;DR: Lens is way to dark to use on a regular basis, won’t be bringing it out again unless I have a great concept to shoot.

Diana F+

Digital-Lomography-Diana-Lenses

Diana-35mm-Super-Wide-Digital-Lomography-Lens

Diana-Canon-Lenses-75mm-premium-glass-35mm-super-wide

Now on to the Diana lenses. These one’s are a little more unique because they are the actual lenses that fit onto Diana F+ Cameras. In order to fit them to your DSLR, you need to purchase an adaptor that connects the lens to your camera body. Downside of these lenses is that the adaptor is only available for Canon and Nikon cameras (unlike the Holga lenses which are actually made to directly fit a few different camera manufacturers). Now, the first Diana Lens I want to talk about is the 38mm Super Wide Angle. In comparison to the other three lenses, this one felt the most plastic-y. The Holga’s were actually made from quite a hard sturdy plastic, but this Diana lens felt light and wobbly like it may just break apart- but good news, it didn’t! Even after much in and out of my bag and traveling around, it held up, it just felt unstable! This lens is also the largest out of the toy lenses I purchased. It too, like the Holga 60mm, has a focusing ring with a very non-precise system of focus measuring, but again, once you got used to using it, you sort of understood the focusing distances. The thing that is quite interesting about this lens is that it creates some very interesting effects with the light. The Diana F+ is often dubbed the Dreamy Diana, because of the soft, ethereal lighting effects that it creates. This lens works well in situations where you have a lot of lighting contrast, so a bright sunny day was a good time to shoot with it, or conversely, I would also love to take this out into the city at night and capture the electric city lights and signs that brighten the night (it’s on my to do list)! Because of the dreamy lighting effects, I actually think that I prefer to use this lens for video as opposed to photography. I played around with it while we were apple picking and I loved the vintage feel of the scene as the light danced around in glowing blobs! Overall, it wasn’t a terrible lens and I found the artistic quality of it to be very lovely!

Dreamy-Diana-35mm-Super-Wide-Lens-for-DSLR-Canon

TL;DR: Feels cheap, but gives a unique artistic feel. Best for creating vintage inspired video, in my opinion.

Diana-75mm-Premium-Glass-Lens

Diana-Canon-75mm-Premium-Glass-and-35mm-Super-Wide

Now to the final lens, and you can say I saved the best for last! This final lens is the Diana 75mm Premium Glass Lens. Yes, I said premium glass. Again, this is a lens that was made for Diana F+ Cameras, sort of as an upgrade to the cheap plastic made lenses that come standard with the camera in order to bring more sharpness to the film photo’s. Out of all the lenses, it was my favorite, but it was also about twice the price of the others. First, let’s address the construction of this lens because it’s a little odd and a bit of a juxtaposition with the term premium glass. Yes, the optical element of this lens is glass, but the body is still plastic, albeit a much sturdier plastic than the 35mm Super Wide. It’s a relatively small lens, that definitely has a more premium look to it than the others, however, it has the strangest manual focus. Instead of the focus ring being placed outside the body of the camera, this one is actually located in the front center of the lens, right around the glass, which makes it awkward to adjust. People with large hands and fingers may find it a pain to focus this way, I found it a pain and I have small hands and fingers, but I will say that this odd focusing ring actually lends itself to an overall positive experience with the lens. As you can see from the sample images I took, this lens is sharp. It produces clear, crisp images once you can get the lens in the proper focus. You have to remember, this is a 75mm lens, so it lends itself to being more of a portrait style lens by nature, and personally, I find that it’s the sort of lens I want to use when I’m taking stills of friends, or I’m on a nature hike, walking at a leisurely pace and photographing flowers and plants. I know that may sound weird, but the fact that you have to take a moment to finger the focus to the appropriate spot means you need to take a moment to stop and think about the shot. I think that slower paced, more thought process driven method of shooting is actually very important and a great opportunity to learn more about your own style of photography. For the size and the price and the quality combined, I have no excuse not to keep this little guy with me!

Diana-75mm-Canon-DSLR-Premium-Glass-Lens

Diana-75mm-Premium-Glass-DSLR-Canon-1

Diana-75mm-Premium-Glass-Lens-Canon-DSLR-2

Diana-Premium-Glass-75mm-Canon-DSLR

TL;DR: Good quality lens with relatively sharp optics and small form factor. Is now a staple in my camera bag. 

I hope you guys found this installment of Picture Perfect to be helpful and informative. I would say that although most of these lenses aren’t wonderful quality, the fact that they are pretty inexpensive is reason enough to pick one up if you are a DSLR owner who maybe only owns a real lens or two. I could imagine that if you are reading this, you most likely only own an entry-level DSLR with the kit lens, so these loom lenses are a fun way to mix up your photography, especially if you want to pick up the 75mm because that focal length is a pretty good one to own and for the price, you can’t beat it! Even if you’re not so into photography, I think these lenses would actually make really great gifts for friends, family and loved ones who may be interested in photography and own a DSLR! Especially students because I think they would get a lot out of playing with these sorts of artistic/creative lo-fi lenses!

Alexis-Signature

{Picture Perfect} Review of the Canon EOS Rebel T5i

Canon-EOS-Rebel-T5i-Review-Vogue

Ever since I purchased my new DSLR, the Canon EOS Rebel T5i, I have received numerous questions about how I’m liking it as my first DSLR experience. So, I thought I would go ahead and do a proper review for anyone who was considering their first DSLR, or may be looking to upgrade from an older model to something new! When I first introduced this camera on my blog, I made something of a bold statement. I suggested that the camera could possibly be the best camera for bloggers out on the market currently, and after weeks of using the camera and taking it on multiple day trips to get some good shooting experience in, I am actually prepared to defend this statement! But before I do, I am going to have to amend it. You see, the Canon EOS Rebel T5i isn’t just a great camera for bloggers, it’s also a great camera for scrapbookers, project lifers, parents, students, and anyone else who is looking to take great quality photos without having to spend extra time and money!

The Canon EOS Rebel T5i is an awesome camera with some very useful features that make DSLR photography seem simple, even for beginners or those who don’t have the time or interest in learning the ins and outs of photography, but still want to get the most bang for their buck when it comes to taking great photos. Here’s what I love about this camera:

Canon-EOS-Rebel-T5i-Review

3.0 inch Touch Screen LCD Display with Live View and Touch Shutter: The touch screen display on this camera is an absolute lifesaver and makes the T5i a breeze to use! First off, the display moves and tilts so when I am taking portrait shots of myself or using the camera’s video mode, I can keep an eye on everything and make sure I am in frame and properly composed. It also helps when I am taking shots from high or low angles because I can see everything in the shot from practically any position. The fact that this display is touch screen is almost an afterthought, something you wouldn’t necessarily mention, that is, unless you are using a previous generation model that lacks a touch screen. Then, you miss the convenience a touch screen display brings, especially now that we are all so used to touch screen devices- it’s like second nature to touch a display to manipulate it! Not only is this display touch screen, but it also has an awesome touch shutter feature which allows you to take a photo just by tapping on the display. It’s great when you are using a tripod to shoot and really using that display to compose your image, because it means you don’t have to wait to take the shot, you can just tap the screen and capture your image. Finally, the fact that this display has full live view preview means that what you see on-screen is what you get when it comes to your images. When using the creative filters built into the camera, you actually get to see those filters in action before you take the shot. Again, this sounds like child’s play to anyone who has an iPhone, but this sort of technology is still relatively new to entry-level DSLRs.

Built-in stereo mic: You ‘d think that a built-in microphone would be a standard feature in a digital camera that was made to capture video, but you’d be surprised at the number of DSLRs that actually lack them. Although I didn’t buy the Canon T5i to use for videography, it was definitely a feature I wanted in my camera for occasional use. Now, it’s not the greatest mic in the world, and if you do plan to use your DSLR for videography, you will certainly need an external mic if you want to get top-notch audio, but something is better than nothing when you are in a pinch.

18.0 Mega Pixel CMOS Sensor with Hybrid AF: The sensor of any digital camera is probably the single most important feature because it is what captures the images. 18 mega pixels may not be the highest number of mega pixels available, but it is more than enough and certainly nothing to laugh about! What is really important about the sensor, however, is the hybrid AF system that basically makes all the cool live view features possible. It makes live face detection and auto focus possible with nine all cross-type auto focus points.

Aspect Ratio Function: Now this function may be a minor one, but it tops my list of my favorite features on the Canon T5i because it makes my life as a blogger and Instagram enthusiast much, much, easier! The standard aspect ratio for a digital camera is 3:2 and that’s the ratio of the LCD display, however, through the magic of technology built into this camera, you can actually change the aspect ratio for your images to 16:9 or even 1:1. Why is this important? Why can’t I just crop my images in post production? Well, glad you asked. Yes, I can crop my images in post production, however, when it comes to properly composing an image, it’s much easier when you can see your final product while you are shooting. So, if I am taking a picture that I plan to use on my Instagram account, I can switch to 1:1 aspect ratio and compose an image that is perfectly square. If I were to take all my photos in 3:2 aspect ratio, I would have to make a visual guess as to whether or not my image is composed in a square, which I may or may not get right, it’s basically up to chance! Same goes with 16:9 aspect ratio that is standard for YouTube cover photos. Normally, I would crop those down to the right size, but thanks to the aspect ratio function built into my camera, I can take the right picture from the start and not have to mess around with the crop in Photoshop!

Compact body: DSLR cameras come in many shapes and sizes, but the Canon EOS Rebel T5i has a relatively compact body that contains all those glorious functions I mentioned above! Now, it’s not the smallest DSLR in Canon’s lineup, however, when you take into account the fact that it is such a full featured camera in such a compact body, you really begin to appreciate the fact that you get so much power without having to lug around a huge camera.

Canon-EOS-Rebel-T5i-DSLR-Review

Overall, I am very pleased with this camera and I think I made an excellent decision with this purchase. It really is very easy to use and a great camera for someone looking for quality without needing to know the ins and outs of DSLR photography! If you are interested in picking up this camera, here is a link to where I purchased mine for a very good price! Also, in case you were wondering, I purchased the body of the camera alone, and then also purchased this 50mm 1.8 lens to use with it, since I knew the kit lens wouldn’t be useful to me. If you would like to know more about why I chose the 50mm lens, let me know in the comments or send me a tweet. I may very well make it the subject of a future post in this photography series, especially if I know people are interested in the topic!

{Picture Perfect} Great Balls of Bokeh!

bokeh photography for bloggers

As you may already know, back in July I purchased my first DSLR camera, then of course, being the internet loving, tech savvy chic I am, I went straight to the internet to learn everything I could about photography! Now, to be completely honest, although I had never owned a DSLR before, I did know quite a bit about photography from studying the subject in college as part of my Art History major and just being a general photography geek for years. But, being a photography geek with a new DSLR, I just had to immerse myself with as much information as possible, and let me tell you, it was like being swallowed whole by a leviathan! There is a lot of information out there on the web about photography, and it ain’t all pretty. Worst of all, there isn’t much out there geared towards helping bloggers or even Instagram enthusiast take better pictures. So, being a blogger, such as I am, I thought to myself that it may be helpful if I actually went ahead and shared the information I learned with my readers.

So, the first topic I want to tackle is my all time favorite photography subject: Bokeh!

What is Bokeh? 

It’s just a term used in photography to describe the quality of the out of focus elements of a picture. Literally, it comes from the Japanese word ‘boke’, which means ‘blur’ or ‘haze’. If you have ever seen a picture with those little balls of light in the background, that is like the epitome of the word, but bokeh is so much more than great balls of light! So, if you would like to learn more about bokeh and how to achieve this affect in your own photography, you are in luck because this is going to be a fun little post!

Bokeh is All About Controlling Depth of Field

Geek-Glasses-Depth-of-Field-Bokeh
Notice that only the first pair of glasses on the tray is in focus, and the others are not, creating some nice bokeh balls towards the back of the image.

In order to get a good bokeh effect in your images (yes, there is good and bad bokeh, but we will discuss the difference later) you have to understand one of the major principles of photography, which is depth of field. Depth of field is the distance between the nearest and furthest objects in a scene that appear in focus. You can control depth of field three ways.

  1. Aperture: Apertures of 3.5 or greater (3.5-1.2) normally create desirable blur
  2. Focal Length: A 50mm lens is often considered a standard, but you can make do with other focal lengths thanks to the third point
  3. Distance between the camera and subject (and the subject and the background): You can adjust your focal length by stepping closer to or further from your subject. This will help to create a shallow depth of field, but you should also consider the distance between the subject and the foreground or background that you want out of focus. This is less important when using a DSLR with a good lens, but more important if you have a point and shoot!

Don’t Forget Composition and Light!

bokeh photography tips for bloggers
The best type of background for a bokehful shot is one that would still be considered attractive even if it was in focus.

The composition of your image is very important when it comes to creating good bokeh. Remember, bokeh refers to the quality of the out of focus elements of the image and to a greater extent, how they interact with the in-focus elements. You may think your background doesn’t matter because it will be blurred out, but things like bright colors, lines or patterns in your background can be distracting even with a blur. The subject is always an important part of any image, and a distracting or overwhelming background can detract from your subject and create a mismatch between subject and background, thus resulting in bad bokeh! Try to think of your blurred background as a way of directing the viewer’s eye towards the subject and in turn, pointing the viewer’s eye from the subject back to the lovely blurred, bokehfull background!

And you also can’t forget the light! When it comes to creating great bokeh and especially bokeh balls, you need light in your image reflecting from your background. It’s a popular tactic in photography to use strings of fairy lights in the background of dark images to create an obvious bokeh ball effect, but you can still get great bokeh balls in broad daylight, as long as there is enough light bouncing off objects in the foreground and/or background of your subject. This is why thinking about your composition will help you find a great shot and create an image with awesome bokeh!

No DSLR, No Problem!

bokeh photography tips for bloggers
This tilt-shift style image was taken with a Canon point and shoot from the London Eye, illustrating that it is possible to get a beautiful hazy blur from a compact camera!

But what if you don’t have a DSLR? Well, good news! Although point and shoot camera’s don’t give you anywhere near the amount of control a DSLR does, they still have a few features you can use to control the depth of field! Many point and shoots come with various modes for shooting that can help you achieve a bokeh effect. Portrait modes are normally good for this because they expect for there to be a single object or person in focus and then, to help the subject stand out, the background is blurred. You may have to do some work adjusting your distance from the subject and the subject’s distance from other objects in the foreground or background of the scene, but portrait modes are generally a good place to start when trying to get bokeh from a point and shoot. A second feature of a point and shoot you can try is the toy camera or miniature effect. Canon point and shoots are notorious for having this setting, which basically blurs the top and bottom of the image for you, so that only the center plane horizontally is in-focus. This is like an instant bokeh helper because the camera goes ahead and adds a blur for you. A final trick you can try with your point and shoot is to shoot in macro mode. Macro mode is normally used when you are getting very close up to a subject and want to focus on detail, but it can also be used on a point and shoot to help you blur your background. Try taking shots with your macro option turned on and off and see what sort of difference it makes!

Software and Apps

bokeh photography tips for bloggers
This iPhone shot makes you question whether it was taken with a DSLR because of all the lovely blur and bokeh in the background created by using the Big Lens App.

Now, sometimes it just isn’t possible to get a nice natural bokeh effect from your camera. Either because you don’t have a DSLR with the proper lens to pull off the shot, or because you are working with a point and shoot or smartphone camera that just doesn’t allow you the control you need. So, the only way to get that awesome bokeh affect in your image is through software or apps!

Photoshop is probably the most popular way that even pro photographers edit and post process their images. But you don’t have to be a pro to own the application, and in fact, many photo and design enthusiasts already own this software. So, how can you use Photoshop to help you add bokeh to your photographs? Simple, go ahead and import the desired photo into the program. Use the Quick Selection tool to select the elements in your image that you would like to be out of focus and add a Lens Blur! Lens Blur is the preferred blur to use in Photoshop if you’re looking for a bokeh effect because it mimics the characteristics of a camera lens when creating the blur, so it seems more natural on the photo. You may also want to bump up the levels or brightness of the background as well before you add your lens blur so that you have more light to work with in your image.

For iPhone users, there is a great app that I often use to help me create the illusion of depth of field on my iPhone pics, and that is Big Lens. It’s basically a DSLR app for your iPhone that gives you the ability to select an area of your image to be in focus and then add a blur to the rest of the image. You can control settings like aperture, filter and lens to help you create an image that appears to have been taken with a DSLR!

Now, if big blurry bokeh balls are what you’re after, there are quiet a few apps available that allow you the control to add your own to an image, however, I like the app Bokehful. With this app you can load a photo and add custom colored bokeh balls to an image. One word of caution, however, if you want to go this route of adding artificial bokeh balls, is to make sure the image you are using has some bright spots and out of focus areas to begin with and then add the bokeh balls to those areas. If you don’t you will just be adding balls of fake light to your image and it will be extremely obvious (trust me, I made this mistake a lot in the early days of Instagram)! So, bokehful is definitely an app I would use as a final touch after you brighten up an image and then blur out sections with Big Lens.

Other Bokehlicious Effects

bokeh photography tips for bloggers
These lovely bokeh hearts were created using the DIY template for bokeh shapes linked below!

You have probably seen quite a few photos on Instagram and Tumbler where the bokeh balls aren’t actually balls, but hearts, stars or some other shape. Ever wonder how that effect is created? Well, there are two ways to add custom bokeh shapes to your images. The first is by using a custom template to cover your camera’s lens to adjust the shape of your camera’s aperture as it takes pictures. I actually found a great video on this topic on YouTube that also includes a link to some free templates you can download and make at home. Or, if you would prefer to purchase a complete die cut kit, you can purchase one here.  It’s actually quite a fun little DIY for any DSLR owner, and you can create some fun and interesting portraits and even landscape photos using different designs and shapes for your bokeh!

The second, and probably easiest way to create these custom bokeh shapes is through an app! Again, Bokehful and Big Lens both give you options to adjust the shape of your bokeh, as do many other photo filter and lighting effects apps. You may already have such an app in your collection, or you could check out the apps I suggest!

I hope this has been a helpful and informational post for any bloggers or Instagram addicts out there who are as in love with bokeh as I am! If it was, please go ahead and leave me a message on Instagram or send me a Tweet to let me know what you thoughts! Although photography snobs will often say you need a full frame DSLR with a 50mm 1.2 lens to create the best bokeh, the truth is, even the best camera in the world can’t shoot photos on its own. It’s all about the photographer, their creativity and ingenuity in setting up a scene that will produce a beautiful image. So, make do with what you have and get creative. Don’t be afraid to think outside the box when you have a concept for a great pic! Your Instagram followers will thank you for it! So, what other photography topics can I help you tackle? Any burning questions I can help you address to help your photography reach it’s fullest potential? Let me know!