True story– for the past week, I have not been feeling too hot. I’ve been hit with a wave of migraines out of left field and it has me feeling pretty down. So, what’s a girl to do? Well, for me the answer is turn my frown upside down and do whatever I can to make myself feel fabulous! So, I gave it some thought and decided on a few things that I can do to make myself feel like a million bucks. Here is my list, short and sweet!
1. Get dolled up: Sometimes just the act of doing my hair and makeup and putting on a nice outfit makes me feel fabulous because I look fabulous.
2. Wear a fashionable turban: I am completely sure that turban style head wraps are the most fabulous accessory a woman can wear (think Greta Garbo or Elizabeth Taylor). To me it screams old hollywood, full on globetrotting glamour and worldly elegance.
3. Use an obnoxious phone case:Any one of these should do! Look, if you want to feel fabulous, you need to exude fabulousness (is that a word?) and extravagance in every detail!
4. Put on some heels and learn to strut: I take this one from old hollywood starlets as well! Start walking around slow and steady like you own the room. Try it out in front of a mirror and start putting it into practice. Having a distinct walk is completely fabulous!
5. Stand tall, sit up tall, rest with your hands on your hips: Nothing says you mean business like the hands on your hips pose! Actually, this tip is something that’s been scientifically proven to make you feel more confident, and to me, confidence=fabulous! So, stand up tall, sit up tall, like you’re bigger than your actual body, and you will start to notice some fabulous positive vibes soon enough!
So, what do you like to do to make yourself feel fabulous when you need it most? Do you practice these sorts of techniques daily or only when you feel like you need a mood booster? Tell me what you think in the comments!
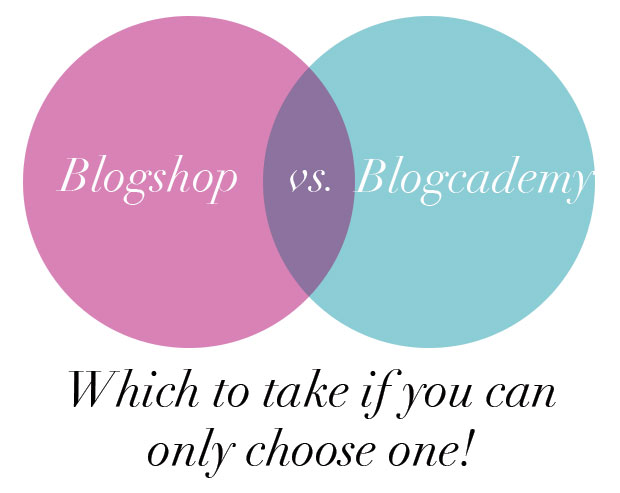
In the last year, I have had the opportunity to experience both the Blogcademy and Blogshop (online) courses. These two day, in person (or online as the case may be for Blogshop only) workshops are geared towards bloggers and web connected business owners who are looking for the skills and know how to stand out in the ever growing entity which is the internet! As a blogger, I was very interested in taking both of these courses, but at $750* a pop, these workshops aren’t cheap and many of you have been asking me to break down Blogshop vs Blogcademy based on my own personal experience and decide which course is the more useful one to take if you only have the money for one!
So, what are Blogshop and Blogcademy exactly? Let me break each workshop down for you in my own terms! Blogshop is a course for bloggers and business owners to learn important basic and advanced skills in the popular Adobe Photoshop software. Photoshop is a program used by many to create and manipulate images and photographs that are used for web and print, and a firm foundation in Photoshop can help both bloggers and business owners create compelling visual content for their blogs or business sites. You don’t have to own a domain to benefit from the Blogshop course, as owners of Etsy shops and other online or brick and mortar retailers will learn tips and tricks for editing product images and creating advertisements that can help their business compete in the online market place. The course mainly focuses on designing for web, however, the topic of print is brought up and one could take the skills they learn in Blogshop and apply it to print projects as well!
Now, Blogcademy on the other hand is a course for bloggers and business owners to learn the basics of blogging. In the workshop, you learn the best blogging platforms, tips on choosing a blog and domain name, how to navigate and use social media to help support your blog, tips for designing your site and creating content, and how to monetize. You don’t have to have a blog to join Blogcademy, but it is preferred that you already have a blog set up in order to use your own site as a basis for examples and exercises throughout the course. When I attended, there was a mix of all sorts of bloggers ranging from mommy blogs, to religious blogs, to health and fitness, lifestyle and fashion blogs! There were also many business owners present who were using the blogging platform to help advertise and sell their products! During the course and lessons, the Blogcademy Headmistresses (as they are known in the class) go around and give personal one to one feedback to the students to help them apply lessons to their own sites and circumstances.
So, now that you know a little bit about the two workshops, you probably want to know which one I found to be a better value for the money in terms of the skills you learn for the dollars spent? That would be Blogshop! Surprised? Not surprised? Let me break down my decision for you guys. Blogcademy is a course designed to teach bloggers how to set up, maintain and grow a blog. The thing is, this topic is one that saturates the web. There are many, many places you can find this information if you want to start a blog. Now, of course it is easier to learn this information in an organized and fun way in the format of Blogcademy, but its a much more expensive learning experience. That expense isn’t something I think most bloggers can justify if you are just starting out, and the content of the workshop seems geared to people just starting out (or at least, I thought so since I have been blogging for a while and I didn’t learn much new information). The networking aspect of the Blogcademy experience, however, was definitely the most valuable part of the workshop for me since I spent two solid days in a room with nearly 30 other bloggers with various backgrounds, interest and knowledge levels when it comes to blogging. Now, just so you understand, I wasn’t the only person in my class or who has taken Blogcademy that thought it was underwhelming for people who have been blogging for a while. I have met some awesome bloggers through the course that have expressed the same thoughts to me, so I know I am not alone. I do appreciate the fact that Blogcademy brought me together with some wonderful other ladies that I keep in contact with and bounce ideas off of, but, like I said, other than the networking, there wasn’t much there that you couldn’t learn from reading Blog Inc, 4 Hour Work Week or The $100 Startup! My second, minor gripe about Blogcademy is that the Headmistresses are only teaching you their version of blogging. I sort of figured this out on my own months after my Blogcademy experience was over, but a lot of the content of the workshop was based on their own experiences of what worked and what didn’t work, but what worked for them may not work for me. The ladies who teach the course are all amazing and popular bloggers who have been around for a long time, but the style of blogging that was innovative years ago that helped their blogs grow, isn’t necessarily innovative now that more and more people have followed that lead. I don’t want my blog to feel repetitive, I want people to know what I’m about and feel like they find something new from me every time they stop by!
Now, what made Blogshop so great? Look, I only took the online version of the class and I got so much out of Blogshop that I wish I had taken the in person class for the networking aspect! The thing that I think made Blogshop great was that it actually taught you trade skills! I learned things about Photoshop that I never knew before and I had been using the program for years! Now, I think that applying the skills is something of a personal motivation which some people may or may not have, but I feel like my blog images are improving daily because of the skills I have been putting to use. I am saving time on my blog posts, not because of the repetition and shortcuts that the Blogcademy suggests, but because of quick time savers and templates I have been utilizing in Photoshop! What I actually found pretty interesting was that Blogshop did teach you how to blog, but in such a way that you were inspired to want to create beautiful and interesting things! Even in my online course, the instructors gave you tips constantly on applying certain techniques to your blogs and creating new and exciting content.
Look, I am no pro blogger, but taking either or both of these workshops won’t make you one either. When it comes down to it, the success of your blog is determined by your ability to innovate your content and make it unique. Innovate or Evaporate! When you boil it down that is what both classes preached as the method to a successful blog or business. One workshop gave you information and examples on how to do that by using the methods they had used to get to success and the other gave you the skills to create your own. The better method is really up to you!
As usual, leave me a comment on your opinions of either or both of these popular workshops or leave me a question if you have one!
*The Blogshop Online courses are available for about $300, but the in-person courses are around the $750 mark!
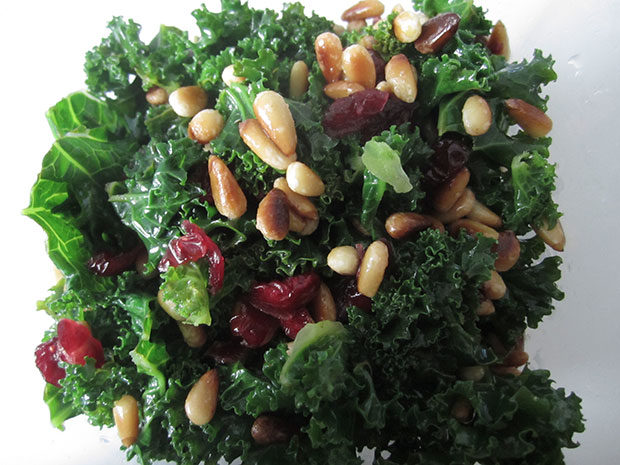
I am definitely one of those people who are constantly on an on-again, off-again health kick! I feel like kale got really big as a popular health food item in the last few years so I am always trying to find new ways to use it! Kale, if you have ever tried it, is not the most inciting green in the garden. If cooked improperly, it can get… gross! Then again, if handled properly, it can be pretty tasty and very filling! Whole Foods sells a delicious Kale Salad (I cannot remember what they call it!) in their prepared foods section and it costs something ridiculous per pound, but its super easy and very inexpensive to make it yourself! I call it Lemony Kale Salad (original, eh?) because thats what it tastes like to me!
Here are the ingredients you will need if you want to give this a try!
1 Head of Kale
3 Tsp of Olive Oil
1/4 cup Lemon Juice
1/4 cup Pine Nuts
1/2 cup dried cranberries
S & P to taste
Directions: The first part of making this salad is to remove the kale leaves from the stalks. This is probably the most time consuming part of the whole recipe, but its not that hard to do! I literally take one stalk of kale at a time and pull the leafy greens off. You can cut them off if you want to with a knife, but thats probably more time consuming. When doing this, try to make sure you don’t take any large branch pieces of the stems with you, because those are particularly bitter. Next, I wash the leafy parts using a salad spinner, but you can use whatever means you have available to you!
Then, you need to steam the kale for a few minutes. I fill a pasta pot a third of the way with water and sprinkle in some salt and cover it, cooking the water on medium to high heat until the water boils. Once you see that the water has started to boil, toss in your clean leafy kale greens and cover again. Let this steam for about 3 minutes until the kale turns a bright, vibrant shade of green! Next, strain the kale and put it into a large bowl to mix. Finally, add the rest of the ingredients listed above and mix! Sometimes, to be fancy, I like to mix the liquid ingredients together in a separate bowl before adding it to the kale, but I don’t think it actually changes the end result!
I store this salad in a plastic storage container and eat about half a cup at a time as a side salad or snack! As the salad sits, the acidity in the lemon juice will mix with the cranberries, resulting in a vinaigrette-like dressing. It’s great fresh from the bowl, but will last about a week in the refrigerator as well!
Let me know if you guys try this recipe and how you like it! Its one of my favorite healthy dishes because I can prepare it in advance and eat it all week!
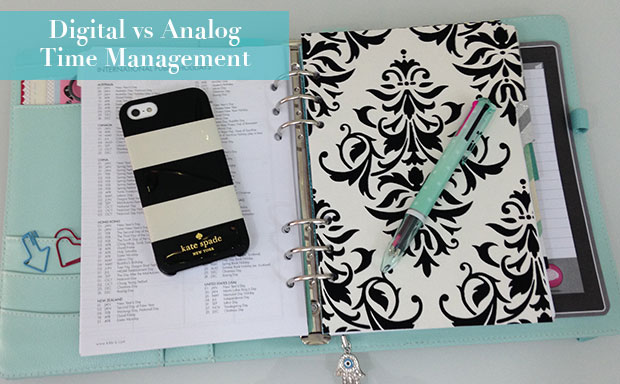
So, in case you haven’t noticed or you don’t read here that often, I finally caved and bought a Filofax! I feel like this decision was an inevitable one as I have been eyeing them for quite a while and actually used to use one before the age of the Palm Pilot (I swear I am not that old, but I did have a Palm Pilot at age 14)! Back then I had a Franklin Covey binder, and before that I had whatever cute ring-bound planners were available from Fashion Bug (if you are my age, I think you know what I am talking about… faux animal fur and psychedelic rainbow prints were my thing). It took me a while to feel like it was time to return to a full-blown paper planner system, though. I had been seriously testing the waters last year with a variety of different paper planners ranging from inexpensive Target planners, to Gallery Leather planners to a more stylish and coveted Kate Spade planner! All of these were nice, but inevitably only helped organize one area of my life; my schedule! I really needed something that would keep my calendar, to-do’s, random notes, my blog’s editorial calendar and so on! Truthfully, all these other planners were fated for extinction because they all had one thing in common, a binding, which meant I couldn’t move things around or add pages or sections as needed.
Now, I get it, I didn’t really have to get a Filofax to get that sort of customization. I could have used any number of apps that I already own to keep track of everything in one place, my phone! The problem with a digital system like a phone, however, is that it seriously lacks a sense of accomplishment. This is totally a personal opinion, but no matter how many lists I would make on my iPhone, or how many events I scheduled, or how many to-do boxes I tapped, I never felt like I did anything. Once you tap those check boxes and close the app, those old items go away, you can’t see them anymore! Yes, your calendar events usually stick around (unless you have to wipe your phone and you failed to back up or sync) and you can still read your old notes, but it’s just not as gratifying! The endless digital paper doesn’t feel like it amounts to much because it’s all inside your phone. It doesn’t matter if you have 1 list or 10 lists, 100 to-dos or 0, it’s all equal inside the phone!
Don’t get me wrong, I do love my iPhone and I think it does some very important things very well and things that my Filofax could never do! For instance, my iPhone is great at reminding me! It dings, vibrates, and does everything in its power to let me know when an event it coming up or to remind me about something I have to do! My Filofax, for all its wonderful goodness, will never be able to get my attention when I have lost track of time! My iPhone is also great for taking notes while I am driving through dictation which I do often! Wow, to think how wonderful the world would be if my Filofax could do that, it would be like having my own personal secretary! My iPhone also is the place I like to take quick notes when I am out and about and either (a) did not bring my Filofax, or (b) cannot pull out my Filofax because of the situation. IPhone’s are nice and discreet like this, but if the note I took is something that belongs in my Filofax, I will eventually transcribe it to its proper place!
Look, the advantages and disadvantages of digital and paper planning systems are really endless and to each their own when it comes to managing your own time. For me, for now, my Filofax and its trusty friend, my iPhone will be living and working together in tandem to help keep me and my life together!
What sort of planning system do you use? Do you use a mix of digital and analog like me, or are you all one or the other? Let me know in the comments and feel free to share any apps or planner tips that you find especially helpful!
My daily makeup routine is one that I always seem to be tweaking on a regular basis. I blame YouTube beauty guru’s for this mostly, as they always seem to have a new awesome product that I need to buy or a great dupe for this, that or the other! Recently, I have been trying really hard to stick to one set of makeup that works on a daily basis for work and life in general. Although I have a bunch of products that I like, right now these are the select few that I have been repeatedly using for the last few weeks!
Maybelline Baby Skin Primer
Bourjois Color Correcting Concealer Stick (for blemishes)
L’Oreal Magic Lumi Concealer (for under eye)
Borjois Healthy Mix Foundation
Hourglass Lighting Palette
NARs Desire Blush
Mabelline Color Tattoo in Barely Branded
Maybelline Lavender Lights Eyeshadow Quad
Covergirl Lash Blast Mascara
Revlon Colorstay Ultimate Suede Lipstick in Silhouette
And my makeup bag is from Ted Baker!
Which products are part of your daily makeup routine? Do you have any favorites that you care to share with us? Leave a comment and let us know your must have makeup!
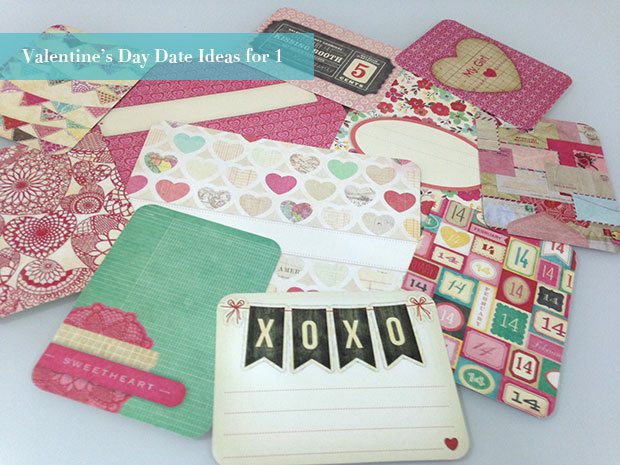
I know Valentine’s Day gets a lot of slack for being a couples only type of holiday. I never really had a problem with the holiday because I always sort of thought of it as a time to celebrate those you love, romantically and even platonically! But I get it, not everyone has a significant other and not everyone goes out with a group of single friends to mock the holiday. For many, I’m sure its just another day. If this sounds like you, I suggest celebrating the holiday by yourself and for yourself! So, show yourself a little self love and try one of these Valentine’s Day date ideas for 1!
Order our your favorite meal from your favorite restaurant and eat it at home in the comfiest pajamas you own!
Take a seriously luxurious bubble bath, including Lush Bath Bombs, bath salts, bubbles and champagne!
Schedule yourself a message!
Take yourself out to your favorite store and buy yourself a splurge worthy gift, and make sure they wrap it up with all the trimmings!
Order yourself a bouquet of flowers or an edible arrangement and have it delivered to your work or home. Tell no one who it’s from and just enjoy a beautiful treat to yourself!
So, how will you be spending your Valentine’s Day? Let me know in the comments!
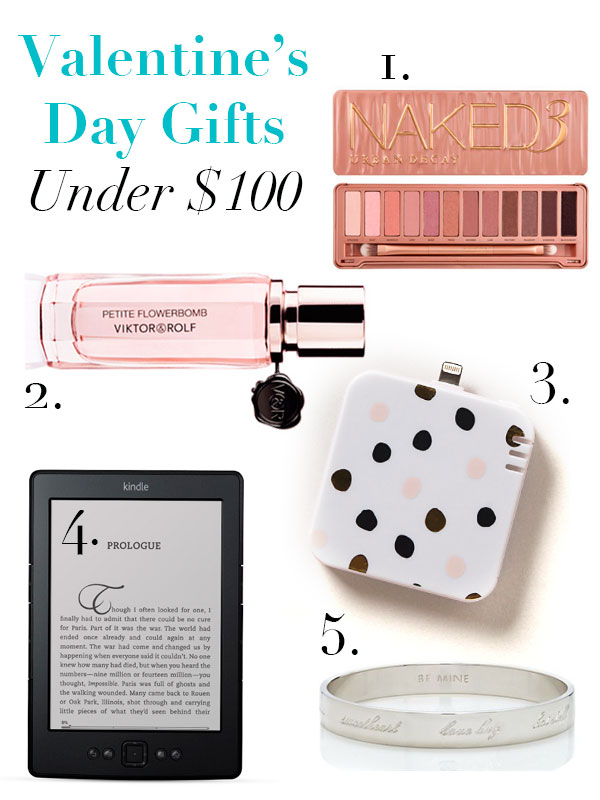
Valentine’s Day is right around the corner, guys and gals, so make sure you pick up something sweet for that special lady in your life! I know it can sometimes be daunting to choose that special gift for that special person in your life, so I have put together a few ideas at variety of price points all under $100. These range from practical to geeky to fancy, so there is something here for every lady!
1. Urban Decay’s Naked 3 Palette: This is the perfect gift for makeup lovers! It’s like the hot product right now, and its oh so Valentine’s Day themed with a variety of rosy hues that are sure to have your gal making amorous eyes at you in no time!
2. Victor & Rolf’s Flowerbomb Perfume: This is my new favorite scent and I think its a nice rounded perfume that a variety of women would be interested in! Since it’s a perfume, it comes in a variety of sizes and price points, but I think this petite flower bomb is adorable and just enough scent to have her remembering you for the months to come!
3. Anthropologie Mod Dot iPhone 5 Backup Charger: This is one of those practical gifts that nearly any lady could use as long as she has an iPhone 5, 5s or 5c! Everyone wishes they could get extra life out of their iPhone’s battery and your little gift may be the lifesaver that they remember!
4. Kindle: Bonus points to you if you load this up with Jane Austen Novels before you give it to her, but what lady wouldn’t love an ereader to cuddle up with at night before bed, or to join her in a nice long bubble bath, or heck, just to throw in her bag as company on a long day! It’s the gift that keeps on giving!
5. Kate Spade Valentine’s Day Bangle: I may not be the kind of girl that’s into jewelry but this idiom bangle is filled with sweet little sayings that even I couldn’t say no to. Think about it, its like a love letter that you wear on your wrist. I don’t know if it gets anymore romantic than that! And yes, it comes in gold!
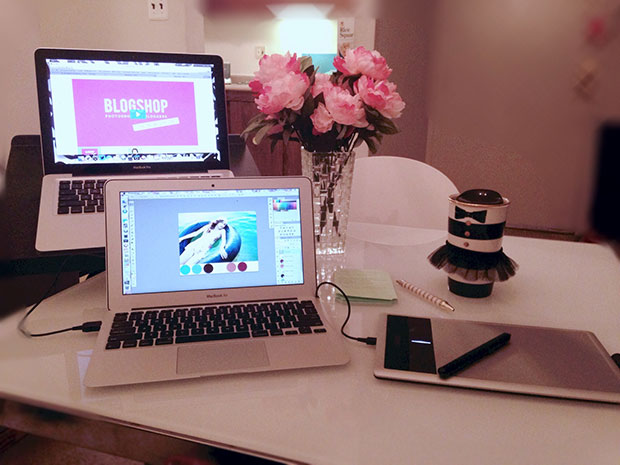
A few weekends ago, I took part in the first official online Blogshop class! Back in November or December, I had seen an update on Bri Emery’s blog {DesignLoveFest.com} that her infamous course teaching photoshop skills to bloggers was testing the waters with online courses. Normally, Blogshop, is an in-person two day workshop that costs around $700 dollars per person to attend. Earlier in 2013, when I came to the decision to attend Blogcademy (another two day in-person workshop, this one dedicated to helping bloggers create awesome blogs)I had to choose between Blogshop and Blogcademy because I just couldn’t afford both! So, when I saw that the initial test group for this online Blogshop course would only need to pay about $200 for the complete course online, I knew I had to jump on the opportunity.
Initially, I wasn’t 100% certain of what to expect from Blogshop. I had been using Photoshop for years and thought that I knew how to do everything I needed to know how to do. On top of that, my husband is a graphic designer, so usually when I don’t know how to do something, he does! Still, after watching a few of the Blogshop promotional videos and recaps, I began to get the impression that even those skilled in Photoshop would learn new tips and tricks to help them specifically with their blogs. So I went for it!
Now, after having finished the online course, which pretty much consisted of a solid 3.5 hours of video teaching and then breaks to work on our own examples, I can safely say that I did learn many new skills that will help me be a better blogger, however, a majority of the content I was already familiar to me and put to practice on my site. I was definitely glad that I got the chance to partake in this online course, because for me, its all about learning new skills and new ways to make my blog awesome, so the fact that a majority of the content wasn’t new to me really didn’t bother me because I did learn some pretty valuable skills that I don’t think I would have learned if it wasn’t for this course.
To give you guys an idea of what a seasoned Photoshop user learned from the course, I am going to list the 5 Things I Learned from Blogshop!
How to quickly (and easily) create a GIF!
How to add texture to text and just about anything else!
How to edit photo’s with masking (and achieve some really awesome affects)!
How to lighten and brighten my photo’s instantly (without the use of a Photoshop action)!
How to create a collage or mood board in Photoshop (bye bye Polyvore)!
Well, do any of those skills sound like something you would like to learn? I certainly didn’t even realize how monumental learning this skills would be for me personally! I can’t wait to start putting this knowledge to use on my own blog because not only did I learn new skills that will help me create better content, but everything I learned only took a few minutes to achieve. My mind was literally blown when I realized how quickly everything took once I understood the way certain tools worked!
So, you’re probably reading this waiting for the part where I tell you whether or not Blogshop is worth it for you? The answer is really up to you, and the IHeartBlogshop website does a better job than I at explaining what you will get out of the course, either in person or online! For me, I think I made the right choice with the online class where I picked up a few valuable skills I was missing that will really help me boost my blog! I do think there is something to be said for taking the in person course, however, where you really get a chance to network with other bloggers in your area and bounce ideas off each other! As for a Blogshop vs Blogcademy overview, I will be working on that for you guys, so expect that in the near future if you are on the fence whether to take Blogshop or Blogcademy (if you can only afford one)!
This has really been quite the interesting week so far! Monday I had off for MLK Day, which was a nice little three day weekend that of course flew by! Yesterday, my area was hit with a major snow storm that supposedly dropped something like 16 inches of snow in my area (crazy!) and today I have another snow day at home with the hubster which is awesome! So, I know I don’t normally post on Wednesday, but I have been playing around with some different content and made this awesome little GIF of my Kate Spade iPhone 5 cases that I just had to share with you guys! I kept thinking I wanted to save this for something special, but by golly, today is something special!
Anywho! I hope you enjoy the GIF and if you too are working from home or get a full blown snow day (yay!) here are a few other recent posts of mine that I suggest you catch up on while you are stuck at home all warm and cozy in your pj’s and your fluffy socks!
Hope you guys enjoy the snow day if you have one or just have a fabulous day in general if you live in an area with fairer weather! Let me know how you’re spending your day either way in the comments below! See you all tomorrow with our regularly scheduled posts!
Letter writing really is a lost art and sometimes I think a very undervalued one in our modern digital society! What is not lost or undervalued, however, is the art of writing a thank you note. Since the new year and plenty of holidays just passed, I thought this would be a good time to urge everyone to write someone a thank you note. Perhaps it is for a gift you received, or a favor someone paid you, or perhaps its just to thank someone for being there for you when you needed it, but right now I urge you to add sending a thank you note to your to do list for the day!
How To Write a Thank You Note
Writing a thank you note is easy once you know who you are sending it to and why. They don’t need to be long, drawn out letters, although they can be, but just a sentence or two written in gratefulness will do! It is very important, when it comes to thank you notes, that they be written by hand. That is really the only rule I think worth following when it comes to them. Timeliness is also important, but I always think that when it comes to gratitude, better late than never! So, here are a few rules for writing thank you notes that you can keep as a little cheat sheet for yourself!
1. Always write a thank you note by hand (You may need to decide which form of handwriting of yours is best and most legible, it doesn’t matter if you write in cursive or not!)
2. Mail a thank you within two weeks of receiving a gift (unless its a wedding gift in which a 2 month span is allowed for larger weddings).
3. Be sincere when writing the note, your tone will show!
4. Send thank you notes often, even for simple things and favors!
Now, to get you started, I have written a few little excerpts that you can copy and use for your own thank you notes in case you have trouble giving words to your feelings. Don’t be ashamed of this, people often find it difficult to express gratitude, and after a while of using the words of others, you will be able to develop some words of your own.
Dear NAME OF RECIPIENT,
Thank You so much for the GIFT HERE! I am very grateful and appreciative of your generosity!
Best Regards,
YOUR NAME
Thank you, NAME OF RECIPIENT, for the lovely gift! I am so grateful that you thought me on my NAME OF EVENT!
Thanks again,
YOUR NAME
Dear NAME OF RECIPIENT,
I just wanted to take a moment to thank you for DESCRIPTION OF FAVOR! I truly appreciate that you were willing to help me and I am very grateful for your FRIENDSHIP OR SUPPORT!
Thoughtfully,
YOUR NAME
I hope this inspired you to start writing thank you notes to those in your life who show you their generosity and support! Do you have any tips for writing Thank You Notes that you can share in the comments?