
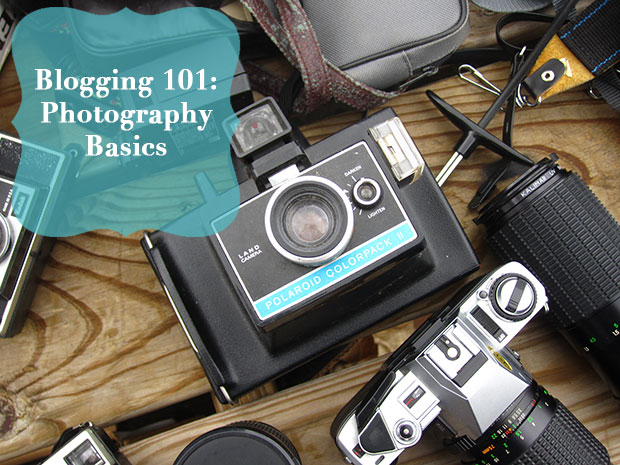
Blogging 101 is a 10 part series where I share my tips and tricks for creating and growing a blog from scratch. This is the eighth installment in the series, and you can find more information on the topics of this series here.
If you are thinking that blogging has more to do with writing than pictures, you are dead wrong. There was a reason I listed a camera as a piece of necessary hardware in my basics guide, and that’s because pictures are a major component of blogs and blog posts in 2014! Think about it, do you read any amazing blogs that use images in their posts? Are those images relevant and interesting aids to the content itself? I’m pretty sure that would be a yes and a yes! Why is that? Because people love pictures. Images tell stories just as much as your blog posts do, and in this era of the 5 second attention span (thanks Twitter & Instagram) leading with a great image is the best way to capture someones attention so that they want to stick around to read your posts. Now, if you haven’t been very interested in photography before and are totally worried now that you don’t have the right equipment or skills to add great photos to your blog, worry not! With a few simple tips, I am going to instruct you on how to take great photos for your blog no matter what your current skill level with a camera!
First and foremost, lets discuss the camera itself. Like I mentioned in a previous installment, any camera that can take decent shots will do to start you off on the road to taking supporting blog images. I myself use an old Canon point and shoot, which surprises some people who think I must be using a higher end camera. Nope, I just use a few solid photography techniques that I am going to share with you today. You can even use a smartphone camera, again, only if it shoots decent photos, meaning you can get a good focus on your subjects and the photo comes out clear and without any pixellated distortion. I use my iPhone 5’s camera more often than you may realize, again, because I use specific techniques that help me take better photos!
Okay, so you have a pretty decent camera in your hands and you’re ready to take some photos, what are these important techniques I keep talking about? Well, the first one is to shoot in plenty of light! Most of the photos I take are shot in my living room because I have a big window that lets in beautify natural light. Natural light is your friend, so use it! If you are like me and take/need mostly still life sorts of shots, make yourself a set up by a window that gets lots of light pouring in and take your photos in the afternoon when the sun is at its highest and brightest in the sky. The more light you get in your shots, the clearer your photos will be and using natural light means the objects in your shots will be true to color more often than not!
Another technique I use that relates to lighting is that I like to shoot my pictures on a light reflecting surface. Ever notice that most of my images have a white background or that my objects are sitting on a white surface? That’s because I am trying to maximize light and light bounces off white surfaces really well! If you don’t have a white surface in your home near a window, go out and pick up a few white foam core boards from your local dollar store or craft store. You can use the boards as your surface and even set up other boards around your photo set up to reflect even more light! One great tip I have for shooting in natural light is to keep your objects facing the direct source of your light (facing the window if that’s your light source). This means that shadows will be behind your objects so that they don’t interfere with or darken the image.
If shadows are too heavy in your images, like I said above, use a piece of white foam core board and set that up facing the shadow so that light bounces off your board and towards the shadow you want to dissolve. Hand mirrors are also great for dissolving dark shadows or even for highlighting objects in a spot light type way. Just point your hand mirror towards your object, making sure it’s also picking up light from your source and you will see that the mirror focuses light wherever you point it. Experiment with moving the mirror closer to and further away from your objects to see how it affects the lighting in the scene.
Okay, so I have explained how to work with natural lighting, but what happens if its dark outside or if it’s night-time and you want to take a picture? Now, this gets a little tricky because the answer is not to just turn on your household overhead lighting and shoot with that because the quality of most people’s home lighting isn’t photo quality! You could buy a photo lighting kit, I use this one from Amazon which is very inexpensive, but I still think that natural lighting is the best light to shoot in! One tip I have already mentioned in an earlier installment is to schedule yourself a date and time to shoot a bulk amount of photos so that you are not taking your photos piece meal, some one day, some another day, and on and on. One of the benefits to doing this photo shoot style session is that you can choose a time of day when the lighting is great and plan out all the shots you need for upcoming blog posts and just go to town taking all the pictures you need and it avoids the situation of having to take a last-minute picture in undesirable light.
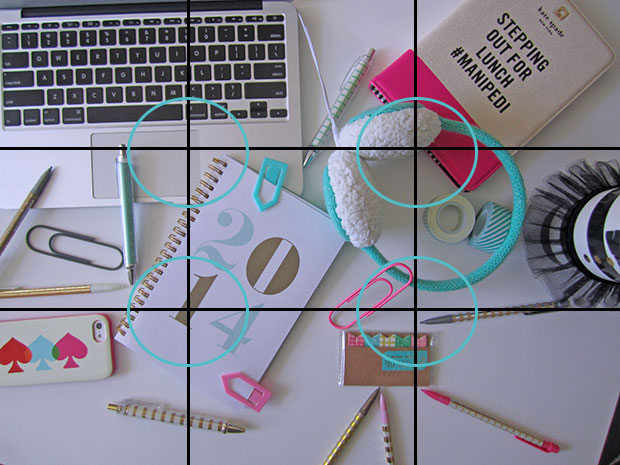
Now that we have discussed lighting, I would like to discuss another major point of photography which is composition. The way you compose your images is very important because you want your photos to be interesting and visibly legible. The default technique that I think anyone with photography knowledge would suggest is the rule of thirds. The rule of thirds is a principle in photography that helps to create balanced composition through the use of a visual guide. Imagine when you are taking a photo that there is a tic-tac-to board drawn on your image, breaking your image into three sections horizontally and three sections vertically. The idea is that you want to place your point of focus on a point on this grid where two lines intersect and if you have more than one important object in your frame, you want to position those all at places in the grid where lines intersect. It’s a pretty simple concept and its so popular in fact that many cameras including smartphone cameras have a mode that is already built-in to the software of the device that will go ahead and add the grid marks for you in case you’re not so good with imagining them in your head.
Of course, the rule of thirds isn’t the be all and end all of good composition. I always like to mix it up and try new angles to shoot my photos from and give unexpected views. Once you have good lighting in place you can try multiple different compositions for shots and all different angles and close-ups you can imagine! This leads me to the final technique I rely on to take great photos. Practice! Practice, practice, practice! Photography isn’t a skill you learn overnight, although I do believe some people have a natural knack for composition while others have to work on it, but the only way you will get great photos is to practice and experiment as often as you can! You never know what you’re going to get and you may play around with some different compositions and find that you create a few interesting ones that may not fit with a specific blog post you have in mind right now, but heck, save that cool shot for a rainy day or post it to Instagram to drive more attention to your blog! You should always be building up on the stock of photos you have available to you so get your camera and start shooting!
Wow what a long and helpful post!
http://www.mercuteify.com/
Thanks Allison! I’m glad you enjoyed it! Please make sure to share it in your social media feeds!
I am loving this entire series! It is making me think about getting my blog up and running again…there are so many useful tips! I do have one question pertaining to the photography. I know this may sound weird, but I was wondering how you don’t get the shadow of you holding your phone (or camera) above a certain shot in the bird’s eye view type of photos (such as the one you posted). A lot of blogs do this and I am so baffled, mostly because whenever I try to do it, my shadow is always caught in the photo!
Thanks for the wonderful feedback, Vanessa! To answer your question, I do this one of two ways. I either hold my phone or camera at an angle against the light in which you do not see a shadow OR I will use a studio light to shine against the shadow. Its sort of hard to answer this in an easy way because where you will place your camera/phone and where you will place the lighting is different based on your set up of the objects you are photographing. So, I suggest playing around with it. Remember, you get a shadow whenever an object blocks a light source, so you may be able to work around your light source to get the shadow to disappear! Hope this helps!
Thanks for finally talking about >Blogging 101: Photography Basics – Strange
& CharmedStrange & Charmed <Liked it!
Hi Alexis! Thank you so much for this series! It’s been incredibly helpful for me. I’m starting a blog, just for my own fun and enjoyment. It also helps me maintain an identify in addition to “Mommy”! 🙂