
All inserts released from my shop beginning in Summer 2020 onward are now compatible for printing in Happy Planner dimensions 7in W x 9.25 in H. Please use these instructions to accurately print your inserts.
Step 1: I recommend using the Half Letter PDF insert size to print to any other size pages, such as Happy Planner and I recommend using these directions with Adobe Acrobat Reader. These directions are also intended to be used with Full Size Letter paper or A4 only.
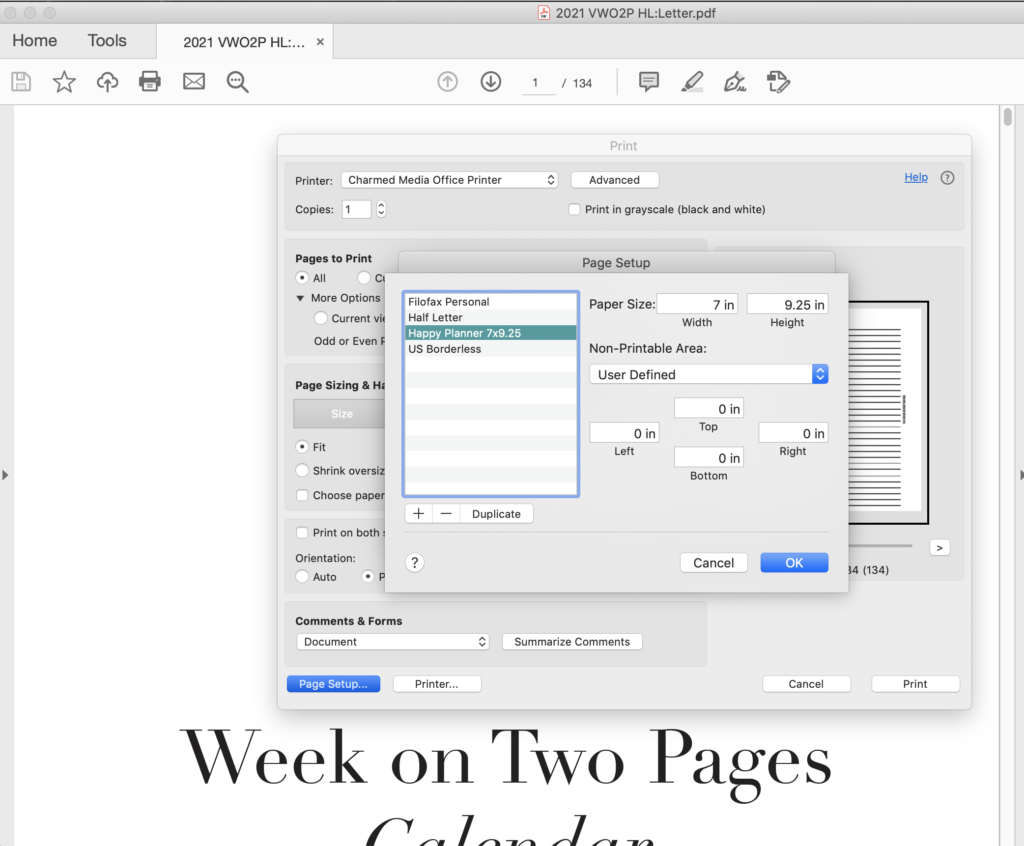
Step 2: In Adobe’s Print settings, select Page Setup, and under Paper Size, select the option Manage Custom Sizes. Create a custom paper size for Happy Planner which is 7in Wide by 9.25in High. Also I recommend adjusting the margins of the paper to 0 in all directions as per the screen shot below.
Step 3: Under Pages to Print select your print range- the page numbers you wish to print in total from the file. Here you will also select Print Even Pages Only (Pay attention to this setting as its important for keeping the pages printed in a coherent order- see image below).
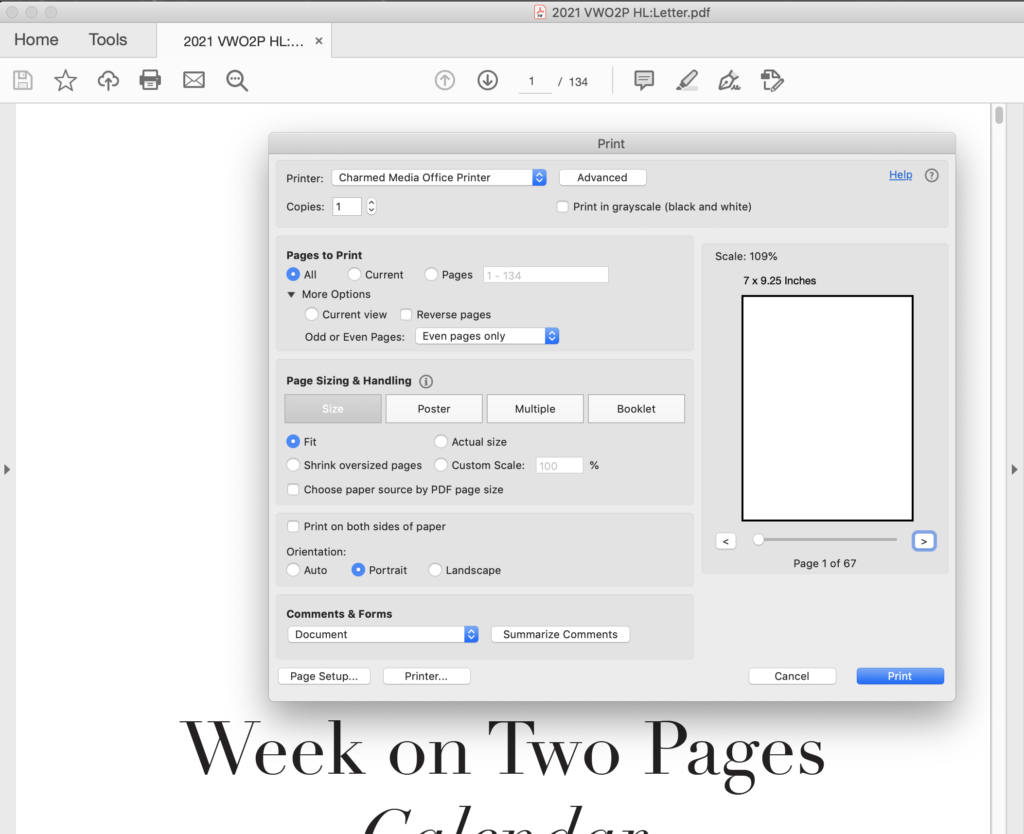
Step 4: Under Page Sizing & Handling ensure that the option Fit has been selected and the Orientation is set to Portrait as seen in image above.
Step 5: With all these settings correctly in order, hit Print.
Step 6: Once your pages print, you will take the pile of pages from your printer and reinsert them into the printer in the proper orientation so that you can print the Odd Pages behind them. So make sure you understand how your printer handles paper.
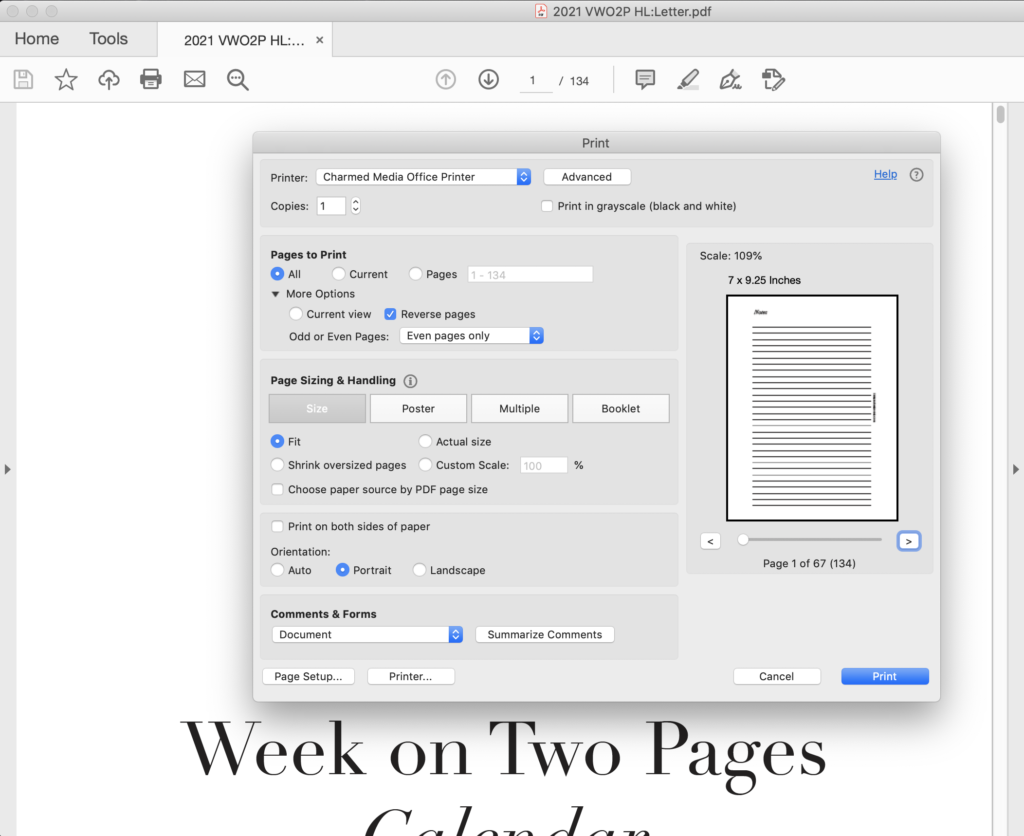
Step 7: With your printed pages reinserted, go back to the Pages to Print option, ensure your proper print range is entered yet again (this should be the same range as you entered initially) and this time select Print Odd Pages Only AND make sure the Reverse Pages option is also selected as seen in the image below.
Step 8: Double check that all the initial print settings in Step 1, 2 & 4 are the same before hitting Print again. The result should be a double sided printing of your inserts in the Happy Planner dimensions, in proper print order.
Step 9: From here, you will need to use a piece of Happy Planner sized paper or another Happy Planner insert to act as your cut guide so that you trim the excess paper from the pages accurately. I recommend using a paper trimer for this. Make sure you have left extra room on the appropriate long side of the inserts for where you will be punching the inserts.
Step 10: Once the pages are cut down to size, use a Happy Planner compatible punch, disks and cover to finalize the binding of your inserts.