DIY

DIY Bow Clips for your Planner & More!

DIY Planner Bow Clip

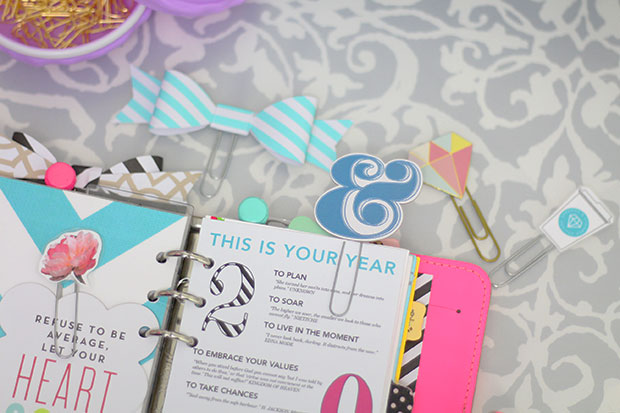
Ever since I showed you guys those cute little bow paper clips I made for my Filofaxes, you have been asking me to do a DIY tutorial on how to make them! Well, ask and you shall receive, right? I Actually put together a video with not one, not two, but three DIYs for making paper clip accessories for your planner so that everyone is able to create exactly what they want for their planner.

DIY Bow Making Pattern
This is a low res image, download the full file via the link below!

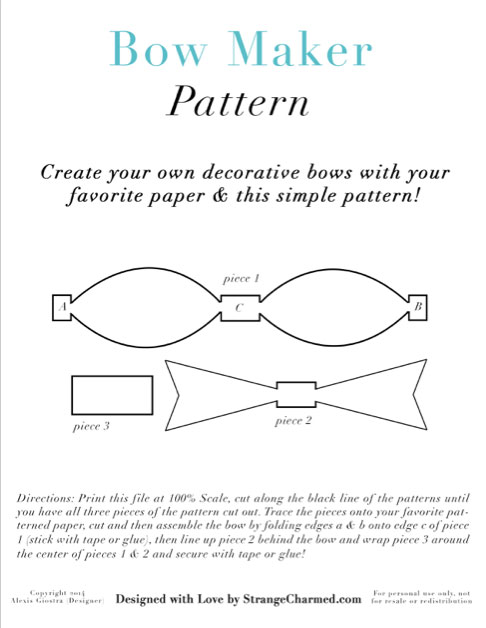
To go along with this DIY video, I created a special Bow Maker Pattern Printable to act as a template for creating your own bows. I show you how to use this template in the video, but the file itself also has directions as well. Feel free to download this file and make yourself bows to your heart’s content! But remember, this printable is free for personal use only. Commercial use of this file is prohibited, and please, if you want to share the file with friends and family, link them to this post or my YouTube video instead of directly sharing the file!

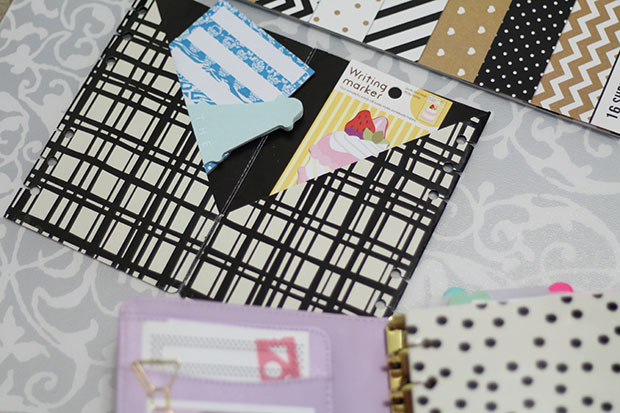
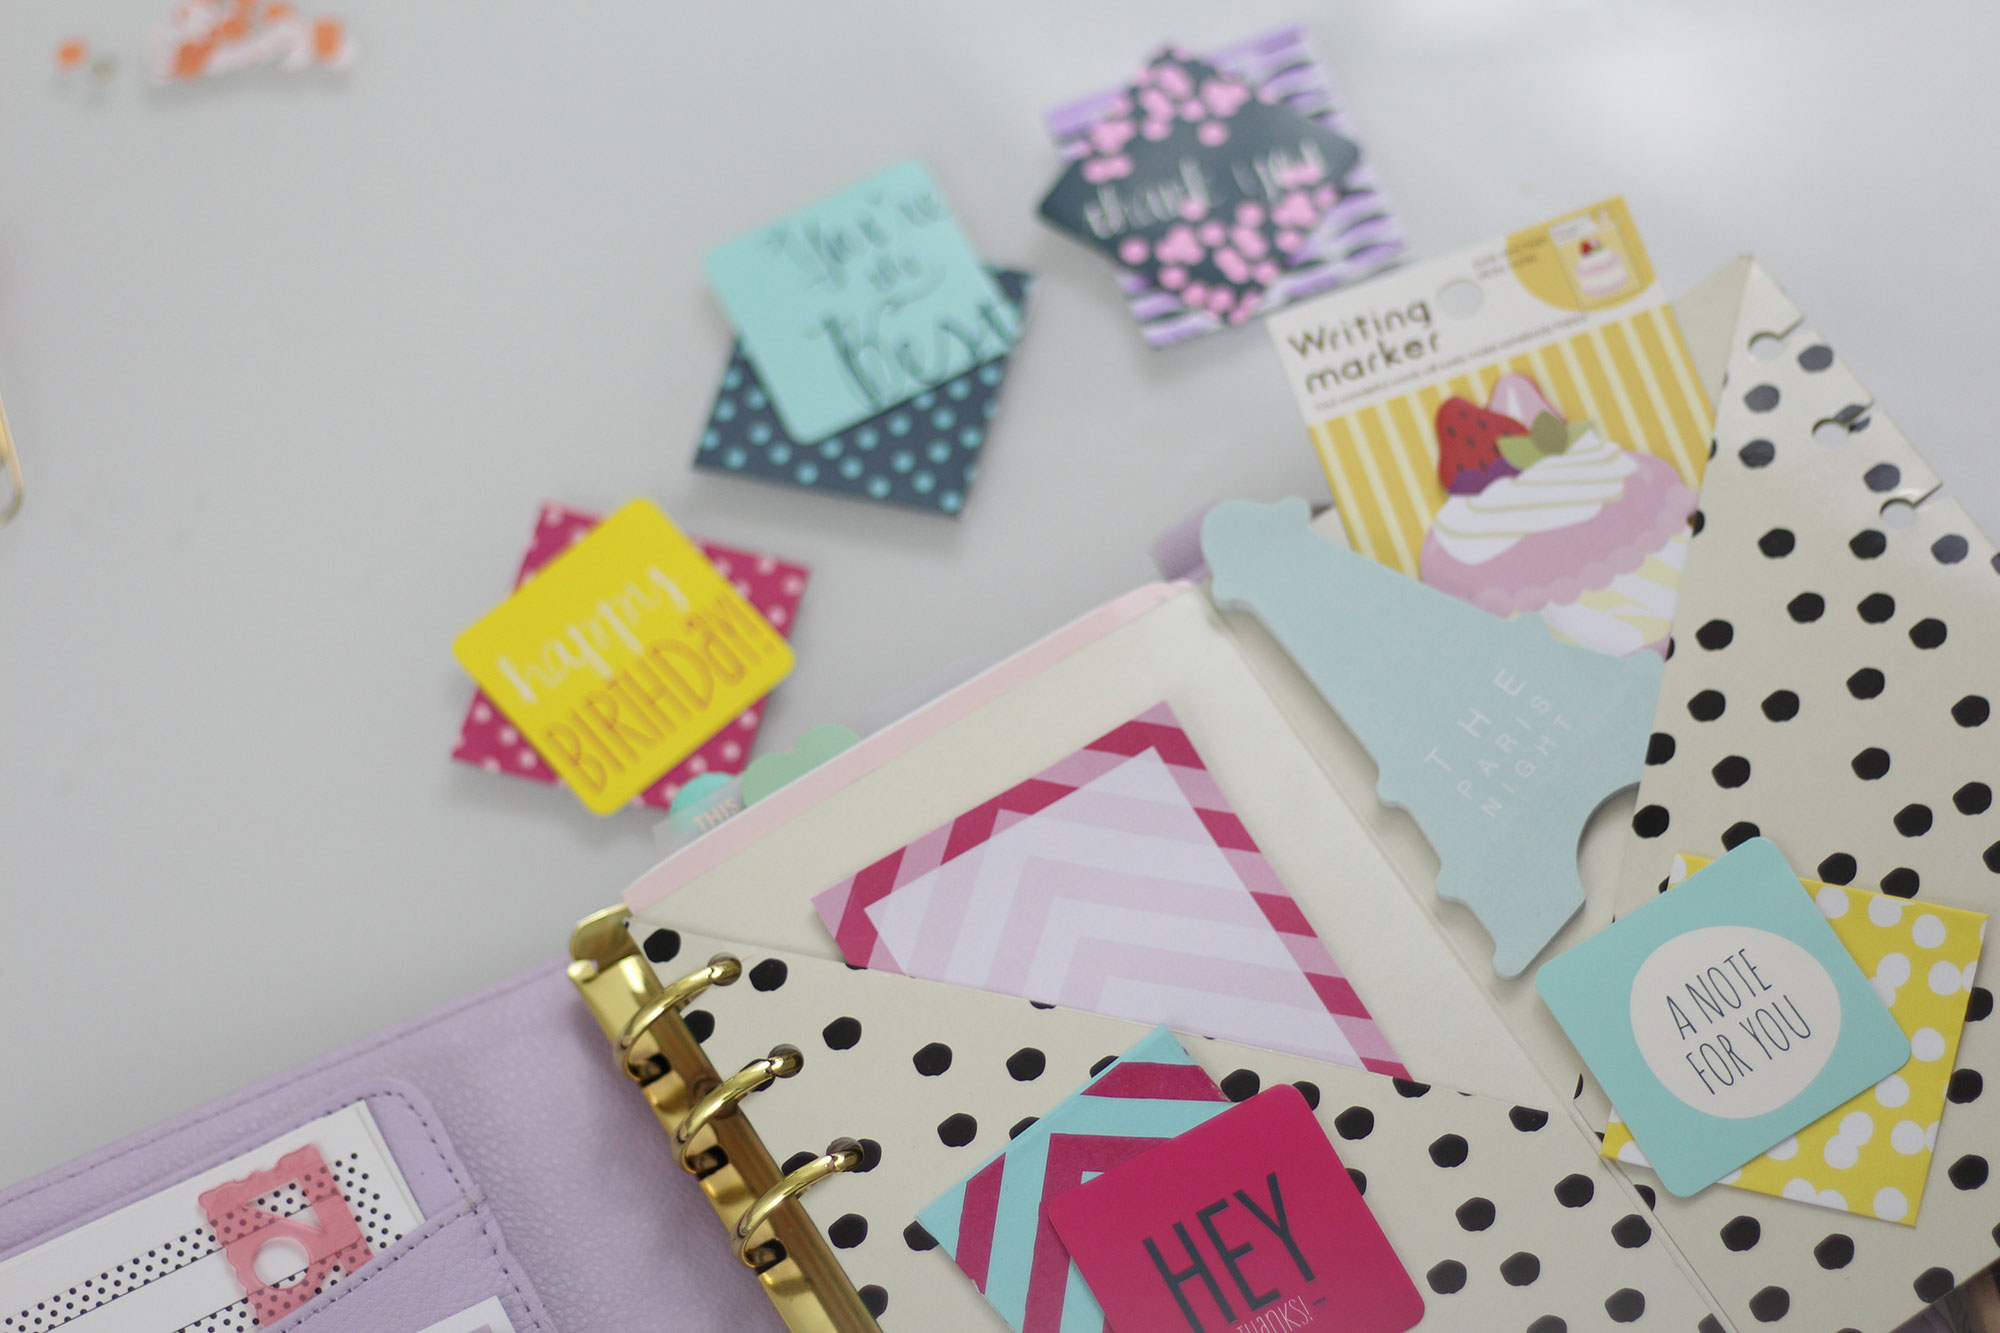
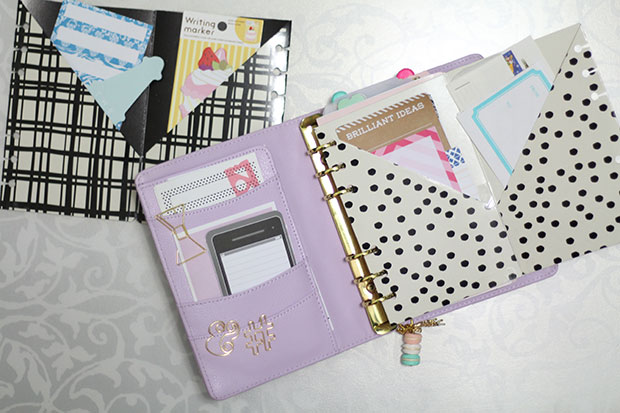
Three DIYs, you read that right! So, other than the bows, I also show you how to make page clips with chipboard elements as well as how to make clips from printables and any other images or icons you may find! If you can print it or if it’s made from paper, you can turn it into a decorative page clip for your planner!

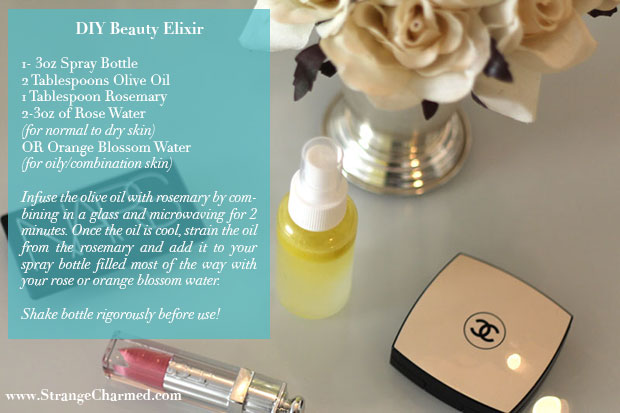
In the video I use my new 2014 Favorite Things Sticker Set as a template for some clips I made by printing the PDF on heavy printer paper instead of on sticker paper! I love this new Sticker Set of course because it’s filled with some one my favorite images and icons from the year! Think pink peonies, coffee cups, perfume bottles and of course, stripes! You can purchase this set from my shop and use it as stickers or to make your own page clips as well!

So here is the video linked above! This is definitely one of those tutorials that is better explained visually, so if you would like to see the three methods I used to make some lovely embellished paper clips for my planner, check it out! Of course, if this video helped you in any way or gave you some new planner inspiration, please make sure to share it in your social media and tag me @MissTrenchcoat! It would mean the world to me!

xoxo,

Alexis-Signature

This article was first published on Strange & Charmed on December 18th, 2014 and is being reposted as part of my Holiday Prep Hiatus! For the months of November & December I will be recycling some vintage S&C content that you may have missed in order to give myself some extra time to finalize projects and spend time with my family during the holiday season. All reposted content will be marked as such. I hope you enjoy this blast from the past blog post!

7 Ways to Wear a Scarf for Fall + a DIY Blanket Scarf!

7 Ways to Wear a Scarf for Fall

It’s that time of year again when we break out our favorite scarves for fall! Although we had something of a long summer into October here in the mid-atlantic, I am excited to report that in the last few days, the weather has started to turn and it officially feels like fall now! This weekend was great- although it rained a bit on Saturday, you couldn’t have asked for more quintessentially fall weather, and I even had the chance to wear my new DIY Blanket Scarf out and about to keep me warm with a light jacket!

DIY Blanket Scarf
Me, wearing my DIY Blanket Scarf this weekend in a corn maze! Don’t worry, I made it out!

So, I’m sure some of you are wondering about my DIY Blanket Scarf, so I will let you in on what that’s all about! I think most of you are probably familiar with the concept of a blanket scarf- Zara sold a wonderful tan and red plaid version last fall and I have been waiting for it to come back for what feels like forever, but apparently, I keep missing it… epic sad face! It just got to the point where I was sick of waiting and decided to take matters into my own hands, so I did the only logical thing I could think of- I headed to the craft store! JoAnn’s Fabrics to be exact, and searched through rows and rows of lovely fall themed plaid fabric until I came across a wonderful super light fleece material that I thought would make a perfect blanket scarf. I believe the Zara variation is made from a woven cotton and is very soft, but not as thick and warm as you might expect (at least, that is what I have heard from friends and around the internet). One thing the Zara Blanket Scarf is, however, is large! Something like 53″ squared! That’s like most of my height people, no wonder they call it a blanket scarf! My lovely fleece material, however, was only something like 45″ wide, so I had to make do with a slightly shorter, although still massive, piece of material. I just had the fabric cut into a square and it cost me something like $6 after I used a coupon! Can’t beat that for a DIY scarf that’s made of warm fleece and only slightly shorter than the original. I’d guess my version saved me something like $30, which I’m pretty happy about!

Now, onto the real meat of this post, the seven ways to wear a scarf! Well, for that, I assembled a very simple tutorial video to walk you through my favorite styles! The first three styles are ways to wear a blanket scarf specifically and then the final four apply to a traditional oblong scarf! The styles range from cozy to super chic, so no matter what weather you’re experiencing you will find a style to wear your favorite scarf that keeps you seasonally dressed and stylish! If you don’t have the time or ability to watch the video right now, just make sure to bookmark this post and refer back to it later on so you can learn these great styles! I know I am always looking for new ways to wear a scarf, so hopefully you learn a new style or two that you can integrate into your wardrobe this fall. Enjoy!

I hope you all enjoyed this video and this DIY Blanket Scarf information. If you have a tutorial with other ways you like to wear your scarves, please feel free to tweet me the link and of course, if you try any of these methods I teach you in the video, be sure to snap a picture and TAG me in it on Instagram so I can check it out!

xoxo,

Alexis-Signature


This article was first published on Strange & Charmed on October 13th, 2014 and is being reposted as part of my Holiday Prep Hiatus! For the months of November & December I will be recycling some vintage S&C content that you may have missed in order to give myself some extra time to finalize projects and spend time with my family during the holiday season. All reposted content will be marked as such. I hope you enjoy this blast from the past blog post!

DIY Filofax Folder Divider!

DIY Planner Folder Tutorial

Immediately after I received my newest planner, the Kikki K Lilac and Gold 2015 Time Planner, I went through something of a Filofax revival! All of a sudden I was super obsessed with my planner again, I scoured the internet for new inserts and goodies and started watching way to many planner set up videos for new inspiration. At some point, I watched a video where a woman showed her setup and briefly commented on a DIY folder she had assembled for her planner. I remember thinking it was one of the cleverest things I had seen in a planner in some time, and made a mental note to attempt to DIY one for myself, not knowing exactly how she had gone about making hers. A few weeks later, I found a little note in my planner that referred to this file folder DIY, and feeling crafty, I decided to see what I could come up with!

DIY Target File Folder Filofax Insert

Many of you have seen exactly what the result of my labor was, and have commented on your interest in seeing a DIY on the topic. So, I went ahead and filmed a video where I walk you through how I made mine. As this wasn’t my original idea, I really wanted to find the source of my inspiration and link you all to the original video I had seen that had inspired this creativity, but for the life of me, I can’t find the video! I searched through my YouTube history, spent days searching videos trying to find the originator of this idea, but alas, I could not find it and thus do not know who I should credit for this idea, but thank you, whoever you are! I love this little folder I have made for myself and I think you guys will love this DIY because it’s really almost too simple!

DIY Target File Folder Filofax Insert

I considered whether or not I should write out the directions to this tutorial, but I know I will probably get a bunch of questions on the process because I feel like crafty tutorials like this need to be seen, not read. So, below is the video where I walk you through the process. Here is a list of supplies I used and suggest for this project:

  • A Target $1 Spot File Folder
  • A cutting mat
  • A metal ruler
  • An exacto knife
  • A permanent glue roller
  • Clear tape
  • Scissors
  • A single hole punch

I hope you all have enjoyed this video and this DIY! I think this little folder is great for storing a variety of different planner supplies like extra paper, sticky notes, page flags, stickers and more! It can also act as a divider as well or even a dashboard if you keep yours in the front of your planner like I do! If you have a planner that lacks lots of pockets or if you just need a more unique storage idea, definitely take the time to try this out and share it with your planner friends as well!

Looking for some more great Filofax inserts? Check out my 31 Things to Do in October Printable or visit my shop for more of my unique inserts and trackers!

xoxo,

Alexis-Signature

DIY Spooky Halloween Skull Cake

Williams-Sonoma Nordic Ware Skull Cake

Last year, I was obsessed with the Nordic Ware Halloween Skull Cake Pan from Williams-Sonoma. I’m not really big into baking, but the thought of being able to bake a cake in the shape of a skull was enough to turn me into Betty Crocker! Well, unfortunately for me, the pan sold out relatively quickly last Halloween season, but this year it came back and I had to have it! So, my husband surprised me with it last month and to thank him I immediately made him a cake using the pan!

Williams-Sonoma Nordic Ware Skull Cake

Mike loves red velvet cake, and I thought it would be the perfect type of cake to make to test the pan! The cake itself is obviously red, and when covered with the off white cream cheese frosting, I thought it would look like a real (enough) skull, and then when you cut into the cake it would look like it was bleeding because of the red cake underneath! I was super excited to make the cake, and although I used a simple cake mix and pre made frosting, it was a really fun and festive activity.

Williams-Sonoma Nordic Ware Skull Cake

As you can tell from the image of the cake pan, the cake is made in two pieces. The pan itself has two wells, one for the face of the skull and the second for the back of the neck and head. Once the cakes are baked, you connect both halves to create a complete 3D skull! But I was thinking about it and if you wanted to, you wouldn’t necessarily need to make the whole cake, you could just use the well with the skull face and that would make a festive cake that didn’t require too much coordination connecting the two halves of the skull. Using both wells, it took two boxes of cake mix, so it becomes a rather large cake in the end once it’s all together, so in the future I will probably end up making half of the cake more often than the whole head!

Williams-Sonoma Nordic Ware Skull Cake

Now, although this is a Halloween themed cake pan, I think it’s interesting enough to use year round and I plan to make skull cakes for every event I plan to attend from now until forever! Really, the possibilities are endless. The next cake I make may be a white cake, perhaps an angel food cake?!? That could be awesome and it wouldn’t require frosting (which, admittedly, I am not so good at) but would still give that bone white skull look! For now, if you would like to see how my cake turned out and the process for how I put it together, check out my video below!

I love this cake pan, and if you are a fan of skulls and/or Halloween, I think this is a great festive addition to your bakeware collection! Now, if you like the skull motif but don’t think you would get much use out of such a large pan, Nordic Ware also makes a Mini Skull Cakelet Pan that makes 6 large cupcake sized skull cakes (face only). Since the Halloween bakeware is currently on sale, I may go ahead and pick this one up as well!

Thanks for reading (and watching)! So, tell me… who else is super excited for Halloween? What sort of festive treats are you looking forward to for celebrating the season of spooks and ghouls? Let me know in the comments below!

Alexis-Signature

Update Your Workspace with 5 Simple DIYs

5-DIYs-Update-your-Workspace

My office happens to be one of my favorite places to be, and for many of us, it happens to be a place we spend a good portion of our day. Whether your workspace is a nook at home, a cubicle or a corner office, it needs to feel like a comfortable and inspiring place to do work. There is nothing more un-inspirational than a bland office! So, what’s to be done when you don’t have the cash to purchase new furniture and art? DIY it of course! You don’t have to spend a lot of money to add interesting and functional elements to your office, all you need is a craft store and some creativity! So, to help you get inspired to add a little fun into your office space, I have put together a short video with 5 Easy DIYs appropriate for any workspace, guaranteed to make your work day a little brighter and a lot more stylish!

In this video I show you how to make:

  1. A Custom Framed Cork Board/White Board Combo
  2. A Personalized Desk Pad
  3. A Colorful Keyboard
  4. Inspiring File Folders
  5. A Custom Floral Arrangement

Happy DIYing!

If you have any other ideas for some simple office or workspace DIYs, please make sure to share them in the comments below! And, of course, if you give any of these DIYs a try, make sure to snap me a pic and send it to me via Twitter, Instagram or Facebook, and use the tag #SandCDIY so I can find it!

DIY Beauty Elixir {Facial Toner & Setting Spray!}

beauty-elixir

Hands down, one of my favorite skin care items is the Caudalie Beauty Elixir! If you’re not familiar, the Beauty Elixir is a facial toner & makeup setting spray made from all naturals ingredients that help to hydrate, moisturize and refresh your skin! Problem is, it will set you back about $50 for a full size bottle, and during the warmer months or during times when my skin is out of control, I can go through that bottle fast! So, I did a bit of research and decided that I would try my hand at creating my own recipe for a DIY facial toner spray that I could make at home for a fraction of the price of Caudalie’s! Here’s what I came up with!

DIY-Beauty-Elixir

Now, if you would prefer a step by step tutorial, I also made a video showing how I make this elixir so you can watch that in real time! I’ll link it below so you can take a look!

I hope you enjoyed this DIY skin care recipe I cooked up for you guys! I love facial toners and they are easy enough to make at home, but I am always up for hearing your thoughts and recommendations for similar products or alternate ingredients! Send me a tweet and let me know what you thought about this DIY!

DIY Starbucks @ Home Green Tea Frappe

Aren't you super impressed with my Starbucks Green Tea Frappe Watercolor? I made it myself, much like this recipe!
Aren’t you super impressed with my Starbucks Green Tea Frappe Watercolor? I made it myself, much like this recipe!

One of my favorite summer drinks from Starbucks is their Green Tea Frappe! I am a big fan of green bubble tea and green tea flavors in general, but as you know, in the heat of summer, that Frappe addiction can end up costing you quite a pretty penny. So, I save my cash and opt for a homemade version instead. It’s pretty easy to make so long as you have a blender and either matcha or a green tea powder mix. I buy my matcha from Teavana because it’s owned by Starbucks now so I assume they are sourcing their matcha from the same place that Starbucks does. Matcha is a little pricey, but a little bit goes a long way. Another option is to purchase the Tazo Green Tea Latte Concentrate. It’s what Starbucks uses for their drinks, but it’s a bit controversial because its a mix of matcha with other sweeteners and ingredients that end up making it really high calorie (another reason, I have been opting to make my Green Tea Frappes at home).  The third and final option is to use a Green Bubble Tea powder mix. You can buy this online or purchase it in an Asian market. It is a mix of matcha and sweetener, but its more reasonable calorie wise, although you don’t get as strong of a flavor as you do with the artificial Starbucks mixture.

From there you just need some milk, additional sweetener, vanilla extract and of course, ice! Below is my recipe using matcha. I have also included a video I made on how to make a Starbucks Green Tea Frappe at home, using green bubble tea powder. The recipes for these two differ slightly because when you are using matcha you need to add sweetener at a 2:1 ratio because matcha is very bitter. When using a powder mix that also contains sweetener you use a 1:1 ratio of mix to sweetener (if you even need sweetener depending on the type of mix you are using).

Green Tea Frappe

  • 1 cup of Milk (your choice)
  • 1 tsp matcha
  • 2 tsp sugar (or alternate sweetener)
  • 1/2 tsp vanilla extract
  • 1 cup filled with ice (5-6 cubes)
  • Whipped Cream (optional)

Add all ingredients into a blender and mix until desired consistency (ice cubes have broken down into a slush consistency and no large pieces of ice remain). Pour mixture into cup and garnish with whipped cream and an extra sprinkling of matcha if desired.

See, that’s super easy! And delicious! And have I mentioned I’m obsessed with green tea flavored things? 

I hope you enjoyed this installment of Starbucks @ Home. If you did, please make sure to tweet this recipe out and/or share it on your social media! Let me know if you have any other drink requests for me to create an at home recipe for you! Have a Frapptastic Day!

3 Simple Bridal Shower DIYs

Bridal-Shower-DIY

This past weekend I had the honor of hosting a bridal shower in honor of my brother and future sister-in-law. I have been to quite a few bridal showers in my day, but I have never hosted one so this was quite an experience but one I was ready to take on head first! I didn’t have quite the amount of time or money that I believe normally goes into an event of this importance, but I still wanted to make the day special and personal for those attending. So, I headed over to the bridal mecca which is Pinterest and found some great inspiration for a few DIY projects I took on for the party!

DIY #1 Initial Letter Blocks

Initials

While I was browsing around Michael’s Arts & Crafts one day, I came across an end cap of wood block letter initials and symbols. I was immediately drawn to them because I thought they were the exact sort of sentimental DIY decor that I could use for the party and that the guests of honor could then take home and have as a memory of the event. So, I picked out the letters I needed plus an ampersand, some bottles of acrylic paint that coordinated with the wedding theme, some sponge brushes and of course a pack of sand paper!

This DIY was pretty simply but turned out lovely! All I did was sanded down the letters (they had rough edges) until they were nice and smooth, and then painted the letters. I ended up doing about three coats of paint and let the letters air dry for about an hour in-between coats. I then let them dry out overnight before packing them away for the party. I ended up using them as decor on the cake table and they were a big hit!

DIY #2 Date Night Jar

Date-Night-Sticks-1

I found the inspiration for this DIY on Pinterest! Basically, the Date Night Jar is something of an activity for the shower guests and again, another sentimental take home for the couple. You take a decorated mason jar, and fill it with large popsicle sticks that guests at the shower will write date night ideas on. When the couple gets the Jar home and want an idea for date night, they pull a stick out of the jar at random. Obviously, this isn’t something the couple have to use, but I think it’s a super cute idea and it was an activity everyone enjoyed participating in.

Date-Night-Sticks-2

Assembling this DIY was super simple and I was easily able to find all the items I needed from my local craft store. For this DIY you will need a mason jar, popsicle sticks (I suggest the wider sticks that are easier to write on), embellishments (ribbon, twine, labels, etc), and then markers for the guests to write on the sticks during the party! I used a label to name the jar, wrapped yarn around the neck of the jar and added a custom little poem I made up to piece of craft paper that I then threaded through the yarn. Again, super simple, very inexpensive, but highly personalized and a fun activity for the guests!

DIY #3 Marriage Advice Box

Marriage-Advice-1

Again, I found the inspiration for this DIY on Pinterest. The idea behind this activity is to put out a pretty box where guests can leave notes filled with their marriage advice for the couple. This is pretty self-explanatory, but once the couple return home after their wedding, they now have a treasure trove of advice from their friends and family waiting for them in a lovely box!

Marriage-Advice-2

This was probably the simplest of the three projects, because I really didn’t need to do very much except arrange the elements. In the original pin online, a large trunk style box was used, but I knew that would be too large for my needs, so I picked up one of those lovely book shaped boxes from Michael’s in their home decor section.  Once I picked out the box that fit with the wedding and shower theme, I picked up a few packs of blank notecards from the dollar bins at the craft store to go inside. I found lovely monogram cards that were perfect and seemingly personalized! I then took a small journaling card and embellishment sticker from my own craft supply collection and fashioned a little sign inside the box so that people knew what it was! On the day of the shower, I displayed the book box open on an inexpensive frame stand also purchased at the craft store. I passed around the notecards and guests deposited their words of advice in the box throughout the event. Super simple, and yet super sweet!

Do you have any other simple and inexpensive DIY ideas for a bridal shower that you could share this wedding season? Let us know in the comments below!

Starbucks @ Home: Pumpkin Spice Latte

PSL-1

That’s right! I am back with a second installment in my Starbucks @ Home Series, and this time I am tackling everyone’s fall favorite, the Pumpkin Spice Latte or #PSL for the hip among us! To be completely honest, I am not a big pumpkin spice latte fan, although I do generally enjoy pumpkin flavored things! When it comes to the actual Starbucks PSL, the drink is made with a pumpkin spiced syrup that is loaded with sugar and calories and too me is too sickeningly sweet. So, my variation is going to be much fewer calories because I am going to use a pumpkin spice coffee as my base. As always, I have a Keurig so that is what I use to brew my coffee, but you can use whatever means you have at your disposal!

What You’ll Need

A Reusable Starbucks Cup: I bought this simple reusable Starbucks cup earlier this year when Starbucks was running a reusable cup promotion. I believe the cup only cost me $1 and it looks exactly like a regular Starbucks cup!

A Pumpkin Spice Coffee K-Cup: There are loads of varieties of Pumpkin Spice Coffee that you can find this time of year, but since this is a seasonal drink I chose a more wallet friendly coffee brand this time.

Whipped Cream: Whipped Cream is actually going to be a staple in this recipe to help add sweetness without getting too much sugar. In a way, its acting as the creamer. If you don’t have whipped cream you could use creamer or milk I suppose, but make sure to add a bit more than you normally would!

Vanilla Extract: It really doesn’t matter to me if its pure or imitation extract, but you will need about a teaspoon of the stuff to help achieve that lovely spicy pumpkin flavor!

Sweetener: Although the whipped cream adds sweetness to the drink, you will still need a bit of something extra. As I mentioned earlier the Starbucks PSL is very sweet, so to pull this off you need to add some additional sweetener. I use stevia to sweeten my coffee, but feel free to use whatever you’d like!

Cinnamon and Nutmeg: You will need to use a pinch of cinnamon and a quarter pinch of nutmeg for this recipe. I know, those measurements are so precise! Basically you need a tiny bit of nutmeg (because it’s a very strong flavor) and 3-4 times as much cinnamon to help round it all out. Since we are making a drink and not a pie we are using such small amounts its hard to measure out!

Garnish: I garnish this drink with some whipped cream and some cinnamon! You could use pumpkin spice as well, but since the coffee is pumpkin flavored you pretty much have the flavor there already.

Let’s start brewing!

PSL-2

The first thing you will need to do is brew you coffee. K-Cups are super simple, but they do cost a bit more than regular coffee grounds. Obviously, you will just use whatever method of brewing your coffee you have available to you! While your coffee is brewing you need to prepare a few ingredients in your reusable cup first! Add the cinnamon, nutmeg, vanilla extract and sweetener to your cup first and mix it together. This is going to act like the “syrup” in a PSL except significantly less sweet (unless you used a lot of sugar as sweetener). Once this is done you can add the brewed coffee and then copious amounts of whipped cream until your coffee is a nice light mocha color (approximately 1 cup whipped cream). Mix everything together until the whipped cream has fully dissolved in your coffee. Next add some more whipped cream on top and then garnish with some cinnamon!

PSL-3

Voila! Top your cup with its lid and take a sip! Delish, I know! And to think, this is so much simpler than standing in line on a cool autumn morning!

Has this recipe inspired you to start making your own coffee-house drinks at home? Have you tried my past recipe? Do you visit Starbucks or your local coffee-house as part of your daily commute to work? Or, perhaps you already brew your coffee at home? Let us know in the comments!

DIY TLR Camera Kit

     Last year I decided that I wanted to get into photography as a hobby that myself and my husband could share. We both love photographs, especially real film photographs so we bought a Holga to learn more about real film photography. When I get into things, I get in very deep and one of the things that interested me most of film photography was how cameras actually worked. You really don’t think about it much, especially in the age of cell phone photography, but it really is an interesting process.
     Then I came across a DIY Twin Lense Reflex Camera Kit. This was an opportunity I just could not pass up! I loved the idea of building my own camera from scratch. It would give me insight and understanding that hours of scouring webpages could just not compete with. Not to mention, how many people can say they have built a camera before?
     So, I ordered the kit that I found on Photojojo and immediately began assembling the camera. It took me about an hour to do, mostly because I got stuck on the shutter mechanism which is one of the most important and delicate parts of the camera. I learned so much in the process I was blown away with the simplicity and intricacy of the device. Although its not a state of the art device, I use the camera from time to time and love knowing that I assembled it myself. I have even opened it back up to do some adjustments on the viewfinder which make me feel like an absolute genius knowing how everything goes together even without the directions!
If you are interested in photography or a photography student or professional, I highly suggest this inexpensive and educational kit that will literally bring you closer to your photographs!